Aug 28, 2025

[Photography] Add Motion! The Hohem iSteady M7 Gimbal can help!

The post Add Motion! The Hohem iSteady M7 Gimbal can help! appeared first on Digital Photography School. It was authored by Sime.

We’ve been sent the latest gimbal from Hohem, the iSteady M7. It’s an ‘Ai Tracking’ gimbal that you can use with your mobile phone to capture video of your work, and after a couple of weeks of using the gimbal for various little projects, here’s what we think! (Tldr; great tool to add to your toolbox!)

Add Motion! The Hohem iSteady M7 Gimbal can help!

When I say ‘video of your work’ I’m specifically talking about that stuff that people seem to love to see in Facebook groups and online in various places, the “BTS” or “Behind The Scenes” from your photo shoots, the footage that people seldom get to experience.

I’ve used all manner of tools to capture behind the scenes of me setting up for a shoot or during a shoot, be it a timelapse of a large group (think team sports) setting up, from when I arrive at the venue to the pressing of the shutter release on the frame that I’m after, to packing away the chairs – I’ve found it’s a nice little extra to share with the team when they get their images for the season! Or another example was when I was photographing a new menu for a client, the experience of setting up the area I was shooting, then the food coming in and out of the set – it was handy for the client (a marketing agency) that they could then use to send to prospective businesses to get more work – There are all kinds of reasons that you might want to maybe catch a bit of video or a cheeky timelapse, and it’s also often the case when you’re starting out that you’re there on your own and don’t have someone to run around capturing that footage…

Well! This is why we thought it might be cool to try out a gimbal like the Hohem iSteady M7, you can use it like a normal gimbal (What’s a gimbal, Simon? : A gimbal is a device that stabilizes a camera or other object, allowing it to remain level and steady despite movement or shaking ) but you can also put it on a tripod and with the Ai follow capabilities, you can have it follow you around your set (It doesn’t walk, no!) and capture that BTS for you, or start a motion timelapse from point A to point B, taking in a whole scene…

The M7 mentions FOLLOW capabilities and Ai in the same sentence, the ability as a solo creator to place your camera phone on the gimbal and have it follow you around the space you’re working in is great! Even with my Pro Max sized iPhone, the gimbal movements were precise and quick, it easily kept track of me – I captured a quick video of the iSteady M7 keeping up with my jerky movements, check this out.

Use-Cases for creating video on your next shoot.

Showcase the creative process – Demonstrates the thought, planning, and techniques that go into a shoot, making the final images more impressive.

Build client trust – Helps potential clients see professionalism, preparation, and problem-solving skills in action.

Create extra marketing content – BTS clips can be repurposed for social media, reels, stories, or blog posts alongside the final images.

Educate and inspire – Provides teaching moments for other photographers or enthusiasts who want to learn from your workflow.

Capture candid, human moments – Shows genuine interactions with clients, models, or crew, which adds relatability and personality to your brand.

Features of the Hohem iSteady M7 Gimbal

  • 360 Degree Infinite Pan Rotation
  • 360 RGB Lighting Colours
  • Detachable 1.4″ LCD Touchscreen controller
  • 500gm Payload
  • Ability to charge / power connected phone
  • Built-in extension pole / selfy stick (it’s about 20cm long)
  • 3 axis stabilisation
  • Live-view via detachable remote

The M7 isn’t the most compact or the most lightweight gimbal you’ll find on the market today, Hohem also have a smaller brother, the iSteady V3 Ultra (Which we’ll also be taking a look at) The M7 weighs in at about 630gm which is actually pretty light! The M7 is never going to fit in your pocket, I found it fit in the laptop sleeve of my new camera bag – small isn’t always better though, the motor strength on the M7 is impressive, easily propels my iPhone 14 Pro Max around like it’s nothing, keeping up with all my shaky handed movement easily ? (I’m a coffee drinker, gimme a break!)

Add Motion! The Hohem iSteady M7 Gimbal can help!

What are our thoughts?

Between the tracking, stabilisation and the live view via the detachable remote, this gimbal is a well-priced option for many of you looking to add a little motion to your photography offerings. You do need to spend a couple of minutes balancing your phone after you put it in the gimbal, but I had no trouble balancing mine, even leaving it in the case was fine. There are MANY controls, but they’re easy to navigate once you get the hang of what they all are, also very easy to install and control the Hohem app if you prefer that. You don’t NEED to install the app, even to use the Ai tracking, you can use it without the app, just using the native camera app on your phone, as the tracking is all done via the little module atop the gimbal – great!

We think this is a great mid-sized gimbal option to use in your creating content, vlogs, making short films with your friends, capturing the holidays or just filming unboxings with a bit of Ai powered dynamic follow-along!

You can check out the Hohem iSteady M7 HERE (There’s a great back to school sale event happening right now)

The post Add Motion! The Hohem iSteady M7 Gimbal can help! appeared first on Digital Photography School. It was authored by Sime.


it's from Digital Photography School https://ift.tt/tQRgGa3
via Sime

Aug 27, 2025

[Photography] Horse Photography: 10 Tips for Amazing Equine Images

The post Horse Photography: 10 Tips for Amazing Equine Images appeared first on Digital Photography School. It was authored by Lea Hawkins.

A guide to beautiful horse photography

Horses are not just beautiful and intelligent creatures; they can be the subjects of some truly breathtaking photographs. And horse photography – which is all about capturing the grace and majesty of these animals – is intensely rewarding.

Yet photographing horses can present certain challenges. Horses are free-spirited, plus they can be easily spooked. Add to that the technical expertise required to photograph a horse in action, such as racing or jumping, and you might start to feel more than a bit overwhelmed.

But don’t worry! Even a beginner can learn to take great horse photos; they just need an experienced guide. I’ve done plenty of horse photography, and I’ve also spent plenty of time learning from trainers and owners. In this article, I share it all: how to capture beautiful horse portraits, how to create stunning horse race photos, and even how to effectively photograph events like show jumping.

Ready to create some gorgeous horse images? Let’s dive right in!

1. Be careful

Horse photography

Approaching a horse with a camera is not always straightforward. While some horses may be exceedingly gentle, others can be unpredictable or even aggressive. A single kick from a horse can cause serious injuries, so caution is essential.

Never stand behind a horse or catch them by surprise. Sudden movements or even wearing bright colors can startle them. It’s essential to be aware of the horse’s presence and ensure they know where you are.

Before diving into the photography session, have a chat with the owner or handler about the horse’s personality. Is the horse flighty or bitey? Have they ever seen a camera before? Understanding these aspects can help you approach with caution.

Flash photography is generally a no-no around horses unless you’re sure they are used to it. A flash could endanger not just you but also the horse and the handler. I advise avoiding it as much as possible.

2. Learn the horse’s language

Horse photography

Horses communicate through their ears, leg stance, and head movements. This language is understood by horse owners and trainers, but it might be new to you. Spend some time researching horse body language before your first shoot. You’ll want to understand how the horse is feeling to predict their behavior and avoid danger.

Horse owners often prefer certain positioning of ears, legs, and heads. For example, pinned-back ears signify an unhappy horse, while relaxed, forward ears can mean the horse is content. Understanding this language will not only keep you safe but also ensure you capture shots that the owners will love.

If you’re familiar with this equine language, you’ll have a better sense of what the owners want, and your photo shoot will be more successful. So invest a little time in this unique aspect of horse photography; it’s well worth it!

3. Start with an introduction

Horse photography

Photographing horses isn’t about jumping right in with your camera. It requires a delicate approach. When you first meet the horse, it’s essential to create a calm environment.

Let the handler introduce you if the horse is calm enough. Allow the horse to approach you, sniff the camera, and become familiar with your presence. Talk softly and move slowly; a gentle pat might be welcomed if the handler deems it appropriate.

Are you unsure how the horse will react to the sounds of your camera? Organize a few test shots with the handler. Ensuring that everyone is in a safe position during these test shots is vital. If the horse reacts negatively, a sudden buck or kick can be dangerous.

If your camera has a silent shooting mode, this is a great time to use it. But remember, “silent” doesn’t always mean entirely noiseless. Test it out to gauge the horse’s reaction.

4. Choose the right lens for horse photography

Horse photography

Selecting the right lens is a critical decision in horse photography. It can be influenced by various factors, including the horse’s temperament and the type of shots you’re aiming for.

If you’re doing a portrait session and the horse is comfortable with you getting close, a wide-to-standard zoom lens, like a 24-70mm with a maximum aperture of f/2.8, can be a great choice. With it, you can capture wide-angle shots or zoom in for tighter images.

A 50mm or 85mm prime lens is also a fantastic option. These lenses often offer quality at an affordable price, with a wide aperture like f/1.8 for beautiful background blur.

When photographing from the sidelines or with a skittish horse, a longer telephoto lens is a must. A 70-200mm lens will allow you to capture detailed images from a distance.

Sometimes, having a good telephoto zoom handy, even with a more approachable horse, can enhance your shots. It allows you to get those close-up details without invading the horse’s personal space.

5. Dial in the right horse photography settings

Horse photography

Setting your camera correctly is fundamental. Using Auto mode won’t do justice to these magnificent creatures; instead, you’ll likely end up with blurry shots.

Shutter Priority, Aperture Priority, or Manual mode are your friends here. A fast shutter speed is essential – a minimum of 1/250s for general horse photography. If the horse is moving quickly, even faster speeds like 1/500s or 1/1000s are necessary.

Don’t be afraid to boost your ISO if you need to ensure a good exposure. Modern cameras handle high ISO quite well, but test your camera to know your limits.

A wide aperture, such as f/2.8 or f/4, can be valuable, especially in low-light conditions. But remember, a wider aperture narrows the window of sharpness. You’ll need to focus with precision, making sure the horse’s eyes and head are in sharp focus.

Getting the settings right will allow you to capture the horse’s grace and energy, adding depth and emotion to your photographs. It’s a combination of understanding the horse’s behavior and using your camera’s capabilities to their fullest potential. It’s not about having the most expensive gear, but about knowing how to use what you have to create stunning images.

6. Photograph the tender moments

Horse photography

Connecting with a horse is a magical experience. Capturing that connection between horse and rider in your lens? Even more so. Every horse owner has a bond with their companion that is unique, personal, and full of emotion. As a photographer, your mission is to capture that bond, that shared love, in a way that transcends the physical frame.

Take a moment to observe. Notice the horse and its owner, their interactions, their unspoken communication. Look for the soft moments, the shared glances, the loving gestures. It’s in these fleeting moments that the true essence of their relationship lies. Patience is key here, and waiting for these tender moments can often reward you with the most touching and powerful images.

An integral part of this process involves integrating the rider into your photoshoot. It’s essential for you to keep them engaged, keep them relaxed. Encourage them to interact with their horse naturally, as they would when no one is watching. These candid shots often result in the most authentic images, brimming with raw emotions and moments of connection. Remember, horse lovers are often just as excited to be part of the shoot as they are to have their equine companions photographed.

7. Don’t forget about the details

Horse photography

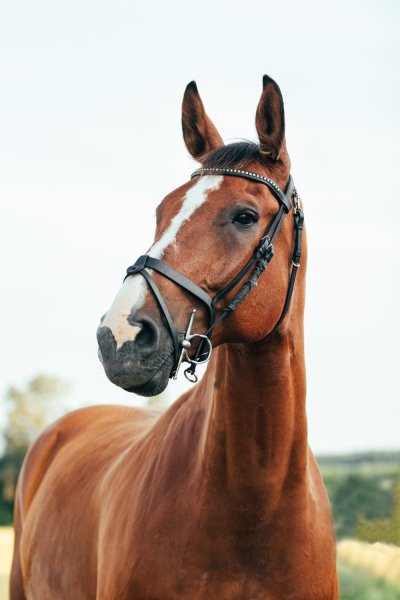
Horse photography is not just about the whole animal, but also about capturing the individual details that make each horse unique. These can range from the gleaming shine in their coat to the distinct patterns of their markings, the flowing mane, the softness in their eyes, and so much more.

I always find it useful to have a chat with the owner before I start clicking away. Get to know the horse through their eyes, understand what makes their horse special to them. They might have a fondness for certain features – the curve of the horse’s neck, the unique color of their eyes, the way their mane catches the light. Your job as a photographer is to capture these personal favorites in the best light possible.

Use your lens wisely for these detail shots. A telephoto lens works great if you want to maintain a safe distance, especially if the horse is a little skittish. However, with a calm and friendly horse, feel free to move closer and use a standard lens. Experiment with varying your aperture to create a range of effects, from an overall sharp image to a focused shot with a beautifully blurred background.

8. Take your time

Horse photography

A crucial tip for successful horse photography, which I can’t emphasize enough, is to take your time. Spend a day, if possible, with the horse and the owner. Get to know them, understand their dynamics, build a rapport. Patience and understanding go a long way in establishing trust, which in turn helps capture the best possible images.

Observe the horse’s habits, their likes and dislikes. Maybe they love a particular spot in the paddock, or they jump around gleefully after a good run. Keeping these nuances in mind will help you anticipate their actions and be prepared for spontaneous shots.

Slowing down also allows you to notice the small but significant details of the environment around you – interesting backgrounds, shifting light patterns, shadows, and reflections. All these elements can add depth and context to your photographs, turning a good picture into a great one.

Don’t rush the process. Horse photography, like all good things in life, takes time. It requires patience, practice, and a keen eye for detail. But rest assured, the results will be worth your effort.

9. Use similar techniques to photograph equine events

Horse photography

Photographing equine events like show jumping has its own challenges, but many of the principles remain the same. Finding a safe spot is crucial, and one where the horse can see you from a distance. Always stay put and never move towards the horse and rider, and remember, using flash is a big no-no. Checking with any officials before you start is also a smart move.

To capture both horse and rider in mid-jump – a favorite of horse riders – you’ll likely need a shutter speed around 1/650s to 1/800s. By setting your camera to continuous release (burst) mode, you can press the shutter just as the horse lifts off, increasing your chances of getting the perfect shot.

Focusing can be tricky, so you’ll need to be extra attentive. Prefocusing in advance where you know the horse will be is an option, but I find using your camera’s AF tracking to follow the horse generally better. It lets you shoot a variety of images as the horse moves in different directions, giving you a range of dynamic shots to choose from.

10. Work fast for horse race photography

Horse photography

Horse racing is a thrilling sport, and capturing it in a photograph requires a special touch. Horses at top speeds are incredibly fast, so I’d recommend the fastest shutter speed the light will allow. Use your camera’s continuous shooting mode, and don’t hesitate to take hundreds of shots. Among the failures and near-duplicates, you’ll find those magical moments that make it all worth it.

Getting close to the finish line at smaller race meets can make for breathtaking photos, but you’ll need permission. Assure the officials that you don’t use flash and that you understand how easily horses can be spooked. Your diligence can grant you access to some unique vantage points.

Here’s a pro tip: try panning shots during the races. It captures the sense of movement and speed, giving your photos an artistic flair. Lower your shutter speed to around 1/30s and move your camera along with your subject as you fire the shutter. If done right, you’ll end up with a sharp horse and rider against a stunning blur of motion in the background.

This technique might take a few tries to master, but the resulting images can be truly spectacular. Combining both standard and panning shots during horse races can provide you with an exciting and varied portfolio of images, each illustrating a different aspect of the race!

Horse photography tips: final words

From understanding a horse’s personality and body language to choosing the right lens and settings, we’ve explored essential tips and techniques so you can capture beautiful images of horses.

Remember to approach each photo session with care and patience; with some perseverance, you’ll capture plenty of horse photos you can be proud of – whether it’s a tender moment between rider and horse, or the thrilling speed of a race.

Now it’s your turn to grab a camera and explore the world of equine photography. Happy shooting, and have fun!

Over to you:

Which of these horse photography tips do you plan to use first? Do you have any advice of your own that we missed? Share your thoughts in the comments below!

Table of contents

Pet Photography

The post Horse Photography: 10 Tips for Amazing Equine Images appeared first on Digital Photography School. It was authored by Lea Hawkins.


it's from Digital Photography School https://ift.tt/8jy2rDK
via Lea Hawkins

Aug 26, 2025

[Photography] 6 Still Life Photography Mistakes (And How to Fix Them)

The post 6 Still Life Photography Mistakes (And How to Fix Them) appeared first on Digital Photography School. It was authored by Rika Guite.

common still life photography mistakes (and how to fix them)

Are you struggling to capture stunning still life photos? You’ve come to the right place.

In this article, I share the six biggest still life photography mistakes – and I explain how to correct them, so that, no matter your level of experience, you can get outstanding results. Specifically, I discuss:

So if you’re ready to take your still life shots to the next level, then let’s get started!

1. Using improper lighting

What’s the very first rule of still life photography?

Your subject needs to be well-lit.

still life photography mistakes

A poorly lit subject will look terrible, no matter the composition and camera settings you choose – while a well-lit subject will often look great, even if you struggle to get the framing and settings correct.

Start by ensuring you have enough light. Personally, I like natural lighting in still life photos; it’s bright, it’s strong, and it can be very, very soft. (For the most flattering natural lighting, try shooting during the golden hours or on days with heavy clouds.)

If you’re working indoors, it often pays to bring along some artificial lighting. Studio strobes are great for more serious setups, but if portability or price is a concern, several flashes plus a few light stands will do a great job.

You can also work with window light. On cloudy days, you’ll get a gorgeous soft effect near large windows. And if the sun is high in the sky, you can always drape a sheet over the window and get a beautiful light diffusion effect.

Pay careful attention to the direction of the light, too. Direct front light rarely looks good in still life photography; it’s too bold and too flat. Instead, I recommend sidelight, which will add plenty of depth and dimension to your subjects. Another option is partial backlighting (and you can always try this as part of a two-light setup, with one light providing sidelight and the other providing partial backlighting).

Here’s an image that I captured using partial backlighting:

still life photography mistakes

And here’s a second image, which features strong backlighting from the right-hand corner:

still life photography mistakes

Really, I’d encourage you to experiment with many light sources and directions. If you’re not getting a great shot, try another angle or test a new light modifier. You never know what you’ll create!

2. Including a distracting background

Still life photography is all about the subject…

…but the background matters, too! A good background can help emphasize the main foreground subject, or – in the best images – complement the subject for an amazing result. But a bad background can draw attention away from the subject and prevent the viewer from appreciating its beauty.

So before you take a single photo, evaluate the background. Look for distractions in the form of lines, shapes, or even colors. Then do what you can to eliminate them completely.

Yes, you can take care of some distractions during post-processing. But the more you handle these issues in-camera, the less time you’ll spend in the editing room, and the more time you have to shoot! (Plus, not all distractions are editable.)

If you do notice distracting background elements, the best method is often to change your angle until the offending areas are gone. But you can also try placing handpainted or assembled backdrops behind the subject or moving your subject to an entirely new location.

still life photography mistakes

What makes a great still life photography background? I’d encourage you to choose a plain stretch of color, such as a white or gray wall. A bit of texture can add a nice touch, but don’t go overboard (too much texture will draw the eye away from the subject!). And if you can’t find the right kind of wall, that’s okay; just cover it up with some white posterboard!

One more tip: If you’re shooting flat lays, make sure you spend extra time picking a background. White poster can work great, but consider using black poster for a moody look, or a blue, red, or yellow poster for extra pop.

3. Working without a tripod

Still life photography is often done indoors, when the light is (relatively) low.

And unless you’re using flashes or strobes, you’ll need to drop the shutter speed for a balanced exposure – often to 1/60s or below.

If you try to shoot handheld at 1/60s, a lot of your shots will turn out frustratingly blurry, which is why a tripod is essential. Yes, tripods can be cumbersome and slow to work with, but they’re necessary and are used by most serious still life photographers.

In fact, even still life shooters who work with strong artificial lights generally still keep their camera mounted on a tripod. Why? For one, the tripod helps maintain the composition even as they adjust different elements and light positions. And the tripod maintains the camera position for focus stacking (which is often necessary for sharp close-up still life photography).

So make sure you grab a sturdy tripod. And use it whenever you can.

By the way, if you find that you’re often working in low light, I’d encourage you to buy a wireless remote. That way, you can trigger the camera shutter without hitting the shutter button (which can produce blur-inducing camera shake). A solid alternative is your camera’s two-second timer, but constantly waiting for a two-second interval can get annoying, especially if you’re firing off multiple shots in succession.

4. Forgetting to carefully compose

still life photography mistakes

If you want great still life photos, then you must compose carefully. In fact, when I do still life photography, I often spend many long minutes adding in items, tweaking the composition, and nudging different elements in different directions.

While still life composition is a complex subject, here are a few handy tips:

  • Fill the frame with your main subject
  • Include plenty of negative space to let the subject breathe
  • Experiment with different angles for unique results
  • Use the rule of thirds to position your main subject
  • Don’t forget about the rule of odds, which encourages you to include an odd number of similar elements (e.g., three flowers, five books, one vase)

If you’re struggling to create a compelling composition, I’d really encourage you to spend time just playing around with each setup. Move your main subject to the right or the left, add supporting objects in front or behind, and take constant test shots.

Another helpful tip is to find some still life photos that you like (paintings work fine, too), and study the compositions. Note how the objects are arranged in relation to one another. See if you can identify any rules or guidelines you can apply to your own work.

5. Not experimenting with each setup

still life photography mistakes

This still life mistake is a simple one, but it can make a huge difference to your photos.

You see, most beginner still life photographers set up their lighting, create their arrangement, and then…shoot. The whole process is streamlined, fast, and efficient.

But while you can get decent images using the above method, if you want to really take your photos to the next level, then you must spend time experimenting.

Go ahead and create your first arrangement. Take a few photos.

But then mix it up. Try adjusting the position of your lights. Change your composition. Go minimalist by adding in extra negative space, or add in additional objects for a more chaotic effect.

After I’ve captured my first setup, I like to “randomize” the scene. I’ll take all my objects and mix them around. Or I’ll add a new background, or I’ll use different lighting, or I’ll change my camera angle.

In other words: I experiment! That way, I end up with plenty of unique images (and I learn a lot in the process).

6. Choosing the wrong lens

Many photographers don’t realize this, but the lens you choose can dramatically affect the feel of a still life image.

A wide-angle lens will tend to push subjects apart from one another for a breathy, expansive feel; a standard lens will portray subjects naturally, the way the eye sees; and a telephoto lens will compress subjects and enhance background bokeh.

Which type of lens is best for still life photography? That depends on the effect you’re after! A wide-angle lens is great for capturing in-your-face still life shots, while a telephoto lens will give the viewer a bit more distance (literally and figuratively). Standard lenses tend to be more neutral in their effect, and they’ll do a great job of rendering subjects as they appear in real life.

But while you can capture great still life shots with any lens, many still life photographers gravitate toward standard and short-telephoto options. These lenses are perfect for capturing well-proportioned, natural images. And they do a great job of creating stunning shallow depth of field effects, too:

still life photography mistakes

If you’re struggling to visualize the difference between wide-angle, standard, and telephoto lenses, then I’d urge you to create a still life setup, then try out each focal length. Carefully review the results, paying careful attention to the relationship between different objects as well as distortion effects. Ask yourself: How does each focal length render the scene? When would each effect look good?

Over time, you’ll learn to “see” in different focal lengths, and you’ll be able to choose the right focal length with very little effort.

Still life photography mistakes: final words

Now that you’ve finished this article, you know the six most common mistakes made by still life photographers – and you know how to fix them, too!

So memorize these mistakes. Evaluate your photography. Make the necessary changes. And watch as your photos improve!

Which of these still life mistakes are you making? How will you fix them? Share your thoughts in the comments below!

The post 6 Still Life Photography Mistakes (And How to Fix Them) appeared first on Digital Photography School. It was authored by Rika Guite.


it's from Digital Photography School https://ift.tt/qjEebI7
via Rika Guite

Aug 25, 2025

[Photography] 10 Essential Tips for Low Light Photography

The post 10 Essential Tips for Low Light Photography appeared first on Digital Photography School. It was authored by Sime.

Shooting in low light can be both exciting and frustrating. While the mood and atmosphere of dimly lit scenes can create stunning results, the lack of available light poses technical challenges like noise, blur, and loss of detail. With the right approach, though, you can turn those challenges into creative opportunities. Here are ten practical ideas to help you make the most of low light conditions.


1. Use a Wide Aperture

Open your lens as wide as it will go (f/1.8, f/2.8, etc.). A wide aperture allows more light to reach your sensor, helping you shoot at faster shutter speeds. As a bonus, you’ll get beautifully shallow depth of field, perfect for portraits or isolating your subject against a dark background.

10 Essential Tips for Low Light Photography

2. Raise Your ISO (Within Reason)

Modern cameras handle high ISO settings far better than they used to. Don’t be afraid to push ISO 1600, 3200, or even higher if needed. While higher ISO introduces noise, it’s often better than having a blurry photo from too slow a shutter speed.

10 Essential Tips for Low Light Photography

3. Slow Down Your Shutter

If your subject is still, experiment with longer exposures. A tripod becomes essential here—letting you capture moody nightscapes, star trails, or light trails from passing cars without shake. For handheld shots, try not to go slower than the reciprocal of your focal length (e.g., 1/50s with a 50mm lens).

10 Essential Tips for Low Light Photography

4. Stabilise Your Camera

Tripods are the obvious choice, but even leaning against a wall, bracing your elbows, or resting the camera on a table can reduce shake. For an extra edge, use your camera’s self-timer or remote shutter release to avoid nudging it when you press the button.

10 Essential Tips for Low Light Photography

5. Shoot in RAW

Low light often means tricky exposure and odd colour casts. Shooting in RAW gives you maximum flexibility in post-processing—recovering shadow detail, reducing noise, and correcting white balance far more effectively than JPEGs allow.


6. Use Available Light Creatively

Street lamps, neon signs, candles, or even the glow of a phone screen can all become beautiful light sources. Instead of fighting the low light, embrace it and use those unique tones and contrasts to enhance the atmosphere of your shot.

This is a bad (quality, but good..) example, I only had my phone with me, but I loved the way the light sorta of played down onto the scene, wish I’d had a camera and tripod with me!

10 Essential Tips for Low Light Photography

7. Experiment with Motion Blur

Not every low light image needs to be tack-sharp. Try deliberately introducing blur to capture movement—like people walking, cars passing, or waves crashing. This can turn a technical limitation into an artistic advantage.


8. Mind Your Focus

Autofocus can struggle in the dark. Switch to manual focus if your camera keeps hunting. Use focus peaking (if available) or zoom in on live view to nail sharpness, especially for static subjects like cityscapes or astrophotography.


9. Add Light When You Can

Sometimes, the solution is simply more light. A small LED panel, a phone torch, or bouncing flash off a wall or ceiling can make all the difference. Even subtle fill light can bring out detail without ruining the mood.


10. Embrace the Noise

Finally, don’t get hung up on having perfectly clean images. A little grain can add texture and character, especially in black-and-white. Think of it as the digital equivalent of film grain—it often enhances the story your photo tells.


Final Thoughts

Low light photography is less about overcoming darkness and more about learning to work with it. By combining technical adjustments with creative intent, you can capture images that are dramatic, atmospheric, and full of mood.

JUST GET OUT AND SHOOT ?? ?

— Simon

The post 10 Essential Tips for Low Light Photography appeared first on Digital Photography School. It was authored by Sime.


it's from Digital Photography School https://ift.tt/pwl3fKo
via Sime