Aug 2, 2018

[Photography] 10 Things You Can Learn About Photography from Elliott Erwitt

I’ve always been a huge fan of the photographer Elliott Erwitt. His photography is sharp, often very funny and captures a sometimes silly, sometimes ridiculous part of our human experience.

His way of talking about photography is wonderful. He is a super pragmatic person who doesn’t go in for all fuss of talking about photography as if it’s some kind of sacred experience.

street graffiti - 10 Things You Can Learn About Photography from Elliott Erwitt

He does, though, have extraordinary photographic talent, which has been honed over a 60-year career. So I thought I’d share with you some of the many things we can learn from him. After you read this I encourage you to look up his work and investigate for yourself.

couple in jean jackets with a camera - 10 Things You Can Learn About Photography from Elliott Erwitt

Finding a mentor

I make a point of learning from people I admire. It takes me out of my own little bubble of creative work, the hustle I do as a photographer and creative entrepreneur – and offers me interesting perspectives that are totally different to my own way of doing things.

There are always very cool and interesting ideas to be sparked, new ways to do things, new thoughts and inspirations to be gathered from some of the amazing creative talents in the world.

In this article, I’ve used some of my photos that are a little Elliott Erwitt inspired and paired them with some things you can also learn from this legendary photographer.

man on rollerblade walking dogs - 10 Things You Can Learn About Photography from Elliott Erwitt

Lesson 1: Learning to use your camera is actually the easy bit

“There isn’t much to learn about photography, everything you need to know you can find out by reading the instructions in the box. The rest is practice.” – Elliott Erwitt

Okay, okay, I know this sounds flippant and probably frustrating if you are knee deep in confusion about how to use your camera. But even though it can be challenging and difficult, your camera is a machine with very clear and logical instructions. That’s the easy bit.

Learning how to compose interesting, unique photos, developing your eye for striking compositions, or bringing artistic and captivating elements into your images – those are the challenging parts!

couple with woman crying - 10 Things You Can Learn About Photography from Elliott Erwitt

So if you can trust that with some perseverance you will learn the mechanics of the camera, then you can dedicate yourself to the other part of photography that really makes the difference between an OK photograph and an amazing one. And that is…

Lesson 2: Photography is all about learning to see the world in new ways

“To me, photography is an art of observation. It’s about finding something interesting in an ordinary place… I’ve found it has little to do with the things you see and everything to do with the way you see them.” – Elliott Erwitt

I think one of the reasons Erwitt is so successful is that he is totally an observer. He watches the world from a state of complete presence. I cannot overstate the importance of becoming an observer.

man taking a cell phone photo - 10 Things You Can Learn About Photography from Elliott Erwitt

You may think you are always observing the world, but I would counter that. What you likely do is see a little, but mostly you are lost in your mind, in your thoughts and ideas – usually about the past. “Why did I do that?! Why did he say that?!” Or in the future. “I have to remember to send an email about that meeting!”

We all do it! Then, with the small amount of attention we have left, we are looking at the world, but are so lost in ourselves that what we see is very limited, just tiny measures of what is actually there.

Our brain processes billions of pieces of visual information every second (crazy right?!) but in an effort to make sure we don’t get overwhelmed, we only ever see a few hundred segments.

kid in batman suit - 10 Things You Can Learn About Photography from Elliott Erwitt

So when we are lost in our own minds, our own thoughts, we are seeing even less.

But when you decide to stop paying attention to your never-ending rush of thoughts and ideas and to-do lists and decide to become fully present in the world, fully aware of what is happening right now – then you will be truly observing the world.

Notice the feeling of a light breeze on your skin, the harsh sunlight on your eyelids making you squint, the deep blue of the sky, the way the movement of undulating water is shimmering under the bright sun.

You may notice people laughing in a cafe, a dog barking in the distance, the people walking past you with a rhythmic thud. The rolling drone of cars passing.

crosswalk painting - 10 Things You Can Learn About Photography from Elliott Erwitt

This is what it is to observe the world – to step into the world of now. To step out of your mind and into the present moment.

Elliott Erwitt’s photography is such an amazing display of observing. It shows that when you are in a state of observation, particularly of human beings, you’ll find gems everywhere.

Lesson 3: Don’t stop taking photos – you’ll get a good one eventually

“The ratio of successful shots is one in God-knows-how-many. Sometimes you’ll get several in one contact sheet, and sometimes it’s none for days. But as long as you go on taking pictures, you’re likely to get a good one at some point.” – Elliott Erwitt

corn with a face - 10 Things You Can Learn About Photography from Elliott Erwitt

I like to think of photography in terms of balance. It’s always good to keep learning and developing your skills, but without practice, without getting out there and doing it – all the learning means nothing.

You also don’t want to get stuck in the learning cycle where you never feel like you have enough information, or that you must learn more or upgrade your camera before you can take better photos.

No! Nothing – literally nothing – beats just going out and actually taking photos.

Lesson 4: Technical skill will only take you so far

“Good photography is not about ‘Zone Printing’ or any other Ansel Adams nonsense. It’s just about seeing. You either see, or you don’t see. The rest is academic. Photography is simply a function of noticing things. Nothing more.” – Elliott Erwitt

When I was starting out in photography I bought all of Ansel Adams’ books about Zone printing. I studied them and used them in my work. Through them, I become an excellent printer, both from film and then digital. I am pretty into technology, and I’ve never met a camera manual I didn’t want to read.

But I do, however, have to agree with Elliott Erwitt here. Technical skill can help you capture the photo you see in your head. It can give you the tools to make a photo work, but it is not what makes a photo successful.

couple with sunglasses on a couch - 10 Things You Can Learn About Photography from Elliott Erwitt

There are examples of many famous photographers who were completely untechnical.

Diane Arbus would say that if her camera stopped working she’d just press all the buttons until it started functioning again. Her portraits, though, are breathtaking. She used her ability to connect with people to draw out the most extraordinary expressions and portraits.

So, although I love to draw on strong technical skills as a background for my work – I know it’s not what creates the magical elements, the je ne sais quoi, that makes an image interesting or memorable.

I have seen more than my share of technically perfect, but instantly forgettable images, to know this to be true.

lady in a blue shirt laughing - 10 Things You Can Learn About Photography from Elliott Erwitt

Again it comes back to balance. My ideal goal is to have enough technical skill to be able to execute to my standard, and then focus on that emotion, inspiration, observer part of myself that finds the arresting scenes and subjects to photograph.

Lesson 5: Passion never gets old

Elliott Erwitt is a very prolific photographer. As well as photographing hundreds of advertising and commercial campaigns, he has produced more than 80 books and countless exhibitions.

I love that he has done eight books just on dogs! Isn’t that cool? What that tells me is that you are only done with a subject when your passion for it fades. And Mr. Erwitt is currently 89 years old as of the date this article was published!

dog on the street - 10 Things You Can Learn About Photography from Elliott Erwitt

If you still get excited about a subject, if you still want to photograph it – then you still have something more to say about it. As you get more familiar with your subject, your narrative, your feeling and your observations about it change. Things are always changing and developing with you, the world, and your creativity.

I have been photographing London during the blue hour, sunrise hours, for almost 20 years – and I have never been bored in the city. Often I go to the same spots over and over (East London) and I always find something interesting, because it inspires me.

So always follow that excitement, that inspiration – because passion never gets old.

4 people on a bridge - 10 Things You Can Learn About Photography from Elliott Erwitt

Lesson 6: People reveal a lot about themselves when they think nobody is watching

Elliott has taken some brilliantly absurd shots of people doing bizarre things. You would think that being in public would make people more self-conscious about their behavior. To an extent it does. But most of us aren’t as open as when we are alone.

And yet people are always revealing themselves. It seems impossible to hold onto our mask, our veneer, as humans for very long. Especially when we think no one’s paying attention.

This is one of the key tenets of street photography. Watch closely enough, and for long enough and someone will do something crazy or funny or weird. It’s just human nature.

man taking selfie with a seagull - 10 Things You Can Learn About Photography from Elliott Erwitt

Lesson 7: A good photograph is all about the emotions it invokes in the viewer

“I observe, I try to entertain, but above all I want pictures that are emotional. Little else interests me in photography. Today, so much is being done by unemotional people, or at least it looks that way… I mean, work that’s fascinating and fun and clever and technically brilliant. But if it’s not personal, then it misses what interesting photography is about.” – Elliot Erwitt

This reminds me of a beautiful Maya Angelou quote, “I’ve learned that people will forget what you said, people will forget what you did, but people will never forget how you made them feel.”

It’s the same with photography and all art. If someone feels something when looking at your photos, that creates much more of an impact and connection than a photo that simply looks beautiful or interesting, but doesn’t invoke any emotion.

man with his head down - 10 Things You Can Learn About Photography from Elliott Erwitt

That is easier said than done right?! How do you go about doing that? How do you create a feeling in your images?

The main thing is you, as the photographer, must be in a state of feeling first. If you are feeling bored by your subject, you will not translate an emotionally impactful sentiment into your photos.

If you are looking at your subject and feeling, for example, deeply calm, then you are more likely to convey that feeling in your images.

Like Henri Cartier-Bresson said, “To photograph: it is to put on the same line of sight the head, the eye and the heart.”

10 Things You Can Learn About Photography from Elliott Erwitt - silhouette of a man at sunset with boats

Now, I don’t want to say that happens automatically. Just because you feel something when you are taking the photo doesn’t mean it will immediately be translated into the image. It isn’t. It does require some technical abilities to be able to capture the image that you want – getting good exposures on your light, etc. But that is just learning and practice.

The state of feeling – of always putting yourself in front of things that make you feel something – that is the thing that elevates your images overall.

For example, I spent seven weeks in a castle in Tuscany over the winter and much of my time was spent wandering the hills and forests taking photos. One beautiful, crisply cold afternoon I came upon a deserted building. It was huge and looming, with a cold and scary facade. The gardens were overgrown, and nature had begun its reclamation of the stone statues and walls.

creepy old building interior - 10 Things You Can Learn About Photography from Elliott Erwitt

It was really eerie. Although terrified of exploring it, I pushed through my fear and went inside. The whole time I was there I was anxious – too many scary movies perhaps running through my mind – and my photos reflect that feeling of fear.

But that’s great because it works for the subject. The subject was scary and creepy. So my photos feel scary and creepy. A job well done, I’d say!

As I mentioned, I spend a lot of time photographing cities at dawn – particularly in summer when sunrise is so early in many places that there is no one around. You really get to observe the city as it is, without crowds of people.

Venice at dawn - 10 Things You Can Learn About Photography from Elliott Erwitt

So here’s the second example, above. I have hundreds of photos of sunrises, in beautiful places like Venice or Istanbul, that have filled me with awe. The combination of the sky breaking open from deep blue to explosions of pinks, purples, yellows and oranges and the incredible buildings and architecture in the cities is so exciting for me to experience.

The feeling you get from viewing these photos matches the epic feeling I experienced taking them. I had a feeling of total awe while I was taking the photos. I capture the images technically well – but the impact comes from that feeling.

In another example, I love finding peculiar things stuck on the ground or on walls. I love making funny compositions of odd shapes that you can find on pavement or the shapes created by torn posters.

ripped poser on a wall - 10 Things You Can Learn About Photography from Elliott Erwitt

There are so many ways to play with shape, form, and texture in these subjects.

To me the feeling I have when I find something like this is one of intrigue. I think that translates into the images I capture as well.

So there are many ways to approach this sense of feeling. The most important factor is finding the things that exhilarate, intrigue, or inspire awe within you.

little girl with sunglasses - 10 Things You Can Learn About Photography from Elliott Erwitt

Lesson 8: Interesting things happen all the time…you just have to wait

“I rarely stage pictures. I wait for them… let them take their own time. Sometimes, you think something’s going to happen, so you wait. It may pan out; it may not. That’s a wonderful thing about pictures– things can happen.” – Elliot Erwitt

The world is magical, things will happen regardless of what you do. In fact, the less you do the better. I find that the less you try to control the world around you the more effort you make to observe and be in that state of awareness.

The world, and we humans, always do funny things.

man sweeping a cat - 10 Things You Can Learn About Photography from Elliott Erwitt

Lesson 9: It’s easy to create something original if you don’t follow the crowd

“After following the crowd for a while, I’d then go 180 degrees in the exact opposite direction. It always worked for me, but then again, I’m very lucky.” – Elliott Erwitt

I spend a lot of time photographing some of the most photographed places on earth – cities like Paris and London. You might think it’s hard to capture something original in such over-photographed places, but that’s not the case.

Most people are photographing the exact same things. A bit like how tourists are always to be found crowded around the same spots. The trick is to go (or shoot) in the opposite direction to everyone else.

One evening I was on Westminster Bridge in London. There was a gorgeous sunset setting behind the Houses of Parliament. It was really incredible – lots of purples and pinks.

On the bridge, hundreds of photographers had their cameras pointed at the scene. This is understandable, of course.

I grabbed that shot (above), which was pretty but not very original. Then I started to look around. The light wasn’t just the sunset, it was affecting everything around us. I turned 180 degrees and there was a really cool scene of almost metallic colors. I got a great shot of that scene, see below (and no one else seemed to have noticed.)

Almost everyone will shoot the obvious shot, and not look around to see what else there is to photograph.

Lesson 10: Stay curious!

“I don’t think you can create luck. You’re either lucky or you’re not. I don’t know if it’s really luck or if it’s just curiosity. I think the main ingredient, or a main ingredient for photography is curiosity. If you’re curious enough and if you get up in the morning and go out and take pictures, you’re likely to be more lucky than if you just stay at home.” – Elliott Erwitt

Keep it simple.

This is another piece of Elliott’s simple advice that I love. Don’t overthink photography. Use your passion and instinct. Go out, take photos. Look at the world around you. Then shoot some more.

10 Things You Can Learn About Photography from Elliott Erwitt - chairs on the street and a yellow wall

Last bonus tip – be yourself!

“The dedicated photographer works with his own sensibility, instincts, and experience. He stays curious about everything visible. He looks, looks some more, and then looks again, because that is the fundamental basis of photography. And that’s all… just looking and making your own unique connections.” – Elliott Erwitt

We each have totally different ways of seeing and capturing the world around us. I couldn’t emphasize enough the importance of not worrying about what everyone else is doing and just focusing on you!

Your photos, your passions, your personal curiosity. That’s how you’ll create something unique and interesting.

two guys sitting on steps in red pants - 10 Things You Can Learn About Photography from Elliott Erwitt

I hope this has inspired you to take a look at the work of one of my favorite photographers and given you some ideas for your photography.

I’d love to know what you think of these gems of wisdom from Mr. Erwitt and the lessons I have interpreted from them. Please share your thoughts below.

The post 10 Things You Can Learn About Photography from Elliott Erwitt appeared first on Digital Photography School.


it's from Digital Photography School https://ift.tt/2MaOpep
via Anthony Epes

[Photography] How to Set Up the Photoshop Interface and Workspace for Maximum Efficiency

You wouldn’t start cooking dinner and go to the supermarket each time you need an ingredient, that wouldn’t be very efficient, right? For any activity you want to undergo in life it’s always best to have everything you’re going to need before you start, don’t you agree? With the Photoshop interface, it is the same.

You will be able to work more efficiently if you set up your workspace according to what you need right from the beginning.

Photoshop interface - Get to Know Your Interface Setup Your Interface

The Photoshop Interface

In order to set up your workspace, you need to know what tools are available to you, how they behave, and what are the options. All of these things combined are called the interface, so let’s get to know it.

The big central area is called Canvas.

How to Setup the Photoshop Interface and Workspace for Maximum Efficiency

What is in the canvas area

This is where your image will be displayed, therefore it’s quite an important component. All around the canvas area you’ll find tools and information to help you manage your image.

On the right-hand side, you have the panels. There are tabs here that provide you with information about what you have on the canvas. Which tabs are there is entirely up to you as it is completely customizable, but I’ll get to that later on.

On the left-hand side, you’ll find the Tool box which, as the name suggests, contains the various tools you can use to modify your image. I’ll show you later how it can be moved but as a default, you’ll find it here.

On top, there’s the Option bar which provides the setting options for each tool that you select from the Tool bar, therefore it is constantly changing.

And on top of that, you’ll find the menu bar with many options to control your canvas, file, and interface.

How to Setup the Photoshop Interface and Workspace for Maximum Efficiency

When you put together these sections you can transform your workspace. Now that you know what everything is and where to find it you can start personalizing it according to your needs. Let’s get to it.

Personalizing your workspace

The very first thing that catches your eye, and therefore is something you want to decide, is the color. If you go to Menu > Photoshop > Preferences > Interface you’ll find the options.

You’ll notice on the image below that I have used the lightest shade of grey. But the choice is completely personal, try all of them and see which suits you best.

How to Setup the Photoshop Interface and Workspace for Maximum Efficiency

No matter which one of those you choose, you can change the color of the canvas any time because each photo may need a different background.

For example, if you are working on a black canvas and you start working on a black photo you might not be able to see the edges of the image. Just right-click anywhere on the canvas area and choose any of the default colors or make a custom one.

I’ll make it a really evident green, not because it’s something I would recommend using, but because I want you to be clear on which area is changing with this option.

How to Setup the Photoshop Interface and Workspace for Maximum Efficiency

Usability and function

Now that you fixed the look of your Photoshop interface and workspace, it’s time to move to the practicality aspects.

As a starting point, you can use any of the default workspaces that Photoshop has built-in. To find them just go to the drop-down menu on the top right corner. Feel free to try them all out.

However, since you are reading this in a Digital Photography School article, I’ll suggest you start with the Photography Workspace and we’ll start building up from there.

How to Setup the Photoshop Interface and Workspace for Maximum Efficiency

To start personalizing, it’s worth knowing that most panels can be detached and dragged anywhere on your workspace. You can just click on the top of the panel where there is a dotted line and let go wherever you want the panel situated.

How to Setup the Photoshop Interface and Workspace for Maximum Efficiency

However, this can get very messy really quickly. So if you want to move the panels around, I suggest you still attach them into another available slot. To find them just hover over the workspace and look for the blue lines as they indicate snapping points.

Panels

Let’s now focus on the panel area as it’s the most flexible of all. In here, you have different information windows in tabs that can be grouped or stacked. You may think that it would be helpful to have all of them open but that would take away space on the canvas for your image.

So it is actually much more practical to have as little as possible opened at one time. Therefore, let’s start by closing the ones you don’t need from the default setup. To close a tab just go to the top right corner of the tab and click on the drop-down menu, from there choose “Close”.

How to Setup the Photoshop Interface and Workspace for Maximum Efficiency

You’ll notice that the panel area is divided into smaller boxes. This is because tabs can be grouped. To move tabs from one group to another just drag them. And to close an entire group just choose Close Tab Group instead of Close from the drop-down menu.

How to Setup the Photoshop Interface and Workspace for Maximum Efficiency

Editing the Panels

If you need a panel that didn’t come with the default preset, you can access it by going to Menu > Window and select the desired option. It will be dropped into the collapsible column on the left of the panels which is a collapsible extension of the panels.

If you need it open all the time, like the Layer panel for example, then you can have it on the right so it displays all the information all the time. But if it’s something you need just on occasion, you can keep it collapsed on the left and just click on it when you need it.

If you don’t need a panel at all you can always make it disappear from that column just by right-clicking it and then choosing “Close”.

How to Setup the Photoshop Interface and Workspace for Maximum Efficiency

This column can also be customized to show the icon and name of the panel or just the icon. Just click on the arrow at the top to choose.

While I’m on that, let me tell you that the Tool Bar has a similar feature by giving you the choice of one or two columns. Keep in mind that expanding it means losing Canvas space, so I like to keep it in the slimmer version.

How to Setup the Photoshop Interface and Workspace for Maximum Efficiency

Finishing up

Now you know how to customize your Photoshop interface and workspace.

But, if you work on different projects (i.e you’re a photographer but also do design) you may need different workspaces according to each specific needs. Or if you use a shared computer with another family member or a co-worker then you also might need different workspaces for each of you.

This is why you want to save your customized workspace so you can come back to it easily each time without the need for repeating this process.

To do this, go back to the drop-down menu of the top-right corner and choose New Workspace. Name it and go back to it any time you need.

How to Setup the Photoshop Interface and Workspace for Maximum Efficiency

Furthermore, if you are in your workspace but still find that are some changes from how it’s supposed to look, just click reset and everything will be back to normal. One last tip, from the bottom of the Tool box you can also choose the screen mode you want to use.

How to Setup the Photoshop Interface and Workspace for Maximum Efficiency

Okay, no more procrastination, get to work!

The post How to Set Up the Photoshop Interface and Workspace for Maximum Efficiency appeared first on Digital Photography School.


it's from Digital Photography School https://ift.tt/2n781oU
via Ana Mireles

Aug 1, 2018

[Photography] 3 Tips For Photographing Kids in Harsh Light

You’ve probably heard that the absolute best time for taking gorgeous portraits is before sunset at golden hour. I love the golden hour as much as the next photographer. But I’m also a mom, and I know the importance of being able to capture photographs of your kids throughout day-to-day life, not just when the lighting conditions are ideal.

Let’s face it – birthday parties, parades, celebrations, and field trips often happen in the middle of the day when the light is harsh and more difficult to work with. How do you capture those special midday moments?!

kids eating popsicles - 3 Tips For Photographing Kids in Harsh Light

You can absolutely take amazing photos of your kids no matter the time of day! In this article, I’ll share three quick and easy tips for those times when you want to capture memories and are photographing kids in harsh lighting conditions.

1. Find or Make Some Shade

One of the easiest ways to approach photographing kids in harsh lighting conditions is to find or make some open shade.

If you’re outdoors, look for a group of trees, a small hill, a tall building, or even part of a play structure that can provide you with a bit of shade for your photo. When you’re looking at the shadows on the ground, try to find a patch of shade that doesn’t have “hot spots” of sunlight mixed in with the shade. Mottled light is generally not the most flattering type of light for photographs.

If you aren’t able to find open shade, you can also create it. I’ve used everything from a sun hat to a couple of friends holding a beach towel in the air to create a small patch of shade for a photo of my kiddos. Be creative!

girl in a watermelon hat - 3 Tips For Photographing Kids in Harsh Light

2. Find Your Light

Unless you’re shooting right at high noon, the light from the sun will still have some direction to it. If you’re familiar with the circle trick, this is a great time to utilize it so that you can easily visualize the direction of the light.

Snapping photos without taking the direction of light into account often results in lackluster images with squinting subjects and uneven unflattering lighting.

kids squinting in the sun - 3 Tips For Photographing Kids in Harsh Light

This is an example of what NOT to do when shooting in harsh lighting conditions. See how the girls are squinting and the light is uneven across their faces?

However, spending just a few seconds thinking about the direction of the source of light makes for a much better image in exactly the same location. One simple way that I often communicate this to kiddos is to ask them to stand with their feet pointing towards the head of their shadow.

two girls backlit by the sun - 3 Tips For Photographing Kids in Harsh Light

Nine times out of ten, this simple instruction quickly orients kids so that the direction of light (backlit) is most flattering. You may still end up with some hot spots across their shoulders and the tops of their heads, but typically the light will be nice and even across their faces, which is really my goal when shooting in harsh light or full sun.

3. Try a Fill Flash

girl backlit with water in the background - 3 Tips For Photographing Kids in Harsh Light

So, what if the background you’re trying to capture doesn’t allow you to orient your child in the best way given the direction of light?

Whether you’re taking photos of a historical landmark or a hometown parade, there is another trick you can utilize in harsh lighting conditions. That is to use your on-camera flash as a fill light to help diffuse any harsh shadows and brighten your subject’s face.

For example, the above image was taken at a local lake. Because of the location of the dock coupled with the time of day, I wasn’t quite able to get the sun all the way behind my daughter, resulting in a bit of a hot spot on the right edge of her face, while the rest of her face is just a bit dark.

If this effect bothers you, give fill flash a try!

This second image (above) was taken at the same time, in the same place. But this time I used my camera’s flash to soften some of the highlights near her face. You’ll notice that the coloring of the water is entirely different when using a fill flash versus without it. Additionally, her eyes seem to have more pop with the flash compared to without it.

Whether or not to use fill flash in harsh lighting conditions is really a matter of aesthetic preference. But it’s certainly worth a try if something feels a bit off when you’re shooting in harsh light.

In a nutshell, don’t be afraid of photographing kids in full sun – it’s easier than you may think. Give it a try, and chime in and share your best images with us below.

The post 3 Tips For Photographing Kids in Harsh Light appeared first on Digital Photography School.


it's from Digital Photography School https://ift.tt/2M74OAx
via Meredith Clark

[Photography] Five (More) Uncomfortable Truths About Photography

One of my first articles here at DPS was entitled 5 Uncomfortable Truths About Photography. I wrote it as a reality check to myself, and for you, the readers of DPS. Our beloved art of photography has a dark side, and it’s important to recognize this. In the couple of years since I penned that piece, a few more negatives about our art have occurred to me, so I figured it was time for Part II.

#1 – Bad Weather is Good Weather

cloudy view of mountains from a small plane - Five (More) Uncomfortable Truths About Photography

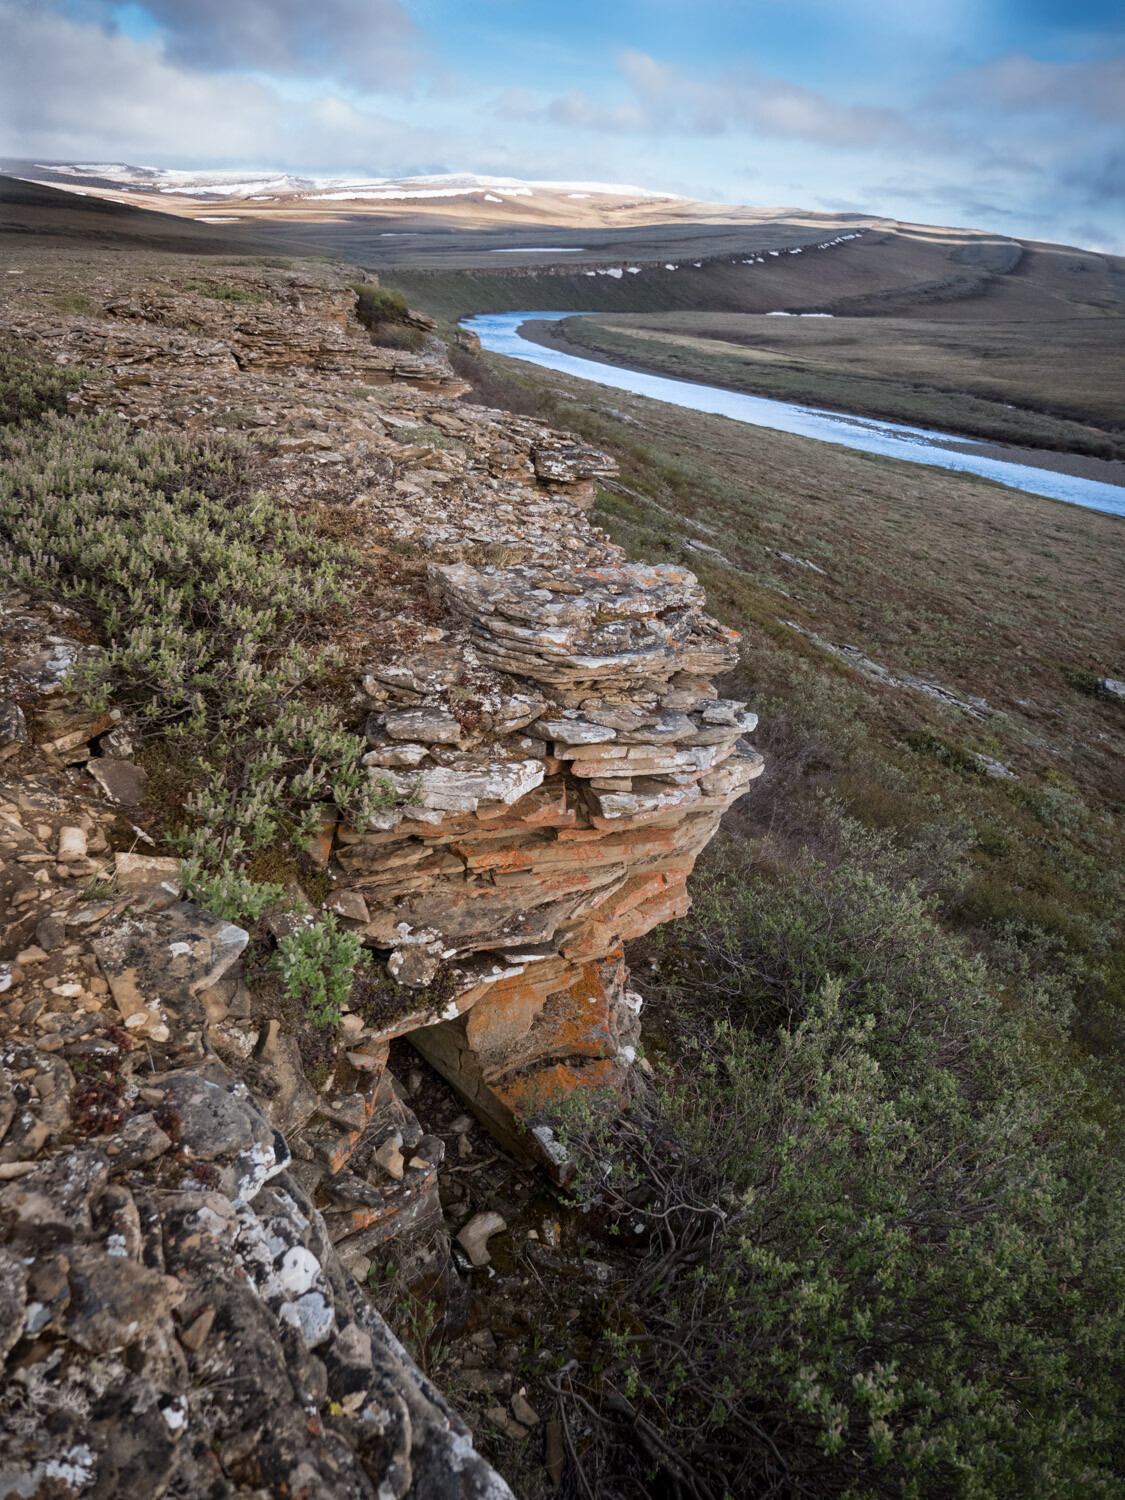
I’ve recently returned from leading a wilderness trip in Alaska’s Northwest Arctic. My group and I spent 11 days canoeing on a very remote and wild river. For the first three days, the weather absolutely sucked and it was glorious. But then the sun came out and it all went downhill from there.

When it comes to outdoor photography, the bluebird days we hope for as hikers, paddlers, cyclists, and explorers, are not ideal. Bright blue skies do not create drama. They don’t catch the evening light, and they don’t roil and boil in textures of deep blues and grays.

Now a good storm, that’s dramatic!

rocky outcrop and cloudy sky - Five (More) Uncomfortable Truths About Photography

Without the moody skies here, the warm tones in the rock would be either absent or much less compelling.

Our small bush plane slipped in beneath low clouds, barely clearing the pass over the mountains. We landed in a mix of blowing snow, sun patches, and a cold north wind. Photographically speaking it was perfect weather; a constantly shifting drama unfolding across the landscape.

For a few cold and blustery days it was perfect, and my best images of the trip were made during that time. But, on the fourth day, the wind shifted and blew out the clouds and snow, leaving behind a bluebird sky, warm temps, and sunshine. It definitely could have been better for photography.

Five (More) Uncomfortable Truths About Photography - blustery day

This image and the one below were made 24 hours apart but from very nearly the same location. This brooding, moody, stormy weather is far superior to the more generic, nice-day image below.

brighter day blue sky - Five (More) Uncomfortable Truths About Photography

The moral of the story is that the best weather for being outdoors is often boring when it comes to photography. So be brave, and step outside even when it’s snowing sideways.

#2 – Lens Snobbery is Real

Five (More) Uncomfortable Truths About Photography - bird in a tree singing

A Swainson’s Thrush singing in my yard in Fairbanks, Alaska. This image is one I could never have captured with my old 500mm f/4 simply because I simply would not have been carrying it while walking my dog.

A few months ago I made the heart-wrenching decision to sell off my beloved Canon 500mm f4L IS lens. It was a hard decision. That big hunk of glass and metal had been with me a for a few years, traveled around the world with me, and made some of my best images. But, its size, heft, and cumbersome, tripod-requiring handling was getting in the way.

I’ve replaced it with a much smaller Olympus 300mm f4 PRO for the micro 4/3rds system (giving me a 600mm f4 equivalent at a third of the size). And here is the uncomfortable part – the quality of the Olympus lens is equal to that of the Canon and I don’t miss the bigger, more expensive Canon lens at all. Not one little bit.

Except (and to be honest I have a hard time admitting this) when I’m around other photographers. As a bonafide professional shooter, the big lens felt like a badge of honor. It’s a bogus badge for sure because the size of your lens has nothing to do with performance or image quality. Yet I felt like I needed that big glass to be taken seriously as a pro.

Five (More) Uncomfortable Truths About Photography - portrait shot of a raven

I don’t think the bokeh or sharpness of my Olympus 300mm f4 falls short in any way when I compare it to larger, far more expensive lenses like my old 500mm f4.

The compact mirrorless 4/3rds system does not stand out the way the big gear did, and in groups of photographers, I noticed my gear (and me) being brushed over.

The great irony is that my long lens work has improved dramatically with the purchase of the new gear. Its small size is easy to transport, so it is always with me when it matters. I now walk the dog with a 600mm f4 equivalent for heaven’s sake! It’s there when I need it and the results have been excellent.

Time to put the snobbery aside and let the images speak for themselves.

#3 – Your big DSLR is Unnecessary

Five (More) Uncomfortable Truths About Photography - animals running on a ridge

Yesterday, while wandering around my local farmer’s market, I saw a photographer shooting with the exact same Canon professional level DSLR I owned until a few months ago. My god, it looked huge!

You see, I’ve recently switched from Canon to Lumix (for general shooting and wildlife) and Sony for night work and high-resolution landscape imagery. Both of these two mirrorless systems cast a tiny shadow compared to the hulking DSLRs of my past life.

In this day and age, the difference in quality and performance between a big DSLR and a light and compact mirrorless is precisely zilch. The big camera may make you stand out in a crowd (see #2 above), but it won’t make better images.

#4 – Creativity is More Important Than You Think

northern lights over a mountain - Five (More) Uncomfortable Truths About Photography

Part of creativity is knowing when to grab a shot. Rather than pausing when the headlights of a big truck fell across this mountainside, I experimented with an exposure.

Look across the pages of any photo website or magazine and you’ll see gobs of articles and tutorials about camera settings, focus techniques, equipment, exposure, and post-processing. But likely you’ll find very few about the creative process of image making.

I know why. These types of articles are popular because they offer simple, actionable things to learn that can improve your images quickly. Don’t get me wrong, these things are super important to know. But all the settings, equipment, and post-processing tips are merely tools in your toolbox, not the final product.

sunset over a forest and hills - Five (More) Uncomfortable Truths About Photography

Eventually, every serious photographer reaches a point where they know all they really need to know about their camera and computer programs, and then what…? They either realize that that photography is more than a technical craft and they begin looking at it from a creative perspective, or they don’t, and they stall out.

Learning the technical details is easy compared to actually finding and composing images in the field. Good photography is not formulaic, and how do you learn something that doesn’t use a formula for success? You work at it, a lot. It’s hard and uncomfortable. That’s how.

#5 – Money is Better Spent on Travel than Gear

northern lights over a mountain scene - Five (More) Uncomfortable Truths About Photography

For much less than the price of a new pro-level camera body, you could go photograph something like this.

Got a few hundred bucks to blow on gear? Don’t. Take that few hundred bucks and take a few days and go somewhere awesome instead. Unless you really need it, your extra money is better spent on going somewhere really cool to make images, and not on cameras, lenses, bags, filters, and flashes.

I can just about promise you that you’ll get more and better images by a few days of travel to photograph wildlife, or landscapes, or the northern lights, or some new city than you will by spending the same amount on a new piece of kit.

sun burst over trees in Africa - Five (More) Uncomfortable Truths About Photography

A trip to Africa last year re-inspired me in a way a bunch of new gear never could.

A new telephoto lens or camera could cost you thousands of dollars. If you have functional camera gear, and you are looking at something new just because it’s all bright and shiny, take a moment to reconsider. Could those thousands be spent traveling somewhere new and unique? Some place to photograph a landscape or phenomenon you’ve always dreamed of shooting?

We make images by exploring our world. Without that exploration, all the fancy new gear in the world is worthless. Just as importantly, you’ll get the experience and joy of travel, and that is truly priceless.

Conclusion

night campfire scene - Five (More) Uncomfortable Truths About Photography

Look, photography is messy and expensive. I suggest you embrace the mess and reassess the expense. Go outside when the weather sucks and see what you find. Remember that the performance of your gear is what matters not the brand or the size, and know that creativity is hard but it’s the only way to advance your photography. Photography takes work.

Lastly, think about how you spend your money. Old glass and old cameras often work just fine, and are capable of producing excellent images. Maybe you should hold onto that gear for a while longer and spend some of that extra money to go somewhere new. Travel, you’ll find, is an excellent strategy for making great photos.

It’s an uncomfortable photographic world out there. So it’s time to accept it, and go make something beautiful.

The post Five (More) Uncomfortable Truths About Photography appeared first on Digital Photography School.


it's from Digital Photography School https://ift.tt/2NZJtJO
via David Shaw