Dec 5, 2022

[Photography] Landscape Photography for Beginners: A Comprehensive Guide

The post Landscape Photography for Beginners: A Comprehensive Guide appeared first on Digital Photography School. It was authored by Barry J Brady.

Landscape photography for beginners

Landscape photography is an amazing activity filled with excitement, beauty, exhilaration, and so much more. And in my view, landscape photography isn’t especially difficult – but it does require dedication, passion, and a bit of knowledge.

In this article, I offer my best tips for beginner landscape photography. I explain how to find the best subjects, how to choose the right gear, and how to handle your camera settings in the field; in fact, you can think of this as a mini landscape photography crash course covering all the basics.

So if you’re a landscape photography newbie and you want to know how to get started, or you’re not sure if landscape photography is right for you but you’re interested in exploring the genre, then keep on reading!

1. Start by researching potential locations

Beautiful landscape photography generally starts with a beautiful subject. Depending on where you live, you may have to drive a fair distance to find some great landscape scenes, or you may be lucky enough to have a few stunning vistas a few miles away.

Regardless, I encourage you to spend some time researching every potential location before heading out. That way, you can optimize your time in the field, and you rarely get stuck hunting for a nice composition while the light fades.

Beginner landscape photography

Before visiting a new location, I often do a bit of googling. I’ll do a search like “landscape scene + [my location]” and browse the Google Image results. Even if you just want to shoot nearby and think you know the area, it’s generally worth doing a quick search; sometimes, you’ll encounter a gorgeous scene that you didn’t know was in the area!

Anyway, use Google Image photos to compile a list of possible shooting locations. (If you don’t find much on Google, you can also check out 500px, Instagram, or even Flickr, all of which feature plenty of great landscape photography!)

It’s also important to keep in mind your shooting requirements and preferences. Do you want to capture a sunrise? A sunset? A mountain? A reflecting pool? A forest? While it’s great to keep a list of all possible locations in an area – and it’s always handy to have backups in case a location doesn’t work out – I’d recommend prioritizing certain areas based on your interests.

Beginner landscape photography

Once you’ve identified several great locations, you may think you’re ready to head out and shoot, but I’d recommend opening an app like PhotoPills or The Photographer’s Ephemeris. Drop a pin on your potential shooting location, then check the sun positions, the moon positions, and any other relevant information. Then time your photoshoot to coincide with the perfect conditions!

(What conditions are best for landscape photography? That’s what I discuss in my next beginner landscape photography tip!)

2. Shoot in the right light

It’s technically possible to capture great landscape shots at any time of day, but most landscape shooters like dramatic colors and soft light – which is why it’s generally best to photograph at sunrise and sunset.

Sunrise and sunset are known as the golden hours because they offer such beautiful, warm light. Unfortunately, the incredible light doesn’t last for very long, so it pays to arrive at least a half hour (or more) before the light show begins; that way, you’ll have plenty of time to select a composition and set up your camera.

Beginner landscape photography

Once you’re out in the field, you should pay careful attention to the direction of the light. Side light – which comes from off to the side of the camera – is a great way to produce photos with three-dimensionality and lots of texture, though backlight can create dramatic results, especially if the sky features a glorious sunrise or sunset.

And speaking of glorious skies: If possible, try to photograph on days when the sky features enough cloud cover to produce eye-catching colors, but not so much cloud cover that everything looks gray and drab.

One more landscape photography lighting tip: While the golden hours work great for most locations, you can also capture beautiful shots during the blue hour – that is, the brief window just before sunrise and just after sunset, when the light turns soft, ethereal, and (as the name suggests) cool. Because of the limited light, blue hour photography is more technically demanding than golden hour photography, but as long as you use a tripod and take steps to prevent camera shake, you can create some gorgeous photos.

3. Choose the right beginner landscape photography gear

Landscape photography is a gear-intensive genre. Sure, you can produce decent landscape shots using only a kit-lens-equipped setup or even just a smartphone, but if you want stunning, printable images that feature plenty of detail and incredible tonal range, you’ll want to purchase a few specific items of equipment.

Of course, you can’t shoot landscapes without a camera, so that’s where I’d start. You may already own a decent model, but if not, I’d recommend purchasing some sort of interchangeable lens camera that offers a decent number of megapixels (20+ MP is pretty standard nowadays and should be sufficient for large prints). There are plenty of great mirrorless and DSLR models for landscape photography, and they’ll all do a very solid job.

Beginner landscape photography

You’ll also want a decently wide lens with sufficiently sharp glass. A kit lens (i.e., the lens that comes bundled with most beginner cameras) can work, but if you want better landscape optics, look for a wide-angle zoom or even a wide-angle prime or two.

Next, you’ll need a tripod, and unless you’re really not sure whether this whole landscape photography thing is for you, I’d encourage you to really invest in a sturdy product. Most landscape photography scenarios – such as golden hour and blue hour – offer minimal light, which will force you to slow down your shutter speed. And a slow shutter speed will produce lots of blur – unless your camera has rock-solid support in the form of a tripod.

Tripods can be expensive, but it’s important to remember that a good tripod can make a huge difference. Also, a solid tripod will last a long time, so you won’t need to replace it anytime soon.

Fourth, you’ll need a remote trigger, which will allow you to trip the camera shutter without actually pressing the shutter button. (Why is this necessary? Pressing the shutter button will produce camera shake, which will cause blur, even if your camera is mounted on a tripod.)

When I was a beginner landscape photographer, I took a while to buy a remote release. Then, once I had one, I wondered why I took so long to get it! Remote releases don’t cost very much, but they’ll help keep your photos sharp, which is essential.

Finally, it’s worth mentioning a few landscape photography filters. Graduated neutral density filters allow you to capture a bright sky and a dark foreground in a single frame – though these days, many landscape shooters rely on HDR exposure blending to achieve the same result.

Then there are polarizing filters, which will reduce reflections on wet rocks, lakes, waves, and foliage. They’re great if you plan to shoot a lot of water and forest photos, but they’re not absolutely essential, so it’s up to you whether you want to invest. And neutral density filters block out the light so you can lengthen your shutter speed to produce beautiful long-exposure effects. While you won’t need one of these right away, they’re certainly worth keeping in mind for the future!

4. Choose the right settings

Once you have the right gear, know how to find good locations, and are familiar with different types of light, you’ll need to understand key landscape photography settings.

Unfortunately, there are no formulas for creating perfect shots – each new scenario should be evaluated on a case-by-case basis – but I can offer some handy guidelines.
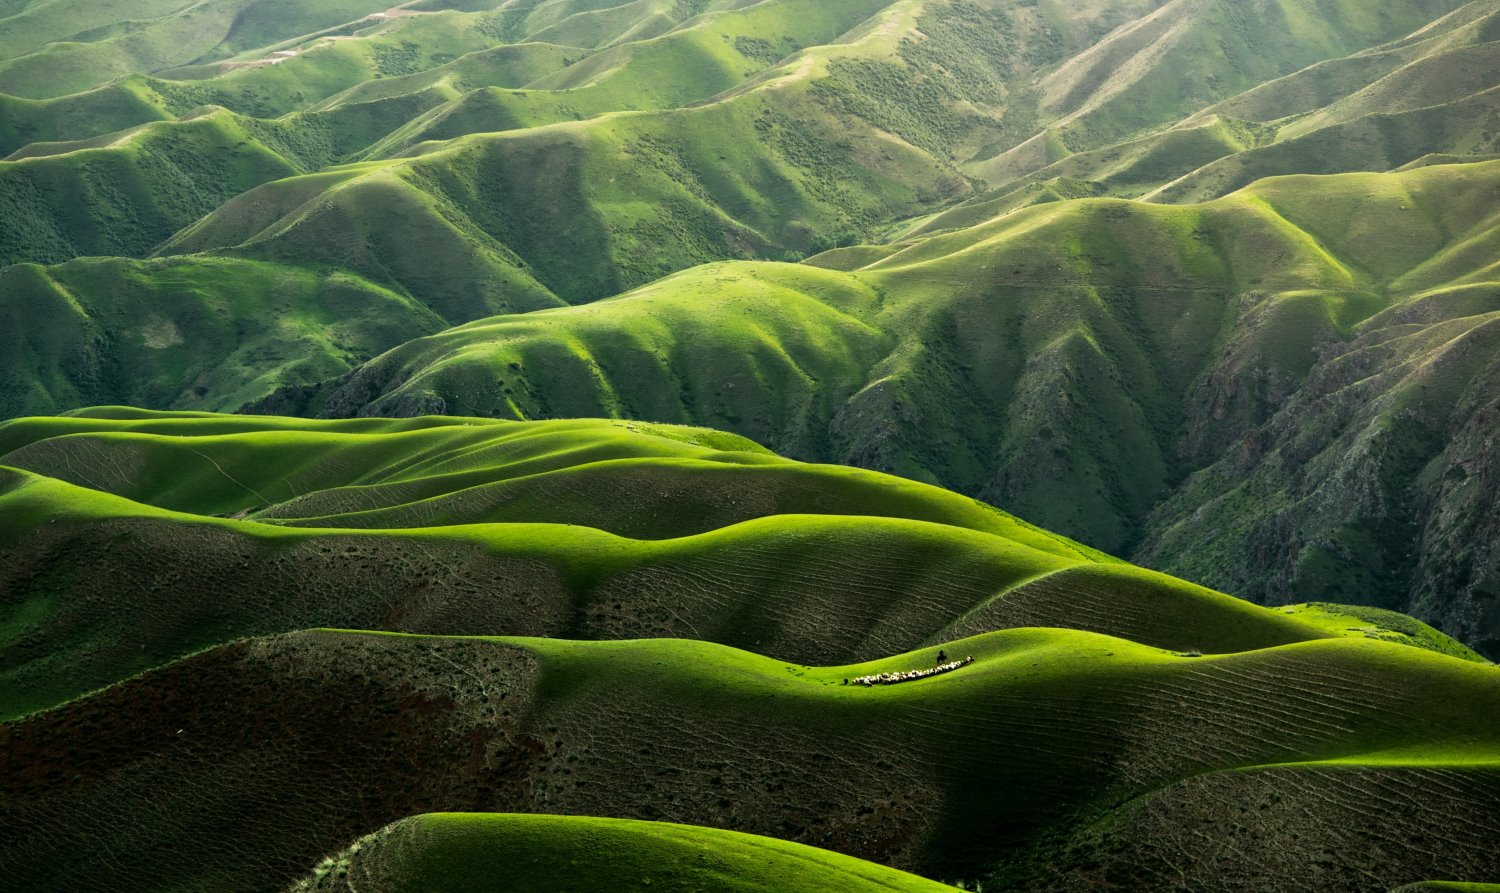
Beginner landscape photography

First, you’ll generally want everything in your scene to be in focus. I’d encourage you to switch your camera to Manual mode, then dial in an aperture setting of at least f/8 (and potentially f/11 or even f/16 if the scene features a lot of depth). Then focus your lens about a third of the way into the landscape scene to approximate the hyperfocal distance and maximize sharpness.

(It can help to initially use your camera’s autofocus, then switch your lens to focus manually once you’ve set focus correctly. That way, you don’t need to worry about your camera refocusing as you make adjustments to your settings.)

Once your aperture has been set, you’ll want to choose your ISO. An ultra-low ISO is basically always best; I’d recommend setting your ISO to 100 (or your camera’s lowest native setting) and keeping it there. That way you can avoid unpleasant digital noise effects and retain as much detail and dynamic range as possible.

Beginner landscape photography

Next, you’ll need to set your shutter speed. Since you’ll have already dialed in an aperture and an ISO, you should simply choose a shutter speed that produces a good exposure. Depending on the light levels, you may need to drop your exposure to a couple of seconds (or more) to get a good shot, and that’s okay. In fact, lengthy shutter speeds can produce beautiful long-exposure effects; water turns soft and silky, while clouds stretch out across the sky.

Note that if your shutter speed is too long for your tastes (for instance, you want to capture blowing trees or crashing waves in sharp detail), you can widen your aperture or raise your ISO, but do so sparingly – such adjustments come with a cost!

One final settings tip: Make sure that you set your camera to capture RAW files, not JPEGs. RAW files are bigger and require processing, but they retain far more detail and are easier to edit, so it’s essential that you shoot in RAW.

5. Review and post-process your landscape photos

Once you return from a shoot, download your images and peek at the results. You’ll want to purchase some form of editing software (I recommend Adobe Lightroom Classic), and you should use it to organize your images. Put the successful photos in one folder, put the unsuccessful photos in another folder, and choose your absolute best shots from the “Successful” file to be edited. (You may find that you’ll shoot 100 images and only a couple are worthy of editing, and that’s okay!)

Editing might seem difficult, but it mostly just involves a lot of experimentation. My best advice is to take your time and test out each effect. Make sure you adjust the white balance to neutralize any problematic color casts, fiddle with different exposure and tonal sliders to bring out plenty of detail, and try boosting the colors and contrast to add a bit of punch.

Beginner landscape photography

Note that if you come up with an editing effect that you like, you can generally save it as a preset so you can use it again and again (though the specifics will depend on your editing program).

And if you struggle at first to edit your landscape photos, don’t worry. You’ll quickly become familiar with the different effects, and before you know it, you’ll be adjusting those editing sliders like a pro.

Landscape photography for beginners: final words

Landscape photography is incredibly satisfying, and with the right approach, the rewards are often unreal. Of course, you have no control over the weather or the light, and the conditions won’t always work out – but when they do, you’ll feel exhilarated!

At the end of the day, the most important tip is to take your time. Don’t rush the process, and don’t pack up until you’re certain you cannot get a better shot. Always go out and have fun. Even if the light doesn’t play along or the weather isn’t what you hoped for, you can use an outing as a practice session. Pretty soon, you’ll be capturing those breathtaking scenes with ease!

What type of landscape photography do you plan to shoot? Share your thoughts in the comments below!

The post Landscape Photography for Beginners: A Comprehensive Guide appeared first on Digital Photography School. It was authored by Barry J Brady.


it's from Digital Photography School https://ift.tt/X6zlZS0
via Barry J Brady

Dec 4, 2022

[Photography] 5 Fun and Festive Holiday Photography Ideas (+ Tips)

The post 5 Fun and Festive Holiday Photography Ideas (+ Tips) appeared first on Digital Photography School. It was authored by Lara Joy Brynildssen.

Fun and festive holiday photography ideas

Holidays in the Northern Hemisphere can be a bleak time of year for photographers. Daylight hours are short, temperatures drop, and the leaves have fallen off the trees. Luckily, in December, cities and suburbs are decorated with a blaze of holiday lights and color – so even if you’d rather spend time indoors, I encourage you to head outside and create some beautiful and colorful holiday images.

What types of photos can you capture? While you can always just set off with your camera and explore, I’ve come up with a list of several festive holiday photography ideas to get you inspired – so read this article, put on a warm coat, and enjoy the holiday season!

1. Search for stunning colors

Over-the-top holiday decorations are filled with color. Stores like Macy’s use festive decorating as a way to lure customers into the store, and it’s a lure for photographers, too. You can photograph the splashes of color in the window displays, and you can even venture inside (especially if you want to get out of the cold!).

Just look at this red lighting:

Five Fun Ideas Holiday Images 1

If you shoot outside during the day, you can work handheld without issue. However, if you want to capture the colors in the windows at night, you’ll need to bring a tripod or work with a camera that offers excellent high-ISO capabilities. If you decide to shoot handheld in low light, you’ll need to crank up that ISO, often to around 1600 or more.

If you photograph inside stores, you can stay near the windows for brighter light, or you can head deeper into the store. You won’t be able to bring a tripod – this is a big no-no in most establishments – so you’ll need to do your best to keep your hands steady while you work.

By the way, in addition to the riot of holiday color, stores are filled with signage, bright spotlights, and people so be creative when you compose your images. Try some unusual perspectives to help you avoid distracting elements.

Sometimes it helps to zoom in when you compose. Don’t worry about fitting the entire subject into your frame. Instead, move around and find a composition with repeating elements:

Five Fun Ideas Holiday Images 13

If you don’t have a big department store to explore, that’s okay; just head to your local shopping mall or main street shopping district. Shop owners work hard to make their storefronts look beautiful! Again, think outside the box when you compose your images. Don’t be afraid to try different angles, have fun testing out various bokeh effects (especially when holiday lights are involved), and just do your best to create unique shots!

2. Look for lights

Cities are amazing locations for holiday photowalks, not least because of the lights. If you live in or near a big city, be sure to take a tripod to the large parks and plazas that usually have lighted trees. Super large outdoor trees make great focal points, and they also make great backdrops because the twinkly lights can blur into beautiful bokeh. (Just make sure you use a longer lens – 50mm is a good focal length – and a wide aperture such as f/1.8.)

When shooting in the city, arrive just before dusk to observe your location and find good backgrounds. A great time to shoot the holiday lights is the hour after sunset because the sky is a lovely shade of blue and it’s bright enough to capture images of people. That said, you may want to break out your tripod – or, if you want to freeze people in action, crank up your ISO.

For this next shot, I was planning to photograph the skaters on the rink below the promenade. Yet this couple looked so beautiful bathed in golden light that I couldn’t help but take their picture.

Five Fun Ideas Holiday Images 3

A really fun holiday photography idea is to focus on a lighted tree branch, especially if the bulbs are unusual. You’ll want to search for an isolated tree branch with a clean background. Then open your aperture to its widest setting – preferably f/1.8 or f/1.4 – and let the more distant bulbs dissolve into soft, round circles:

Five Fun Ideas Holiday Images 4

By the way, scenes filled with white twinkly holiday lights look great in color – but they look gorgeous in black and white, too. For images like these, the trick is to underexpose slightly, so your histogram looks like this:

Five Fun Ideas Holiday Images 5 1

You see, those white twinkly lights are bright, and if you expose too far to the right, they’ll look blown out in your final image. By underexposing and keeping your histogram stacked to the left, you may lose a bit of detail in the shadows, but since the goal is to capture the twinkly lights, it’s more important you retain detail in the highlights.

Five Fun Ideas Holiday Images 5

If you’re primarily interested in capturing the lights in their environment, setting your camera on a tripod is the way to go. But if you’re trying to photograph the lights along with moving subjects (e.g., a group of people), crank up your ISO and do some handholding.

Five Fun Ideas Holiday Images 6

3. Photograph the holiday flora

Most macro photographers despair when winter comes around. However, the holidays offer an exciting assortment of plants and flowers that are great for holiday photoshoots!

You can often find large holiday blooms in botanical gardens, and you can also find plenty of poinsettias, red berries, and pine trees out and about (on street corners, hanging on shop doors, etc.). I’d recommend working with your closest-focusing lens (while a dedicated macro lens is generally best, standard 50mm lenses often offer surprisingly high maximum magnifications). Then choose a smaller aperture and have plenty of close-up fun!

Five Fun Ideas Holiday Images 7

If you prefer a softer-focus, artistic-style look, try widening your aperture so that only a small portion of the flower is in focus.

Five Fun Ideas Holiday Images 8

Of course, you can also buy holiday bouquets at your local grocery store, then create a little home-studio setup and see what you can capture.

One more tip: While the most festive images tend to feature bright holiday blooms, I’d also encourage you to seek out darker and moodier images. Look for snow piled up on wreaths, dying leaves hanging off trees, and tiny plants poking out of the ice. These photos won’t exactly bring the holiday cheer, but they’ll help capture the contrast between the brightly lit streets and the cold, dark winter.

4. Capture miniature scenes

Miniature Norman-Rockwell-like villages crop up everywhere during the holidays. For some folks, these models are family heirlooms and setting them up each year is an important holiday rite. If you have a friend who sets up one of these treasured villages every December, ask if you can come on over and photograph it for them.

You can also find exquisite miniature scenes in public places, like the Winter Wonderland Express at the Chicago Botanic Garden:

Five Fun Ideas Holiday Images 9

The key to successfully photographing miniature scenes is to shoot from eye level and to find a specific focal point, like the train in the image above. This viewpoint successfully highlights all the tiny, intricate details.

And if you can’t find any miniature scenes or you don’t feel like leaving the house, you can always create one using props! Find a crystal orb, place it in front of your holiday display, and watch as the scene is compressed and flipped:

Five Fun Ideas Holiday Images 10

To create such an image, you may need to experiment a bit with the orb’s position. Move it around, set it on tables and shelves, and see what it reflects. And once you find a great reflected composition, set your camera on the same level as the orb. Focus on the scene in the orb and let the background blur away. For the image above, I used f/16 for crisp orb details, but you can always experiment with f/8 or even f/4. Since you’ll be shooting indoors, you’ll probably want to choose a longer shutter speed – mine was two seconds – and a tripod or another sturdy method of support is recommended to prevent motion blur from shaky hands.

5. Photograph music

Buskers and musicians abound during the holidays, and if you’re lucky, you can find a few of them even on a short photowalk. You can make street-photography-style portraits of musicians, or you can photograph the broader scene, with the festive lights and starstruck onlookers.

In this first image, the background was more cluttered than I would have liked, but the harpist’s face was so angelic as she sang that I had to capture the moment. If you’re planning to take this type of candid shot, you’ll probably want to handhold your camera so you can avoid attracting attention. Again, make sure you keep your ISO high if you’re shooting in low light and widen your aperture for a smoother background. (This is the perfect opportunity to try a 50mm prime lens and experiment with wide apertures, such as f/1.8, f/2, or f/2.8.)

Five Fun Ideas Holiday Images 11

Alternatively, you can embrace a slower shutter speed and let the motion blur work for you. Think of it as seeing the music! The shot below is intentionally blurry because I wanted to show the energy and enthusiasm of the brass band:

Five Fun Ideas Holiday Images 12

To make your image look this way, focus on a key element but intentionally set a slow shutter speed. Try 1/10s to start, evaluate the level of blur, and then readjust as needed to get the right look. There is no right or wrong here; just keep experimenting until you get a shot you’re pleased with!

Holiday photography ideas: final words

These five ideas are just a few of the many ways you can make fun and beautiful images during the holidays. Of course, if you plan to shoot outside, don’t forget to dress warm and stop often for hot cocoa!

Do you have more great ideas for capturing the holiday season? Share them in the comments below!

The post 5 Fun and Festive Holiday Photography Ideas (+ Tips) appeared first on Digital Photography School. It was authored by Lara Joy Brynildssen.


it's from Digital Photography School https://ift.tt/DYxMKaT
via Lara Joy Brynildssen

Dec 2, 2022

[Photography] Weekly Photography Challenge – Abstract

The post Weekly Photography Challenge – Abstract appeared first on Digital Photography School. It was authored by Sime.

We tried the theme ‘Abstract’ once before, but didn’t get a whole lot of photos posted – let’s try it again, this time with vigour! (And a better description of ‘Abstract in Photography’ below!) Go out (or stay in!) and make an abstract photograph! Spill some milk on the floor and photograph the edge of it close up? Make a seemingly unreal appearance from real objects – most of all, have fun!

Remember, tag your posts with #dPSWeeklyChallenge and #dPSAbstract22

This is what Wikipedia gives me:

Abstract photography, sometimes called non-objective, experimental or conceptual photography, is a means of depicting a visual image that does not have an immediate association with the object world and that has been created through the use of photographic equipment, processes or materials. An abstract photograph may isolate a fragment of a natural scene in order to remove its inherent context from the viewer, it may be purposely staged to create a seemingly unreal appearance from real objects, or it may involve the use of color, light, shadow, texture, shape and/or form to convey a feeling, sensation or impression. The image may be produced using traditional photographic equipment like a camera, darkroom or computer, or it may be created without using a camera by directly manipulating film, paper or other photographic media, including digital presentations.”

Weekly Photography Challenge – Abstract
As abstract as your ocean.

I guess this next photograph of mine is kinda landscape, but the mixed textures and maybe the framing make it slightly abstract, I’m not sure… All I do know is I class the photo above abstract (It’s the ocean, photographed by my little mini Hasselblad with props…

Weekly Photography Challenge – Abstract
All comes together.

Remember, tag your posts with #dPSWeeklyChallenge and #dPSAbstract22 if you share them on general social media like Facebook, Instagram or Twitter (You can tag us, too!) or you can leave the tags off if you share in the comments under this post.

Have a top weekend and week ahead, it’s silly season! (I’ll be mowing lawns, anyone wanna help!)

— Simon

The post Weekly Photography Challenge – Abstract appeared first on Digital Photography School. It was authored by Sime.


it's from Digital Photography School https://ift.tt/1JAyZ6L
via Sime

[Photography] Canon to Release an EOS R8 or EOS R9 in 2023

The post Canon to Release an EOS R8 or EOS R9 in 2023 appeared first on Digital Photography School. It was authored by Jaymes Dempsey.

Canon to release an EOS R8 or R9 in 2023

Over the past few months, a handful of Canon gear announcements and rumors have made waves in the photography community – including reports of an upcoming EOS R5 Mark II and EOS R50 – and earlier this week, Canon Rumors revealed yet another tidbit for Canon fans to appreciate. 

According to CR, Canon is developing a mirrorless camera that will sit “between the EOS R7 and EOS R10…from a price standpoint.” And while CR can’t offer any confirmed specs, the rumor site believes that the “EOS R8/EOS R9…will have a different form factor and could possibly see the omission of a built-in viewfinder.” CR also suggests that the R8/R9 will pack an APS-C sensor, presumably based on its position between the (crop-sensor) EOS R7 and EOS R10.

To my mind, however, the sensor type is far from certain. The EOS R10 currently costs $980, body only, while you can grab the EOS R7 body for $1499. And while I could certainly imagine another APS-C body that falls in that $1000-$1500 price bracket, the camera could just as easily be an entry-level model à la the $999 Canon EOS RP. After all, the EOS RP is nearly four years old – it was released in March of 2019 – and is due a replacement (in spirit, if not in name).

Personally, I’d expect that any camera falling between the EOS R7 and EOS R10 would feature an electronic viewfinder; after all, the EOS R10 contains one. I could imagine an exception in the case of a very vlog- or video-centric compact model (like an upgraded Nikon Z30), but I’m not confident Canon would make such a move. 

We don’t have a release timeline for the EOS R8/R9, so keep an eye out for additional news. And in the meantime, head down into the comments and let us know:

What do you think about a Canon EOS R8 or R9? Do you have any spec predictions? Would you buy such a camera?

The post Canon to Release an EOS R8 or EOS R9 in 2023 appeared first on Digital Photography School. It was authored by Jaymes Dempsey.


it's from Digital Photography School https://ift.tt/eAdKG8a
via Jaymes Dempsey

Dec 1, 2022

[Photography] Magnifying Glass Photography: A Quick Guide

The post Magnifying Glass Photography: A Quick Guide appeared first on Digital Photography School. It was authored by Megan Kennedy.

A guide to magnifying glass photography

Magnifying glass photography is a great way to capture unique and creative photos – but how does it work? And how can you get the best results?

In this article, I explain everything you need to know about capturing eye-catching photos with a magnifying glass, including:

  • What magnifying glass photography actually is
  • A step-by-step approach for great shots
  • A handy list of ideas to inspire you
  • And more!

So if you’re ready to have plenty of fun, then let’s dive right in, starting with:

What is magnifying glass photography?

As the name suggests, magnifying glass photography is a technique that uses a magnifying glass along with a standard camera and lens setup. The magnifying glass goes between the lens and the subject to create all sorts of interesting creative effects.

Magnifying glass photography

For instance, you can use a magnifying glass to:

  • Enlarge the subject
  • Produce optical distortion
  • Highlight compelling details

In a sense, a magnifying glass can act as a budget macro lens, though the resulting photos tend to be a lot wackier than what a conventional macro lens might create! What’s nice about magnifying glasses is that they’re very cheap and many folks may already have them lying around the house, so they’re ultra-accessible. Plus, they offer endless opportunities for creative photos!

Magnifying glass photography: a step-by-step approach

In this section, I share my approach to beautiful magnifying glass shots. Note that, for the purposes of this tutorial, I’ve chosen to photograph flowers. They’re colorful, interesting, and don’t move around, so they make good subjects for this technique. (And once you can create great images using inanimate objects, you can always move on to more animate subject matter later!)

Required materials

  • A camera
  • A magnifying glass
  • An interesting subject
  • A cleaning cloth
  • A tripod (optional)

You can use any type of camera to create beautiful magnifying glass photos; while a high-end mirrorless model will work great, you can also use a smartphone.

Also, if you want to increase your versatility, it’s a good idea to purchase a few magnifying glasses of varying sizes. Larger models work better if you want to create subject-focused images that don’t include the magnifying glass in the frame, but smaller models can also work well, especially if you’re looking to get creative.

Finally, a tripod can be helpful for a number of reasons: It’ll keep your camera stable while you hold the magnifying glass, and if you’re working indoors and in low light, it can prevent blur due to camera shake.

Magnifying glass photography

Step 1: Set up your camera and clean the magnifying glass

Start by turning on your camera and – if its lenses are interchangeable – mounting a lens in the 50mm-105mm range. (If the lens is too short, you may struggle to get the magnifying glass edges out of the frame, and if the lens is too long, it may be a bit unwieldy.)

If you have a tripod, you’ll want to extend the legs to sitting or standing height. Place the camera atop it.

I’d also encourage you to clean the magnifying glass with your cloth. (A lens wipe also works.) It’s important to remember that the glass in your average, run-of-the-mill magnifying glass is far less impressive than the glass inside your camera, so it’s good to always clean the glass element before use. That way, you can maximize image sharpness. (However, don’t worry if you don’t get pin-sharp images; the softness can actually add to the overall effect!)

Magnifying glass photography

Step 2: Find a subject and position it near your camera

For this example, I’m using flowers as my subject, but you can use pretty much anything: toys, food, electronics, books, or even people. I do recommend you choose a subject with plenty of detail; the more detail that’s present in the subject, the more the magnifying glass has to highlight!

Once you have a subject, adjust your camera’s position until the camera and the subject are close. (You may need to adjust the tripod legs, and it’s a good idea to prop your subject up on a table or other stable surface.) Your autofocus will likely get confused by the magnifying glass, so set your lens to focus manually.

Step 3: Position the magnifying glass

Next, hold the magnifying glass over the front of your camera lens with your hand and look through the camera viewfinder. The image will probably be extremely out of focus, so you’ll need to either adjust the lens’s focus or move the magnifying glass forward and backward between the camera and the subject. This can be tricky, but I encourage you to persevere.

The goal is to find a sweet spot where part or all of the image looks sharp, but don’t be too picky. It’s important to be open to how the magnifying glass alters the photograph!

Magnifying glass photography

Step 4: Adjust your settings and take a photo

Once you get an effect you like, go ahead and press that shutter button! But pay attention to your camera settings, and keep in mind that the extra layer of glass between the camera and the subject will cut down on the amount of light that actually reaches the sensor.

Therefore, you may need to lower your shutter speed or raise your ISO until you get a reasonable result. You can also adjust the exposure compensation if your image turns out too dark or too light, and you should definitely experiment with the depth of field by adjusting the aperture, too. (A shallow depth of field can work great if you’re hoping to produce abstract photos!)

Step 5: Experiment!

At this point, you know the mechanics; you just need to experiment. In my experience, constant testing makes for the best photos!

For instance, once you get a feel for photographing your subject through a single magnifying glass, why not try taping two magnifying glasses together for greater magnification? Or why not move from inanimate to animate objects and try photographing a person or pet? Or why not try moving the magnifying glass ultra-close or ultra-far from the subject? Even the slightest adjustment of the setup can render some unique results, so take the time to experiment and have fun!

Magnifying glass photography
To create this image, I taped two magnifying glasses together.

Magnifying glass photography ideas

As I emphasized in the previous sections, you can capture beautiful magnifying glass shots of pretty much anything, but here are a few easy ideas that use materials from around the house!

You might photograph flowers (either real or artificial) and position the magnifying glass far enough from the lens that it appears as a blur in the composition:

Magnifying glass photography

You might also experiment with a black-and-white conversion, which will highlight the shape and form of your subject and emphasize the ethereal effects created by the magnifying glass:

Magnifying glass photography

You can also use a shallow depth of field to create a beautiful abstract photo (with plenty of gorgeous background blur):

Magnifying glass photography

Another idea is to capture a self-portrait. Set up your camera, then hold the magnifying glass in front of your face. It may take a lot of tweaking to get it right, but the results will be worth it! (If a self-portrait is too difficult, you could try photographing a friend or family member.)

Magnifying glass photography

Finally, try to photograph some animals or insects! You’ll need to be fast, but you can certainly create some unusual images:

Magnifying glass photography

Magnifying glass photography: final words

Well, there you have it:

Step-by-step instructions for capturing beautiful magnifying glass photos.

So grab that magnifying glass, find a fun subject, and get started. Pretty soon, you’ll have a whole portfolio of creative shots!

What do you plan to photograph? Do you have any additional ideas? Share your thoughts in the comments below!

The post Magnifying Glass Photography: A Quick Guide appeared first on Digital Photography School. It was authored by Megan Kennedy.


it's from Digital Photography School https://ift.tt/KPsiare
via Megan Kennedy

[Photography] Lightroom Graduated Filter: The Ultimate Guide

The post Lightroom Graduated Filter: The Ultimate Guide appeared first on Digital Photography School. It was authored by Andrew S. Gibson.

A guide to the Lightroom Graduated filter

The Lightroom Graduated filter is an insanely versatile editing tool; you can use it to enhance skies, add beautiful vignettes, create sun flare effects, and so much more.

But how does the filter work? And how can you use it to achieve the best possible images?

In this article, I share everything you need to know about the Graduated filter. I offer step-by-step instructions for getting started, I explain when the filter is actually useful, and I reveal plenty of tips and tricks for improved results.

So if you’re ready to become a Graduated filter expert, then let’s dive right in!

What is the Lightroom Graduated filter (Linear Gradient)?

The Lightroom Graduated filter, also referred to as the Lightroom Linear Gradient, is an editing tool designed for targeted adjustments:

Lightroom Graduated Gradient filter

Apply a Graduated filter, and Lightroom creates a gradated edit across your image. The effect starts out at 0, then slowly works its way toward 100 as it moves across the image. You have complete control over the location of the gradient, where it starts, and where it ends.

Lightroom Graduated Gradient filter

Note that the Graduated filter doesn’t just have one effect; instead, it’s used to apply many different types of edits. For instance, you can use it to boost the exposure, adjust tones, add saturation, add a color, boost sharpness, and more – all in that signature gradient pattern.

When should you use the Graduated filter?

The Graduated filter comes in handy any time you need to adjust part of a scene without affecting the whole composition. It works especially well when you can see a strong line delineating the area in need of editing (e.g., a horizon).

Therefore, Graduated filters are commonly used by landscape photographers to adjust the sky without altering the rest of the scene. They stretch a filter across the sky until it touches the horizon line, then they make various changes (e.g., darkening the exposure, increasing the contrast, adjusting the saturation).

Lightroom Graduated Gradient filter

Graduated filters are also a favorite of portrait photographers. By adding a graduated filter across the top or side of the frame, portrait shooters can create beautiful haze and/or accentuate sunlight, which enhances the atmosphere of the photo.

Lightroom Graduated Gradient filter

But as I discuss throughout this article, you shouldn’t restrict yourself to specific uses for the Linear Gradient. Instead, learn its ins and outs – and then experiment! Try it in different scenarios and see what you can create.

How to use the Graduated filter: step by step

In this section, I offer clear, step-by-step instructions for working with the Linear Gradient.

Step 1: Create a Graduated filter mask

To begin, make sure you’re in the Lightroom Develop module, then click the Masking icon.

Lightroom Graduated Gradient filter

Choose Linear Gradient, then hover your cursor over the image. The cursor should appear as crosshairs.

Step 2: Position the filter in your image

Click on your image, then drag to apply the filter mask. You’ll see a series of lines appear; note that the red overlay indicates the areas affected by the adjustment.

Lightroom Graduated Gradient filter

You can click on the center handle to drag the filter around the scene. To rotate the filter, drag the outer handle; to increase or decrease the feathering effect (i.e., the strength of the gradation), drag the filter edges.

Lightroom Graduated Gradient filter

Step 3: Refine the filter

Once your filter is in position, you can continue on to Step 4 – or you can make adjustments to the filter shape.

The Add and Subtract options in the Masks panel allow you to expand or shrink the Graduated filter. You can also intersect the filter with another filter (such as a Radial Gradient or Brush filter) to narrow down the filter area.

Lightroom Graduated Gradient filter

For instance, if you wanted to edit the sky while avoiding some trees in the foreground, you could create the initial Graduated filter. Then you could click Subtract, choose Brush, and paint over the tree branches to remove the mask.

Lightroom Graduated Gradient filter

Step 4: Apply your edits

At this point, all that’s left is to add the editing effects. In the Linear Gradient panel, you can adjust various sliders, including:

  • Exposure
  • Temperature
  • Texture
  • Clarity
  • Sharpness
  • Noise
  • Contrast

You can also add color to the scene using the Color option, and you can shift colors via the Hue adjustment.

If you decide the results are a little too strong, you can reduce the filter strength by reducing the Amount slider. (Alternatively, you can increase the filter strength by pushing the Amount slider past 100.)

Lightroom Graduated Gradient filter

Note that you can always reset the editing sliders by double-clicking “Effect” at the top of the Linear Gradient panel.

And if necessary, you can create additional Graduated filters by repeating the process detailed above.

Tips and tricks for using the Graduated filter

Now that you’re familiar with the basics, it’s time to delve into more advanced Graduated filter methods and strategies.

1. Apply multiple Graduated filters to darken the sky

The most common reason for creating a Graduated filter is to darken the sky. It’s simple to do; you drag your filter across the sky (all the way down to the horizon line), feather it as required, then drop the exposure.

The edit tends to add some much-needed contrast, detail, and even drama to the sky. (Bear in mind, however, that the Graduated filter can’t save a completely blown-out sky. It can only work with detail that already exists!)

Here’s a scene without a Graduated filter:

Lightroom Graduated Gradient filter

And here’s the same scene after a filter has been applied:

Lightroom Graduated Gradient filter
I’ve added a Graduated filter to this shot. For a perfectly natural effect, I’d need to subtract the portion of the filter that goes over the branches, but I’m already liking it as-is!

Nice, right? I only adjusted the exposure, yet the filter added a subtle sense of drama.

But while a single Graduated filter can create a nice effect, you can often get better results by adding a second, smaller filter just above the first. The idea here is to create a sort of vignette over the sky that pushes the viewer’s eye toward the center of the image.

So once you’ve added your Graduated filter to the sky, create a second, less-feathered gradient, then drop the Exposure slider once again.

Lightroom Graduated Gradient filter

When done carefully, the results can be breathtaking!

2. Use the Graduated filter to improve your foregrounds

I’ve talked a lot about the Graduated filter’s power to selectively adjust skies. But you can also use a filter to selectively adjust the foreground, which can look equally amazing.

Simply drag a Graduated filter over the image foreground, then start moving sliders. Boosting the exposure can add detail and help create a better balance between the land and the sky. You might also add contrast and/or clarity, both of which can help the foreground (and the image as a whole) feel more three-dimensional.

Lightroom Graduated Gradient filter

And if you want to push the viewer’s eye into the scene, try adding a second, smaller Graduated filter below the first, then use it to reduce the exposure in the immediate foreground area.

3. Create a vignette with several Graduated filters

Most photographers use Lightroom’s Effects panel or a Radial filter to create a vignette. But you can also get great results using a Graduated filter, especially if your subject features well-defined, geometric edges.

Here’s how it works:

Drag a (heavily feathered) Graduated filter across the side of the image, then use it to subtly drop the exposure.

Duplicate the filter, then position the second filter on the other side of your subject.

Continue with the duplication and positioning process until your Graduated filters cover every edge of the subject. You want to direct the viewer’s attention away from the outer areas and toward the focal point.

This next diagram shows roughly where I placed three Graduated filters while editing an image of a metal figure:

Lightroom Graduated Gradient filter

Here, you can see the results:

Lightroom Graduated Gradient filter

Sure, I could’ve used a Radial filter, but by working with several Graduated filters instead, I was able to better customize the effect.

5. Use a Graduated filter to add a color wash that mimics sunlight

This trick works well on pretty much any shot taken in early morning or late-afternoon sunlight. The goal is to mimic hazy, atmospheric light that bleeds into the scene.

Start by creating a Graduated filter, and carefully position it in the area closest to the light source. Open the Color option, then pick a color that closely matches the color of the light. (For a more romantic effect, go with a nice yellow, orange, or red.)

Lightroom Graduated Gradient filter

Then boost the Exposure slider, and watch as your scene is transformed:

Lightroom Graduated Gradient filter

For a bit of extra atmosphere, try reducing the Dehaze slider. And be careful not to overdo the effect. Drop the Effect slider as needed, and make sure your color choice isn’t too outlandish. You want to enhance the scene, not make it feel unnatural.

The Lightroom Graduated filter: final words

Now that you’ve finished the article, you know how to use the Graduated filter – and you’re ready to create some stunning editing effects!

So pick your favorite image, head on over to Lightroom, and test out those Graduated filter skills. See what you can produce. The more you practice, the better you’ll become.

Now over to you:

How will you use the Graduated filter? Which of these tips will you follow first? Share your thoughts in the comments below!

The post Lightroom Graduated Filter: The Ultimate Guide appeared first on Digital Photography School. It was authored by Andrew S. Gibson.


it's from Digital Photography School https://ift.tt/BAwU6so
via Andrew S. Gibson