Jan 11, 2025

[Photography] RAW Landscape Photography: 5 Reasons to Shoot Landscapes in RAW

The post RAW Landscape Photography: 5 Reasons to Shoot Landscapes in RAW appeared first on Digital Photography School. It was authored by Neil Creek.

Reasons to photograph landscapes in RAW

When I first started out in photography, I was told that shooting in RAW was a waste of time. “You won’t need all that information. Shoot in JPEG; it’ll save space.” Unfortunately, that advice, while well-intentioned, wasn’t right for me – and it probably isn’t right for you, either.

Yes, it’s true: JPEGs are far smaller than RAW files (and they require less post-processing work, too). But RAW files come with several outstanding advantages that are especially valuable to landscape photographers. In fact, if you’re a landscape photographer and you’re not shooting in RAW, I encourage you to head over to your camera right now, find the Image Quality setting, and change it to “RAW.” Working this way will be a game-changer, and while you will likely need to grab an external hard drive to handle all those big files, you certainly won’t regret the shift.

Why is RAW so great? In this article, I share my top five reasons why every landscape shooter should work in RAW, starting with:

1. You get extra detail

RAW landscape photography
Detail recovered from a RAW file, before and after.

As I mentioned above, RAW files are bigger than JPEGs. But this isn’t because they contain unnecessary data; instead, it’s because the RAW format doesn’t discard image information that’s captured in the scene. When you shoot a JPEG, however, the JPEG algorithm tries to discard information without changing the way the image looks. That is great for saving space on your memory card, but not so good if you intend to edit your images in Lightroom, Adobe Camera Raw, or other RAW processing software.

The reality is that your camera can capture lots of data that never makes it to the JPEG file – but if you shoot in RAW, you’ll retain the data, which in turn gives you much more flexibility when editing. On average, a normal JPEG file will be a handful of megabytes, but the same image shot on the same camera in 14-bit lossless RAW format will be far, far larger (often 25 MB, 50 MB, or even 125 MB).

While you often won’t notice the loss of data when comparing a RAW file and a JPEG straight-out-of-camera, that extra information often proves critical in post-production. You can get so much detail out of a RAW image – when pulling back blown-out highlights and bringing back detail in the shadows – that would be impossible to recover in JPEG format.

Here’s an underexposed image that I captured in RAW:

RAW landscape photography

And here’s the same image after a bit of tweaking in Adobe Camera Raw, Photoshop’s RAW processor:

RAW landscape photography

This doesn’t mean you should be sloppy and not pay attention to your exposure, but it does mean that in tricky lighting conditions, you will be able to get a shot that’s usable (even without using HDR techniques). And because landscape photography often deals with high dynamic range scenes, a RAW file is often the difference between a keeper and a reject.

2. You have more flexibility with colors

RAW landscape photography

JPEG files save fewer colors than RAW files. Therefore, by shooting in RAW, you’ll capture as much color information as possible – which can then make a big difference when processing your images.

You see, while JPEGs do contain plenty of colors for most scenarios, you may start to notice a banding effect when colors are gradual, such as in a beautiful pink sky. This can become especially noticeable if you try to adjust the colors during post-processing; as you push the colors of that pink sky, banding will become more and more obvious, until your image is unusable.

And if you’re shooting a landscape scene, you undoubtedly want to get as much color information as possible. That way, you can make subtle color adjustments in post-processing, such as color shifts (e.g., turning a blue sky more purple) that help unify the scene and create a refined effect.

Note that RAW files are designed to look rather flat, so it’s important that you do a bit of color adjustment to pretty much every RAW landscape photo that you take. It’s often enough to simply boost the Vibrance or Saturation slider until the scene looks the way you remember it:

RAW landscape photography
It’s easy to bring out color in a RAW file!

3. You can capture cleaner images

RAW landscape photography

The exposure refers to the overall brightness of your scene, and in general, the best exposures feature detailed highlights, midtones, and shadows.

But in recent years, some photographers have started using a technique called expose-to-the-right (ETTR). Basically, by deliberately overexposing your images, you can ensure that as little noise as possible appears in the shadows for the sharpest, cleanest results. (Of course, you won’t want to leave your images overexposed; you’ll need to drop the exposure back down in post-processing!)

Now, the ETTR technique technically works when shooting in RAW or JPEG. However, if you try the technique on a JPEG file, you’ll have far less latitude, and it’s very easy to expose too far to the right and lose key details.

RAW files, on the other hand, handle the technique far better. You can push the exposure further, and once you get back home and process the shots, you’ll have plenty of gorgeous images that are full of beautiful detail!

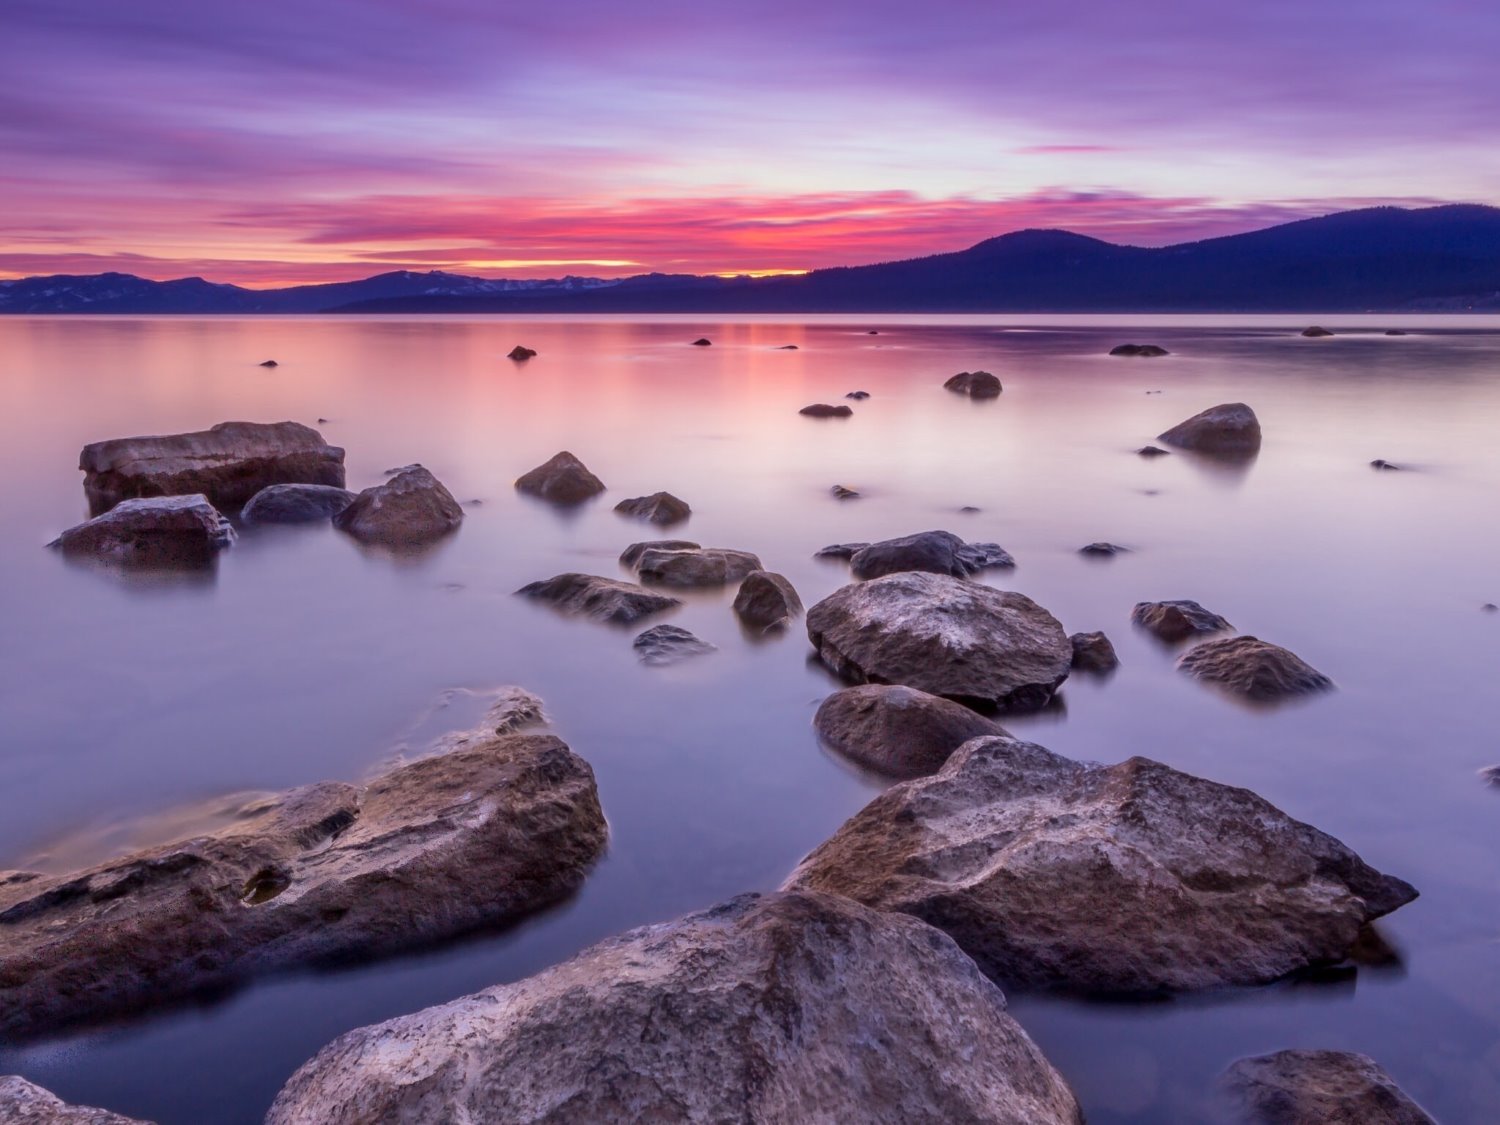
4. Your images will be future-proof
RAW landscape photography

What’s the best part about RAW files? They give you flexibility. When processing a landscape shot, you’ll have tons of information to work with, and you can use that information to create the best possible image.

Even if you try editing a RAW file and a JPEG file side-by-side and don’t notice a huge difference, it’s difficult to predict the sorts of editing tools that’ll be available down the line (and it’s difficult to predict the editing style that you’ll find interesting in a few years, too). You don’t want to shoot JPEGs because they seem sufficient in 2023, only to realize – five years later – that you could really use some extra detail.

I myself have gone back and reworked older images in light of new editing tools, and because the RAW file had lots of information, the added functions brought out the best of that scene!

5. You get the best quality

RAW landscape photography

Every RAW image must be edited; there’s no way around it. RAW files aren’t displayable on browsers, plus they’re huge and difficult to send over email. Instead of trying to display RAW files, photographers edit in RAW, then convert the image to a JPEG (without destroying the original file!) for sharing.

Therefore, editing a RAW image is a two-step process. The first step is working on it via a RAW processor. (Lightroom can handle RAW images, as does Adobe Camera Raw and many other image editors.)

Then you must convert the file. If you plan to work on it in Photoshop, you can convert it to a PSD – and if you plan to share the photo directly, you can simply convert it to a JPEG.

Personally, I like to work on my images in Photoshop, and it’s only if I’ve first done some RAW processing that I know that I’ll have the best possible image quality to work with. And remember: image quality is basically the holy grail of photography. Ask any photographer what’s most important to them, and it will often just boil down to image quality.

(To be clear, when I say “image quality,” I’m talking about sharpness, noise, dynamic range, color, tone, chromatic aberration, and so on. Anything that adds to the overall look and feel of the image.)

Here’s what I’m getting at: If you carefully work on a RAW file in your RAW processor and then edit it in Photoshop, the image quality will be fantastic if you work carefully in your RAW converter and edit well in Photoshop. You can get good image quality in JPEG, but you will be able to squeeze that much more out of the image if you shoot in RAW.

RAW landscape photography: final words

RAW is a great format to use no matter the type of images you shoot; whether you do fashion, food, architecture, or portrait photography, I’d really recommend considering a RAW workflow. However, RAW is especially essential for landscape photographers. A RAW file will contain key details that you simply cannot recover from a JPEG, which will let you capture sunrises, sunsets, and other high dynamic range scenes in a single shot.

Remember, however, that RAW will require a different post-processing workflow. You can’t upload a RAW file straight to social media – instead, you’ll need to spend time carefully processing each shot. It’s the cost of working in RAW, but the benefits are truly incredible!

If you’re skeptical, why not test it out for yourself? Shoot some high dynamic range scenes as RAWs and JPEGs. Then compare them side by side. Try adjusting different editing sliders and see if you can recover lost details. I bet you’ll be impressed by the RAW files!

Now over to you:

Do you plan to shoot RAW in your landscape photography? Why or why not? Share your thoughts in the comments below!

Table of contents

Landscape Photography

The post RAW Landscape Photography: 5 Reasons to Shoot Landscapes in RAW appeared first on Digital Photography School. It was authored by Neil Creek.


it's from Digital Photography School https://ift.tt/pDG9BtZ
via Neil Creek

Jan 2, 2025

[Photography] Live View in Photography: A Comprehensive Guide

The post Live View in Photography: A Comprehensive Guide appeared first on Digital Photography School. It was authored by Simon Ringsmuth.

Live view in photography: a comprehensive guide

Live View is a powerful photographic tool – and if you’re just delving into photography, or if you’ve never done dedicated Live View shooting before, you may not realize quite how effective it actually is.

In this article, I share everything you need to know to get started with Live View, including a basic description of its function, when it’s useful, and when it’s best avoided. I also offer a handful of tips so you can get the most out of your Live View shooting.

Sound good? Then let’s dive right in, starting with the basics:

What is Live View?

Live View is a camera feature that allows you to view the sensor’s feed on the rear LCD. In other words, it lets you see how your images will turn out before you actually take them. If you’ve ever composed a photo by looking at the screen on the back of your camera, you’ve used Live View.

Live View in photography

Photographers tend to talk about Live View in the context of DSLRs. However, most cameras feature Live View in some form, including smartphones, point-and-shoot models, bridge cameras, and mirrorless cameras. (If you’re not sure how to activate Live View mode on your camera, do a bit of Googling or check the manual!)

While some cameras only allow for composition via the rear LCD screen, others are also equipped with electronic or optical viewfinders, which allow you to place the camera to your eye for an “up-close” view of the scene. Shooting through the viewfinder is the more conventional way of photographing, but Live View does have several key benefits, as I discuss in the next section:

When is Live View useful?

As I mentioned above, shooting via the viewfinder is the common way to take photos. After all, the viewfinder allows you to block out all distractions, and the close-up view allows for more careful composition. Plus, Live View comes with a slight lag, whereas (some) viewfinders are perfectly in sync with the outside world.

But Live View does offer several key advantages. For one, it boasts exposure simulation, so you can see precisely how the tones of your photos will look before you press the shutter button. It also comes with an array of shooting aids, including the rule of thirds grid (so you can improve your compositions), focus peaking (so you can see the areas of the scene that are in sharp focus), and a histogram (so you can evaluate the tonal range of your image more precisely).

Note that not all cameras offer the same shooting aids; it all depends on the model you buy. Also, bear in mind that optical viewfinders and electronic viewfinders are dramatically different – optical viewfinders give you a view through the lens, while electronic viewfinders project the sensor feed in viewfinder form. All of the advantages that I’ve described above also apply to electronic viewfinders, but they don’t apply to optical viewfinders. (Confusing, I know! Before continuing, it’s a good idea to determine whether your camera offers a viewfinder, and if it does, whether that viewfinder is optical or electronic.)

Unlike both electronic and optical viewfinders, however, Live View offers a different perspective. By looking at your compositions from a distance, you may find that you can evaluate them more effectively. And because most cameras these days offer articulating screens, Live View is often the easiest way to compose photos while shooting from high or low angles.

Live View in photography
Getting a low-angle shot like this one is much easier with Live View!

Finally, if you use a DSLR, Live View is a convenient way of forcing your camera’s mirror upward before you fire the shutter, which will help prevent camera shake during long-exposure shots.

You shouldn’t use Live View all the time. But you should consider using Live View in a handful of scenarios, including:

  • When you’re trying to capture images from tricky angles (e.g., low-angle landscapes)
  • When you’re working with tricky exposure conditions and you want to be sure you’ve captured plenty of detail (e.g., outdoor portrait photography)
  • When you want to make sure you’ve nailed your composition
  • When doing long-exposure photography with a tripod (e.g., blue-hour cityscape photography)

On the other hand, Live View generally doesn’t work well in scenarios when you’re:

  • Tracking moving subjects
  • Handholding in low light
  • Hoping to really immerse yourself in a scene

Of course, at the end of the day, what matters is whether Live View works for you. Give it a try, then adjust your approach accordingly.

How to use Live View like a pro: 5 effective tips

In this section, I discuss a few helpful techniques that’ll improve your results when shooting with Live View. I also share some hidden Live View features!

1. Zoom in to set the focus

Modern cameras tend to offer incredible autofocus capabilities. In certain situations, however, they can fail – and that’s where Live View comes in handy.

You see, Live View allows you to magnify the sensor feed and check focus on distant elements. If key elements look sharp, that’s great – but if not, you can try changing your point of focus or using a focus-and-recompose approach. You might even switch your lens over to its manual focus mode and carefully set the focus that way (while making sure to zoom in on the rear LCD once again!).

Live View in photography

If your subject isn’t moving, this technique is one of the best possible ways to make sure everything is tack-sharp. One caveat, however: In addition to magnifying the scene, this zoom-in approach will magnify camera shake (on the LCD, that is). Because it’s tough to set focus while your camera appears to be leaping in every direction, I recommend using a tripod (and if you don’t have one handy, set your camera on a rock, a post, or some other solid surface).

Live View in photography
Live View can be a good way to make sure your subjects are tack sharp and perfectly focused!

2. Use Live View to preview effects

One fun trick that many manufacturers have added to their cameras is the ability to apply various effects, including selective coloring, miniature, black-and-white, sepia, and even film simulations. Think of these as Instagram filters or Lightroom presets, except they’re added as you shoot rather than in post-processing.

If you use an optical viewfinder to take photos with an effect activated, you can always see how your images turned out by reviewing them on the rear LCD – but it can be a lot more fun to shoot with the effects in real time! That’s where Live View comes in; it’ll let you see an effect in action before you press the shutter button, and it’ll help you understand how each effect will modify your images in advance.

You can use this trick when testing out fun effects, but you can also use it when doing serious photography. For instance, by setting your camera to its black-and-white mode and activating Live View, you can literally see the world in monochrome, which is a great way to elevate your compositions.

Note: To ensure that an effect is baked into the final file, you’ll need to shoot in JPEG rather than RAW. Otherwise, the effect won’t appear when you pull up your image in post-processing. (This isn’t necessarily a bad thing, as you can often recreate and improve upon various effects while editing, but it’s worth bearing in mind!)

3. Use the histogram to ensure a good exposure

If you shoot via an optical viewfinder, you have no way of previewing the exposure before you fire your camera. You can only make changes after you’ve taken a shot.

Live View, on the other hand, lets you simulate the exposure for each image in advance, and this can be a great way to prevent over- and underexposure from the get-go. But I’d actually encourage you to take this a step further:

Instead of evaluating your exposure by simply glancing at the rear LCD, activate your Live View histogram. (Not all cameras offer this function, but if yours does, it’ll be listed in the manual!)

Live View in photography
The Live View histogram will help you nail your exposure every time!

Then check the histogram before you take each shot (or, at least, when you’re initially setting your exposure). Make sure there are no peaks pressed up against either side of the graph. And if there are, adjust your camera settings accordingly. That way, you’re essentially guaranteed to come home with a decent exposure!

4. Try using touch-focusing

One great feature that some cameras offer in Live View is touch-focusing. In other words, you simply tap on the portion of the screen that features your subject, and your lens will focus precisely as directed. (If you’ve ever shot photos using your smartphone, you’ll know what this is like – and how convenient it makes photographing certain subjects!)

Live View in photography
A touchscreen can make it a lot easier to focus!

It generally won’t be effective if you’re shooting sports, action, or wedding photos (by the time you’ve tapped to focus and then pressed the shutter button, your subject will have moved!). But if you’re out shooting casually, it’s an approach you might really enjoy.

It even has some advantages over traditional viewfinder-based focusing if you’re shooting at extreme angles. Instead of painfully positioning yourself so you can see through the viewfinder, you can simply tap to lock focus and fire off an image.

5. Familiarize yourself with all your Live Mode extras

While every model is different, your camera undoubtedly features a few effective Live View tools, and it pays to familiarize yourself with each and every one of them.

I’ve already talked about histograms and focus peaking, but your camera may also offer additional focusing aids, an electronic level, shooting mode options, and so much more. You may ultimately find that none of these options are useful to you, but you won’t know unless you do a bit of research – and for the right photographer, one (or more) Live View features can make a huge difference.

So spend a bit of time poking around in your camera manual and see what you can find. Then try out some of the most promising options. Who knows? Maybe it’ll revolutionize your photography!

Live View in photography

Live View in photography: final words

Now that you’ve finished this article, you know all about Live View – and you’re ready to apply it to your own photographic workflow.

The next time you’re out with your camera, try playing around with Live View. It may seem unfamiliar at first, but with a few hours (or minutes) of practice, you may wonder how you ever went without it!

Even if you’re a more traditional shooter, I hope you at least give Live View a chance. It’s not going to be the best option in every situation, but you may find it to be more compelling and useful than you realize.

Now over to you:

Do you plan to use Live View? Why or why not? Share your thoughts in the comments below!

The post Live View in Photography: A Comprehensive Guide appeared first on Digital Photography School. It was authored by Simon Ringsmuth.


it's from Digital Photography School https://ift.tt/tRfmlzk
via Simon Ringsmuth