Jul 29, 2018

[Photography] Time-Lapse Photography – Beyond the Basics

Time-lapse photography is a different way to show the world around you. They are videos which are made up of a serious of still images and combined to look like a movie. The frame-by-frame gives a sped-up view of the world. People find them interesting to look at and if done well they are fascinating.

Time-Lapse Photography – Beyond the Basics - sunset and lighthouse

One of the hundreds of photos taken at Point Lonsdale while trying to get a time-lapse there.

There are a few ways of making time-lapse videos The obvious way is to do a video and speed it up, however, most are made from lots of individual still images. Using special programs, you can put them together and set the time for the video to run.

In this article, I’ll share my experiences with you testing out some time-lapse gear and settings so you can learn along with me.

Basic Time-lapse

Doing time-lapse photography is relatively simple. All you really need to do is set your camera up on a tripod and get it to take a photo every few seconds. Put the images on your computer, batch process them if you like, then run some software that will allow you to make them into a time-lapse. Here is an example.

That is a very simplified way of looking at it. Of course, there are many other factors, like what is moving in the scene, how quickly it is moving, etc.

As you experiment more you will learn how to work out what time is best and how many images you need. On average, you will need 30 images for every second of video you want. So if you want a one minute video you will need 30 x 60 = 1800 images.

Adding panning to your time-lapse

Over the years I’ve played around with doing time-lapses, such as I just described. It didn’t seem hard and I thought that adding some new equipment would be fine, That it would just work. I was wrong.

Recently I was loaned quite a few products from Syrp here in Australia to try out. It seemed like the ideal time to step up what I was doing with these. Perhaps get more serious about doing time-lapse photography.

I was loaned enough gear to do panning, tilting, and sliding. In the kit were two Syrp Genie Minis, the tilt bracket, the Genie and the magic carpet rails.

Time-Lapse Photography – Beyond the Basics

Photo by Syrp showing a kit with the magic carpet rails, Genie, and tilt bracket.

Initially I decided to try just the Genie mini. Start with the easy one.

Time-Lapse Photography – Beyond the Basics

One of the stills from the first attempted time-lapse.

Syrp Genie Mini – first attempt

My first attempt was at the Tesselaar Kabloom Flower Festival. There were fields of flowers and lots of clouds, the conditions were perfect time-lapse photography. For a successful time-lapse it is best if there is something moving in the image.

I moved around a bit to various places, but the very first series I shot had to be deleted. The exposure was okay, but none of the images were in focus. It was my first big lesson with doing them this way. I learned that you have to focus the image and then turn off autofocus, otherwise, the camera will attempt to refocus for each image.

The Genie and Genie Minis are all controlled by an app on your phone. It is fairly simple to use, but the arcs for shooting can be confusing.

Next, I worked out how panning worked and wide it should be. Several different arcs were attempted and when I got home and loaded the photos, the problems were clear to see.

The first one was okay, but that was probably more luck than skill. I didn’t really know what I was doing and just let it go for ages, with the camera taking a photo every two seconds. There were around 450 images total.

For the next few, I told the Genie Mini to run for 6 minutes, and for the camera to shoot an image every two seconds. This time it took 360 images. The area it was panning over was increased. When converted to the time-lapse it was jerky and the panning was too fast.

Solutions, if you are going to do a wide pan, you need to take a lot more photos than you think you will need.

flower garden - time-lapse photography

Another one of the stills from the flower center.

Next attempt

I went down to a local area to try it out again, this time giving it more time. Unfortunately, I made a similar mistake.

As I was setting up, I had it in my head to do an image every 5 seconds and to set the pan to last for 20 minutes. This only gave me around 240 images for the video. It wasn’t enough, and the same problem occurred. Next time if I only want to do 20 minutes I should take a photo every two seconds. That will yield 600 images, which should make it a better time-lapse. That is what will be attempted next time.

A couple of other problems happened as well. While panning, the camera was not level for the whole scene. So, I need to work out how to make that happen. Practice will make it easier.

All the tutorials I’ve been watching say to use manual mode for exposure. However, this really only works for constant light. If you are shooting a scene where it is variable, then you may need to use aperture priority.

Working it out

There did come a point when I realized the smaller the arc the better. Not covering such a wide area was better. Making sure there was something interesting in the image as well, something moving.

The number of images and how far apart they are shot is another aspect that can be hard to work out. Taking a photo every 2 or 5 seconds is good for some scenes, but not others. However, it is a good place to start and as you do more time-lapse photography you will begin to understand what settings you need.

Most time-lapse series will result in a video of around 5-10 seconds. When you are compiling it, you need to think about how many images you will need.

As a general rule most are done with 30 frames per second, or 30 images per second. In theory then, for a 5-second time-lapse you will need 150 images. However, if you are adding panning to that, then it will depend on how far you pan. If you are covering a really wide area you might need a lot more images.

time-lapse scene at sunset

You have to make sure there is something interesting in the scene, and that there is movement.

Adding Tilting

Once you think you have worked out how to pan you can try tilting the image up and down as well as panning. I only tried this a couple of times, as the biggest problem I had was my camera is very heavy and the tilt bracket struggled with it. You could see that it was too much weight for the system.

I found that using the Genie Mini with it was a bit tricky and it would tilt the wrong way. The lens would hit the bracket if it went the wrong way. It was the most frustrating aspect.

Again, you have to be careful what you use this for. There needs to be a reason to tilt up or down. Waterfalls are a good choice for tilting. Maybe looking up at a building. Think about why you would do this beforehand.

Gliding along the Magic Carpet with the Genie

The magic carpet rails with the Genie on top will glide the camera along in a straight line. It can add a small amount of movement to your video to make it appear like the camera is moving.

The Genie was very complicated to use and after doing so once, I really didn’t want to use it again. It wasn’t as easy and intuitive to use as the Genie mini. I had been shown how to use it, but when I went to do it myself, I had trouble working it out. In the end, I only used it once.

It does add a nice effect to the final time-lapse, but I’m not sure it is worth the aggravation. Perhaps, if you really wanted to get into doing time-lapse photography seriously it would be worth spending the time learning how to get the best results.

However, Syrp have now upgraded it to the Genie II. It is supposed to be easier to use and can do a lot more. Though at $1599 USD, the price will put it out of the range of many photographers, myself included.

Syrp gear

For most of the time that I had the gear on loan, I used the Genie Mini the most. It was small enough that I could carry it around in my bag most of the time and it was easier to use. Using the phone to control it was never a problem.

It is something that will take a lot of getting used to, but for anyone starting out doing time-lapse photography it would be enough. The Genie Mini is what I would recommend. It isn’t cheap, for what it is, but not that expensive that if you really wanted to do time-lapse. The Syrp Genie Mini sells for USD$249.

In the end, by the time I had to give the gear back, I knew I wanted to do more time-lapse photography. So I have since purchased the Genie Mini. I like what I can do with it, it’s simpler to use and the price-point is doable for most people.

Storage and processing the time-lapse

Everyone recommends you take raw images for your time-lapse series, that way you can process them in Lightroom. The biggest problem is the size of the raw files. My D850 has raw files that are approximately 50MB each, so when you are taking a few hundred images, that requires a lot of space.

Thankfully, the D850 has the ability to change the size of the raw files, so I can use smaller ones for time-lapse. If your camera has this feature, then I suggest you do so. Once the images are processed and the time-lapse is done, you can delete the raw files as you will be unlikely to use them again.

time-lapse still Princes Pier

Princes Pier is a popular place for photos, so it seemed like a good idea to try a time-lapse. This is one of the still images from the series.

Using Lightroom to process the images is good as you can edit one image, then sync the rest of them. This will help give all your images the same look. You can then export them to make the time-lapse.

I used Photoshop to build the time-lapse. However, there are many different programs available to try. Some will give you more control, however, Photoshop is quite basic. It’s a good place to start.

If you have trouble getting Photoshop to work it could be the sequence of images you are using. They have to be consistent, or Photoshop won’t load the images properly.

Getting into time-lapse photography

If this is something you want to try, then start with your camera on a tripod. Take photos every few seconds.

However, if you want to get some camera movement, then I would try the Syrp Genie Mini. Learn how to use it completely to get the best videos. If you decide to add more then you can look at doing tilting and gliding. Don’t confuse yourself by trying to learn it all at once.

Read more on time-lapse photography here:

The post Time-Lapse Photography – Beyond the Basics appeared first on Digital Photography School.


it's from Digital Photography School https://ift.tt/2K4oT8V
via Leanne Cole

[Photography] Tips for Photographing Artwork for Marketing Purposes

You have come a long way as a photographer and people are constantly telling you, “Your photos look great! You should start to sell some!”. As you are excited at the prospect, take their advice, and begin to post photos of printed products on your social media or perhaps you even develop a website.

However, you notice something. When you take an image of your images the color is off, there is a reflection of the lights in the room, and you are generally unhappy with how it looks. Not only that, but you realize your print products do not look that desirable to purchase based on the photo you took.

The reality is taking photos of your print products or artwork (paintings for example) for marketing can be difficult. But for a few dollars and a little bit of work you can increase the marketability (and hopefully sales) of your hard-earned images (and photograph other artist’s work for them too).

Tips for Photographing Artwork for Marketing Purposes - photo of an owl in a rustic wood frame

I create a lot of my own artwork from my images and depend on quality images of my artwork to help market them.

I hope you will learn a few key things while reviewing this article.

You will learn how to make an inexpensive lightbox, how to change lighting direction and source, and how to set up a camera for shooting photos of your photos. With those skills in your arsenal, I hope you will begin to market your own work!

Tips for Photographing Artwork for Marketing Purposes - photo in a frame on a small stand

Pre-matted prints are a common way to sell your work. But in my opinion are difficult to photograph because of the gloss from the cover and reflections is causes. A properly lit lightbox can help you create marketable images of your artwork.

Make a Lightbox for Less Than $20

The first thing you will need to do is create (or buy) a lightbox. A lightbox is a simply a structure that provides a neutral background for making images.

This is beneficial because it helps your camera control the color of your image and as well as removing distracting background elements. The construction of the lightbox will allow you to creatively light your artwork and ensure it is evenly lit as well.

Let’s look at how you can build a lightbox for under $20. I like this design because it comes apart for easy storage or transportation.

DIY Do It Yourself lightbox - Tips for Photographing Artwork for Marketing Purposes

In the steps below I will show you how to build this simple lightbox.

What you will need:

  • 5 sheets of 3/32” foam core board. These can be any dimension and should be large enough to fit your artwork into once the box is completed.
  • A utility blade
  • And a yard (meter) stick.

Steps to make the lightbox

Use the meter stick to measure in 2 inches from the edge of the foam-core board and then draw a line from the top that is half the length of the board.

Now measure in from the same edge 2 3/32” inches and draw another line paralleling the first. You should now have two lines that are 3/32” apart that span half the board

Using the utility blade, cut out the 3/32” space down half the board.

Tips for Photographing Artwork for Marketing Purposes - diy lightbox cutout

Repeat on the other side of the board so that you have parallel cuts in the board (see below).

Tips for Photographing Artwork for Marketing Purposes

Put that board aside and repeat on two more of the boards. Once you are done should have 3 boards with 3/32” grooves cut into them.

Assemble the walls of the lightbox by sliding the grooves of the boards into each other.

Tips for Photographing Artwork for Marketing Purposes

Place one, uncut board underneath the walls for a bottom and place the other on top. You now have a lightbox!

Display in the Lightbox

You will now use your newly built lightbox for displaying, lighting, and photographing artwork. You will want an easel-style stand that fits the feel of your artwork. If you have any extra foam-core board laying around, consider using that to build a neutral easel that will not detract from your artwork.

Tips for Photographing Artwork for Marketing Purposes - DIY lightbox in use

Once completed with an easel, your lightbox will help you create beautiful images of your artwork such as this metal print of the Aurora Borealis.

Lighting

Getting the lighting in the box set correctly is the most important thing you can do. Correctly lighting your image will remove reflections from the artwork, evenly light it, and ensure the color of the light allows your camera to capture the white-balance of the image correctly.

You may consider backlighting, lighting angle, and lighting intensity to help address these things. For each of these things, you should adjust and modify accordingly until you are happy with the shot.

Tips for Photographing Artwork for Marketing Purposes

I use this light panel to light my products, but a cell phone or other light source will suffice, too!

Lighting Angle

Lighting angle is the most important thing you can do to create a quality shot. Try lighting your artwork from the top and the side and see what you like better.

If your artwork is tilted backward in an easel, lighting it from the top and then shooting the image straight on with your camera will remove the reflection of the light in your final image. Lighting from the top and the sides simultaneously will evenly distribute the light over your print to accurately portray your product.

Tips for Photographing Artwork for Marketing Purposes - canvas print on a stand

This image of a canvas print is lit from the top.

Tips for Photographing Artwork for Marketing Purposes

In this image, it was lit from the bottom.

Tips for Photographing Artwork for Marketing Purposes

This image of a canvas print was lit from the side and creates the best finished product to my eye.

Back Lighting

Backlighting the image is another way to evenly distribute light. To backlight, place a lighting source behind your artwork so that it cannot be seen by the camera. Reflect the light off the roof of the lightbox or the side of it to light your image. A properly used backlight will give your image the appearance of floating in mid-air.

Tips for Photographing Artwork for Marketing Purposes

This image of a metal print was lit from behind with a cell phone and from the top with a light panel.

Lighting Intensity

You will need to control the lighting intensity inside the lightbox. There are several ways to do this.

First, be sure to take advantage of those white walls by bouncing light off them. Second, you may want to cover your light source with something to soften the light. This could be a tissue over the light of a cell phone, or a professional cover on a light panel.

As you progress with your skills you may consider purchasing a professional lighting source that allows you to adjust the intensity of the light.

Tips for Photographing Artwork for Marketing Purposes

I needed to reduce the intensity of the light and adjust my camera’s exposure compensation settings to keep this image from blowing out.

Tips for Photographing Artwork for Marketing Purposes

I changed my lighting intensity to get the proper exposure on this metal print.

Camera Settings and Setup

The next thing you need to do is get your camera set up. I like to use a 50mm lens because it is sharp to the corners and will not distort the final image. If you have a tripod, it is best to use it and set it up in front of your artwork.

Try starting your camera in aperture priority mode, your aperture at a couple of stops past wide open (e.g, if you have a f/2.8 lens stop it down to f/5.6), the white balance on auto and your ISO at 200.

You can alter these settings, but use I like to use a shallow depth of field to emphasize the surface of your artwork. Since a picture is two dimensional you will not have to worry about it being out of focus!

With your camera on a tripod, step down the aperture and shoot at a low ISO to reduce noise in the final image. A slow shutter speed should not be an issue with the camera on a tripod.

Practice Makes Perfect

Each of the things discussed in this article is just a starting point. Be sure to experiment with lighting angles, light sources, intensity, and camera settings to get the most stunning image of your product possible.

Remember, “pixels are cheap”, so make lots of them as you go out marketing your art!

The post Tips for Photographing Artwork for Marketing Purposes appeared first on Digital Photography School.


it's from Digital Photography School https://ift.tt/2vdJGBu
via Ian Johnson

Jul 28, 2018

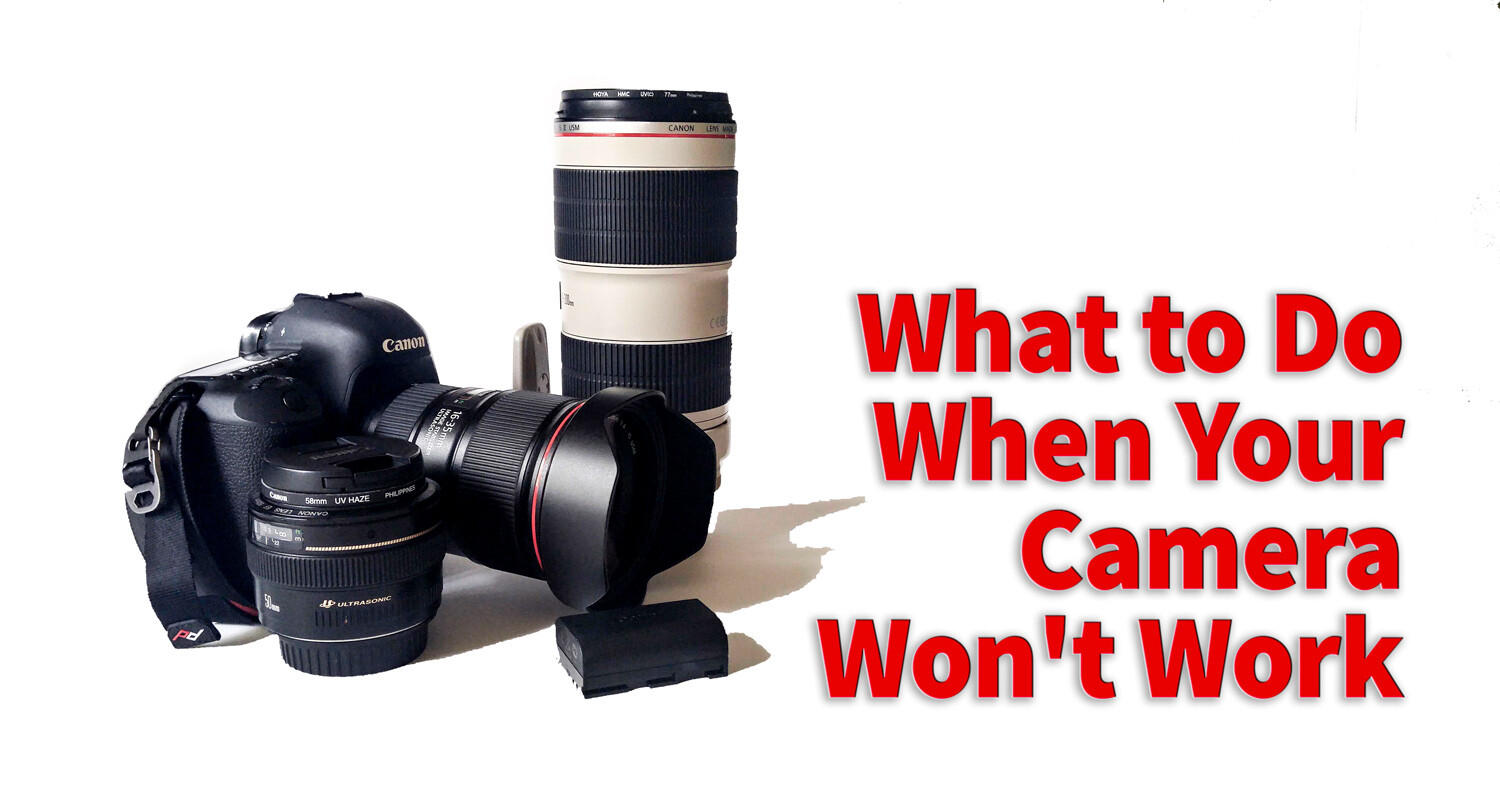
[Photography] What to Do When Your Camera Won’t Work and You Wanna Scream

You love your camera and care for it with due diligence. You (hopefully) clean the sensor and wipe down your lenses, being careful to keep them dry and avoiding high humidity. But what happens when no matter how careful you’ve been, your camera won’t work and starts to act funny? What if that dear, dear equipment of yours stops working the way you try and expect? Then what?

Easy Fixes

There are some fairly common problems that you can fix yourself. They involve a little bit of fiddling with your camera, but you don’t always need to run to your local camera store for repairs. So before you go running to the experts consider these options if your experience the following issues with your camera.

1) The lens won’t focus

  • Check that the autofocus is turned on – This is a fairly easy fix most of the time. The first thing you should always do is check to make sure you have the lens’s autofocus turned on. There have been a few times when I didn’t realize that I had pushed the switch to manual focus and I can’t understand why the lens won’t work. Always, always check this button first.
  • Try removing the lens and reattaching it. Sometimes when changing lenses you may not quite connect the camera and lens properly. In this case, the camera and lens can’t communicate and the camera can’t send a message to the lens to start the autofocus adjustments. Make sure you hear a click and the lens is attached tightly to the camera body (if not it can also fall off!).
  • Try using compressed air or a blower. It may be that there is some dust that is interrupting the proper workings of your camera use a blower to clean out the attachment area for both lens (metal contacts) and the area on the camera.
What to Do When Your Camera Won't Work and You Wanna Scream

Try using a blower to clean the attachment area for your lens. Just remember don’t ever touch the little gold squares with your fingers. They can corrode and then your camera cannot communicate with the lens. I will apologize for the camera shake on this image. It’s not easy holding a camera while shooting using a blower tool.

  • Take out your trusty user manual and see if the there’s a troubleshooting section. Most camera user manuals will have a section where you can find solutions to common problems.
  • You’re too close – Every lens has a minimum focusing distance. If you get too close to your subject, the lens will not be able to focus. For example, if the minimum focusing distance for your lens is 18″ and you try to do a macro shot of a flower and get right into about 8″ away from it – you lens physically cannot do that job. Try adding a close-up filter or using extension tubes to solve this issue.

2) Memory Card Errors

  • Check it’s not locked – If your camera won’t allow you to take or to delete photos it may be because you’ve not removed the write protect on your card or you’ve locked it. If the memory card is locked you can move the switch to unlock it. Sometimes the switch will break off. This is an easy repair. Place a piece of tape over the space where the switch should be and the card will once again be unlocked.
  • Format – If nothing is working, it may be time to consider formatting the card. You will lose all pictures currently on the card (download them first) but this may be the only way to get the card working again.
What to Do When Your Camera Won't Work and You Wanna Scream

Here you can see the little switch on the SD card. If you can’t write to the card check here.

3) Weird Exposures

It can happen sometimes, you read the exposure correctly, and somehow everything comes out way too bright or too dark. The first thing to check is your exposure settings.

  • Perhaps you’ve got exposure compensation turned on. This means that the camera will alter the value selected when the camera is set in various automatic modes (with some models it even applies in Manual Mode, like most Nikons). Check to make sure you haven’t accidentally turned on exposure compensation.
What to Do When Your Camera Won't Work and You Wanna Scream

Oops, yep definitely did not look at camera settings when I shot this. Always check those when you consistently get a weird exposure.

  • Also, check what metering mode the camera is set to use. Often, issues can be caused by using Spot Metering mode if you are not careful and understand how to use it. If in doubt, use Average or Evaluative Metering Mode as a safe fall-back.
  • Check you haven’t activated Auto Exposure Bracketing (AEB) by mistake. This is a common accident and you may not even realize it’s happened, but auto bracketing will take a series of images both under and overexposed that could be throwing off your exposures. If one shot is dark and the next is too bright this could be the culprit, check your bracketing settings.

Know when it’s time to put your camera to rest

There are times when there’s nothing you can do. Your camera is just like other tools and eventually, it will wear out. So let’s talk about the signs that you may have a camera on its last legs.

  • The ISO grain on your camera has become way more sensitive. In this case, it’s time to consider a new camera. If your camera’s ISO 400 is starting to look grainy in good lighting then you may need to go shopping.
  • The shutter is very slow. A camera usually has a lifespan of maximum shutter actuations. Once your camera reaches its limits, there’s nothing you can do. You will know if you’re reaching the end when the shutter on your camera starts to become very slow and there is often a delay after you press the shutter button before it takes the photo.

The dark band at the top is a sign that your camera shutter isn’t functioning properly.

  • You’ve surpassed your camera’s limits – There’s another factor that has nothing to do with the proper workings of the camera. Sometimes you may outgrow the capabilities of your equipment. I used a Canon 50D for years. But then when I became much more serious about my photography, and I needed something with a higher megapixel count I knew it was time to put my lovely camera to rest. Sometimes we need better equipment. It’s okay to accept this fact and move on. I know this sounds like you’re breaking up a relationship of sorts. Well, the truth is you are. Do what’s best for you and the goals you have for your photography.

Conclusion

So go ahead and tell us more about your camera. Give us some nice anecdotes about your frustrations with your gear. Tell us about the quick fixes you’ve found and tell us about your love-hate relationships with your older gear and why you moved on.

The post What to Do When Your Camera Won’t Work and You Wanna Scream appeared first on Digital Photography School.


it's from Digital Photography School https://ift.tt/2OkdVzr
via Erin Fitzgibbon

[Photography] 5 Lightroom Tips and Tricks for Beginners

If you have recently started using the Adobe Lightroom software and are looking for some exciting tips and hacks, this article is the perfect read for you. Lightroom is one such software which allows us to visually improve your photos with easy controls.

But there are some hidden or less explored features of this software of which you might not be fully aware. This is why made this list of five such Lightroom tips and tricks which you can use to maximize your editing skills and save time while editing pictures.

1. Change Colors using the HSL Tool

The HSL tool is one of my favorite tools in Lightroom as it allows you to adjust the Hue, Saturation, and Luminance of a particular color in your image. Yes, you can selectively choose one of the eight primary colors (as shown in the image below) and adjust its tint (hue), intensity (saturation), and brightness (luminance).

If you wish to play around with the colors in your photo, you can use the Hue tool and adjust the tones as per the range of colors available for the respective color.

For example, if you look at the images below, you can simply change a particular color in a photo by adjusting the Hue scale. When I took the purple color hue slider all the way towards +100, the color shifted towards pink. Whereas, when I took the scale towards -100 the color changed to somewhat blue.

5 Lightroom Tips and Tricks for Beginners

It is simply magical how you can use the hue scale and change the color (within the range of hue of colors) and enhance the visual appearance of your photo.

2. Automatic Slider Adjustment (shift + double click)

In situations when you are not sure which slider to adjust and by how much, Lightroom has an automated solution to this. The “Automatic Slider Adjustment” feature enables the software to automatically adjust the primary sliders which are Exposure, Contrast, Highlights, Shadows, Whites, and Blacks.

All you have to do is hover the mouse pointer on a particular slider title (on the word, NOT the actual slider – for example, “Exposure”). Then press and hold the Shift key and along with that double-click the mouse button on the title.

In this example, the software automatically detected the properties of the photo and adjusted the exposure as +0.45. Similarly, you can do this for rest of the primary sliders and let the software decide the best settings for your photos. It’s a good starting point, you can then tweak them as necessary.

NOTE: When you press the Shift key, the “Reset” button at the bottom right corner will change to Reset.

5 Lightroom Tips and Tricks for Beginners

3. Clipping Mask

One of that toughest parts of editing is getting the shadows and highlights accurate and within the range so that there is no clipping or loss of detail. One way of keeping a watch on the shadows, highlights, blacks, and whites is by reading the histogram. But histogram can sometimes be difficult to read and you can end up losing details in certain areas of the image.

Inside Lightroom, there is a quick and easy way of finding out if the shadows, highlights, whites or blacks are going out of range or leading to any clipping.

Press and hold the Alt key and then move one of the four sliders. When you are adjusting the highlights or whites in this way, you will see any areas which are clipped appearing as white. Similarly, when you adjust shadows or blacks, the spots appearing in black (or a color) indicate clipping in those areas (as shown in the samples below).

5 Lightroom Tips and Tricks for Beginners

Left – highlight areas being clipped appear in white. Right – shadow areas being clipped appear in black or a color (partial clipping).

4. Copy Paste Effects

If you are a wedding or event photographer, you might find this tip really helpful. Adobe Lightroom allows you to copy and paste effects from one photo to another with just a click. This comes handy when you are editing photos which are shot in similar lighting conditions and you want the similar effects on multiple photos.

Once you are done editing the first photo from the lot, click on the “Copy” button located at the bottom left corner (or press Cmd/Ctrl+C). Now you can see multiple adjustments (as shown in the screenshot below). Check off the ones you wish to copy or simply select Check All if you want everything similar in other photos.

Now navigate to the next photo and simply press Paste (or press Cmd/Ctrl+V) and all of the same settings will be applied to that particular image.

5 Lightroom Tips and Tricks for Beginners

5. Radial Filter Auto Selection

The Radial Filter in Lightroom is a life saver for photographers, don’t you agree? You may have used this tool to create vignetting effect or to make adjustments in the selected area of your photo.

But did you know that rather than wasting your time manually selecting the shape of the selection as per your subject you can use the Auto Selection trick?

Simply draw a small selection over your subject, press and hold Ctrl/Cmd and double-click on the small dot at the center of the selection. The software will automatically make a selection based on the shape and size of your subject. It is accurate most of the time, but there are always exceptions especially when the photo has multiple elements in the frame.

5 Lightroom Tips and Tricks for Beginners

Conclusion

Lightroom is a great program, but image procesing can be tricky and time consuming. Try out these five Lightroom tips and tricks and let us know how you make out. If you have any others please share your Lightroom tips for beginners in the comments area below.

The post 5 Lightroom Tips and Tricks for Beginners appeared first on Digital Photography School.


it's from Digital Photography School https://ift.tt/2vbNbs8
via Kunal Malhotra