Oct 29, 2018

[Photography] How to Find the Best Kinds of People to Photograph While Traveling

Photographers often struggle to make portraits of strangers while they’re traveling. They’ll have wonderful photos of all the picture postcard views and landmarks, but none of their pictures will have faces. We often encounter this with people who join our photography workshops.

© Kevin Landwer-Johan The Best Kind of People to Photograph While Traveling Transplanting Rice

© Kevin Landwer-Johan

One of the keys to returning home with a good selection of people pictures is being able to pick the best people to photograph. If you learn to observe people you can often judge who’ll enjoy having their portrait made. These are the best people to photograph.

Not everyone likes having their photo taken. Photographers often fall into this group. If you’re like this then your perception, based on your own feelings and experiences, can be negative. You presume others don’t like being photographed because you don’t enjoy the experience.

How do I know this? Because I used to think the same way.

The Best Kind of People to Photograph While Traveling Chinese Woman Photographer © Kevin Landwer-Johan

© Kevin Landwer-Johan

Practice on Your Friends

Take your camera to your next social gathering and photograph your friends. You’ll soon learn who enjoys the experience because they’ll probably tell you if they don’t.

If you’re not used to photographing people, making portraits for your friends is a great way to ease into the experience. It’s easier to communicate with someone you already know. And make a point of reading their body language. It’s an important skill to have when you’re visiting a place where you can’t speak the language.

© Kevin Landwer-Johan The Best Kind of People to Photograph While Traveling Pansa and Malu

© Kevin Landwer-Johan

Look for Clues and Cues

People of a different culture won’t necessarily respond the same way you would. Here in Thailand, people often laugh if they are uncomfortable or embarrassed. Sometimes they’ll even laugh when something terrible happens, which is a lot different to where I grew up.

Other cultures may become a bit hostile at having a snapshot of them taken in the streets.

Look for talkative people who are engaging with others – they’re often happy to be photographed. Quiet and sullen people are less likely to respond positively to your request to photograph them.

When I’m in the street or at a market, I look for a place where I can stand back and observe the people and my surroundings. I look for people who:

  • are having fun and enjoying their day
  • are deeply engaged in a task or a conversation
  • have an interesting face and look a bit bored, and probably wouldn’t mind having a conversation with a photographer.

These are the types of people I find it easiest to make engaging portraits of.

© Kevin Landwer-Johan The Best Kind of People to Photograph While Traveling Moken Sea Gypsie

© Kevin Landwer-Johan

Photographing Children

I always get permission before taking photos of children. Most parents will love the face you want a picture of – they are likely the delight of their life.

Be ready to be confronted by a forced toothy (or toothless) grin. These generally don’t make great portraits, but it’s worth taking a few photos and then working towards a more natural expression. Show them the photos and thank them. They’ll probably go right back to what they were doing. Stay close by, and move back to photograph them again. Hopefully, this time they’ll ignore your camera, thinking you’ve already taken their picture. (This method works equally well with adults.)

Getting down to the child’s level also helps. Look them in the eye and smile. You can get a better response than if you were towering over them with a huge camera.

Some kids enjoy getting their picture taken more than others. Malu lives in an ethnic minority village we often visit on our photography workshops. From the moment we first encountered her we knew she’d be wonderful to photograph. Not only is she super cute, but she also loves being photographed and interacts with us. We’ve built a relationship with her and others in this village that works to our advantage. When we visit with our workshops, our participants can make more intimate portraits than if they were on their own.

© Kevin Landwer-Johan The Best Kind of People to Photograph While Traveling Hmong Hill Tribe Girls

© Kevin Landwer-Johan

Take a Workshop or Photo Tour, or Hire a Guide

Local knowledge and relationships can be extremely helpful and valuable. People who’ve developed relationships with locals and have a rapport with them can help you. Make the most of their relationships so you can connect more easily with your subjects.

Guides and teachers can also help you by translating questions you may have. Being able to ask questions and show an interest in the person you’re photographing can lead into a more open portrait.

© Kevin Landwer-Johan The Best Kind of People to Photograph While Traveling Chiang Mai Photo Workshop

© Kevin Landwer-Johan

Photograph People You Interact With

It’s unlikely that the bellhop at your hotel or the receptionist will refuse a photo. Even the cleaning staff will most likely pose for a portrait. Taxi drivers and boatmen can be great to photograph.

If you’re in one location for a few days, keep buying your coffee of fruit juice from the same vendor. Once they’ve seen you a few times, ask if you can make a picture of them. Anyone you’re giving money to will usually oblige.

© Kevin Landwer-Johan The Best Kind of People to Photograph While Traveling Sea Gypsy

© Kevin Landwer-Johan

Be Open and Approachable

People often reflect the feeling you express. They read your body language. If you’re smiling, open and confident, they’ll more than likely be the same. But if you’re nervous, fiddling around with your camera and not making eye contact, their response may not be so positive.

Learn to say “Hello” and “May I take your photo?” in the local language. This will bring a smile to most people’s faces as they appreciate the fact you’re making an effort to connect with them.

© Kevin Landwer-Johan The Best Kind of People to Photograph While Traveling Malu

© Kevin Landwer-Johan

Fit a Wide Lens to Your Camera

Avoid the temptation to use your longest lens. The photos you take will appear distant and removed. Use either a 50mm or wider lens on a full-frame sensor or a lens around 35mm on a crop sensor. I prefer a 35mm on a full-frame camera for travel portraits. A wider lens means you need to be close, which lets you interact more easily.

If your subject seems a little uneasy, start with a few photos from further back. Show them the picture on your camera monitor. They’ll usually smile. If you’re quick, you can squeeze a few more frames of them. But if you have a longer lens you’ll need to be further back.

© Kevin Landwer-Johan The Best Kind of People to Photograph While Traveling Malu 01

© Kevin Landwer-Johan

That’s how I managed to make this portrait of Malu just after her neck ring was removed. She was quiet and a bit self-conscious that morning, so I crouched next to her and asked if I could take her photo. She nodded, and I took a few frames using my 35mm f1.4 lens. I showed her the photos, and suddenly realized she hadn’t seen herself without her traditional neck ring.

She reached behind her neck and pulled her hair back so I could make another photo and see her neck more clearly. If I’d had an 85mm or other longer portrait lens I would have missed this photo because I would have been too close.

A wider lens also means a more intimate portrait. You need to instill confidence in the person you want to photograph. Observe carefully, and ask people who look as if they’ll enjoy the experience.

By following these tips, I’m sure you’ll find great people to photograph, and create some wonderful travel portraits.

Have you taken some great travel portraits, or have some other photography tips? We’d love you to share them in the comments below.

The post How to Find the Best Kinds of People to Photograph While Traveling appeared first on Digital Photography School.


it's from Digital Photography School https://ift.tt/2yHR3U6
via Kevin Landwer-Johan

Oct 28, 2018

[Photography] Seven Great Ways to Control the Photography Background

Much thought goes into photographing an interesting, compelling main subject. In concentrating too much on the main subject though, it’s possible to neglect an equally important part of the photo – the photography background. The background needs to be controlled to achieve a great photo, and in this article, you’ll learn the various ways to do this. So let’s look at the various strategies you can employ.

1. Look to the light in the photography background

The creative use of light is what makes a good photo. That means you need to be in control of this key element. Control this, and your photo should be better for it. In the majority of cases that light is daylight though, of course, there are artificial light sources as well. Those looking to know where the sun is can use a great website called Suncalc, which is also available as an app. So how does this relate to your background? Well knowing where the sun is rising and setting means you can plan for sunset and sunrise skies in your background. Equally, you’ll know when the sun is in the optimum position to light up your main subject properly. Having a poorly lit subject often impacts the background, which is overexposed to compensate for an under-lit main subject.


Seven Great Ways to Control the Photography Background 1

One option for the background is to underexpose it. This woman is lit by a strobe to the left of the camera.

Low key photography background

A great choice to control your background, especially for street photography, is to underexpose it relative to your main subject. To achieve this, you’ll need to find somewhere that lets a beam of strong sunlight in, like a gap in the roofing at a market. Now the aim is to photograph your subject in that sunlight, and in so doing underexpose the background by -2 to -3 EV.

2. Things can change with the seasons

The position of elements in the sky, such as the sun, the moon and the milky way, all change with the seasons. Knowing when to visit a location so that the background lines up with your photo requirements is another crucial step to make. Once again, Suncalc can help you here, or for astrophotography, Photopils is a great resource. Good landscape photography takes planning. Some photos are only possible for a few days per year, and you’ll need luck with the weather on those days.

Seven Great Ways to Control the Photography Background 2

The Milkyway appearing behind Durdle Door during Spring.

3. Change the angle

Photography is the art of subtraction, and a busy background is an easy way of adding more elements to your frame than you need. A simple change in the angle can avoid such elements as wires or unwanted people in the background of your image. Keep your photo as simple as possible, with your background often needing to be a minimal element of the frame.

Seven Great Ways to Control the Photography Background 3

This photo is effective because the background and angle chosen help to frame the model.

4. Use leading lines

Closely related to changing the angle of your photo is using leading lines to your subject from your background. Those lines are a great way to bring the viewers eye to your main subject, thus, making that background an essential element of your photo. A photographers favorite is the use of tunnels, where lines lead from an infinity point to your main subject. Using this gives you more control over your frame and results in a photo with real impact. A shallow depth of field isn’t always necessary when using leading lines, as the lines hold the background together.

Seven Great Ways to Control the Photography Background 4

Leading lines and tunnels are a favorite of photographers.

5. Line up foreground and background elements

It’s not just about lining up leading lines and avoiding distracting elements in your background. Particular elements in your background can be lined up to compliment whatever you have in the foreground. An example of this is when your background is blurred out with bokeh. In that background, there can be lighter and darker portions. You can also position your main subject in front of a patch of brighter background to highlight this area, and provide a natural frame.

Seven Great Ways to Control the Photography Background 5

The center of the Japanese flag in the background makes and excellent frame.

6. Aperture controls the background

One of the most effective controls you have over the photography background is aperture. What this does is controls the depth of field, allowing you to blur out the background if you wish. Bokeh is the term given to the out of focus portion of an image, often in the background. You can produce bokeh by opening up your aperture, usually on a prime lens. It’s also possible to produce bokeh with a long focal length, as long as the background is some distance from the object you’re focusing on. So controlling the aperture is one of the easiest and most effective ways of controlling your background.

Seven Great Ways to Control the Photography Background 6

Background bokeh can be an attractive element of a frame.

7. Textured backgrounds

Another option available to photographers is to use a textured background. Find a background, like a wall, that has a pattern or texture to it. Photography backgrounds that work well include: brick walls, old decaying facades that have one color, or metal shutters that shops use when they’re closed. Chances are, you’ll be photographing a model in this situation, and a clean background works well for this style of photo.

Seven Great Ways to Control the Photography Background 7

A natural photography background can also work well. In this example, the grass in the background is blurred out.

What do you look for in a background?

There are many ways to create an excellent background in your image. Which of the suggestions in this article do you like to use? Is there a different way of controlling the background that you like to use? This article aims to make you think a little more about the background of your photo, the next time you go out with your camera. So please share your thoughts, and comments with us. Let’s see some of your fantastic photography backgrounds in the comments section!


The post Seven Great Ways to Control the Photography Background appeared first on Digital Photography School.


it's from Digital Photography School https://ift.tt/2ObmhI4
via Simon Bond

[Photography] Gear Review: Sony FE 85mm f/1.4 GM Lens

Gear review: Sony FE 85mm f/1.4 GM Lens 1


Sony has very quickly risen to be a photography power horse in the professional world. With their collection of impressive mirrorless cameras and fantastic cinema products, Sony has carved a name for themselves among the photography legends such as Canon, Nikon, and Leica. As such, it is of no wonder that the company has released a version of their own of the famous 85mm f/1.4 lens (Sony FE 85mm f/1.4 GM Lens) – a fixed millimeter that features a beautifully creamy bokeh.

Gear review: Sony FE 85mm f/1.4 GM Lens 2

I am a very versatile photographer. My work spans a variety of niches in the field, from live concerts to portraiture, action photography to animals. I have found a use for the Sony FE 85mm f/1.4 GM lens in all of these situations, and the wide aperture is a fantastic bonus for the work that I do.

I use this lens in low light situations, aiding in isolating the subject in busy locations, and creating a precise depth-of-field-look for my clients.

Gear review: Sony FE 85mm f/1.4 GM Lens 3

Lens build

My frame of reference is the Canon L lenses of which this is meant to be an equivalent. I find the build of those lenses to be very high quality and durable. Upon opening the box to unveil the Sony FE 85mm f/1.4 GM lens, I was actually rather impressed at the build quality. The camera weighs about 825g – almost 2lbs – a significant weight.

Gear review: Sony FE 85mm f/1.4 GM Lens 4

The outer casing of this lens is high-quality polycarbonate, and all markings are engraved and filled with paint. The physical feel of the lens in your hand is solid and sturdy. The rubberized focus ring was quite comfortable to the touch and was very smooth to turn.

Gear review: Sony FE 85mm f/1.4 GM Lens 5

The lens features a rubberized focus ring, an aperture ring, an AF/MF switch, and on the left side of the lens, there is a programmable button that you can set to work as most anything. An excellent idea for a lens!

Gear review: Sony FE 85mm f/1.4 GM Lens 6

The hood that comes with the camera is also high quality in build. The hood sports a rubberized front bumper and felt on the inside to counteract stray light. Furthermore, there is also a button which you have to press to remove the hood, which ensures the hood stays in place.

Gear review: Sony FE 85mm f/1.4 GM Lens 7

Aperture ring

As an avid Canon DSLR and EF lens user who had recently added a Sony mirrorless to the collection, the aperture ring was something a bit new to me.

Intended to be very beneficial during cinema work, instead of adjusting the aperture on the camera body, you have the option of adjusting its width on the lens. This ring can be adjusted to either be silent or make little clicks to indicate it is turning – very useful for silent shooting.

Gear review: Sony FE 85mm f/1.4 GM Lens 8

For those that prefer to adjust the aperture on the camera body itself, you can set the dial ring to ‘A’ for automatic. My one gripe would be the location of the ‘A’ option- it sits on the f/16 side rather than the f/1.4. It seems more logical to me to place this option on the side of the widest aperture. I found myself accidentally shifting the ring over to f/16 during shooting.

Gear review: Sony FE 85mm f/1.4 GM Lens 9

Focus

The focus on this lens is very accurate if I do say so myself. Although in these types of camera combinations, much of the autofocus relies on the camera- but the speed is very much the lens. The close focusing distance is approximately 0.8m.

Gear review: Sony FE 85mm f/1.4 GM Lens 10

I have read reviews of others who have had focus issues with this model, but I have not. I was able to record an entire sequence of a dog running directly at me from start to finish in perfect tack sharpness. The body I am pairing the lens with is the Sony a7r III, which can make a significant difference.

Gear review: Sony FE 85mm f/1.4 GM Lens 11

Keep in mind that shooting at f/1.4 has its challenges- wide apertures tend to be difficult if you aren’t used to them. To quickly refresh you of the basics, when you focus your camera on a subject, it establishes a focal plane. To get your subject in focus, it has to be on the focal plane. Focal planes happen on an x (horizontal) and y (vertical) axis.

Anything along either of those axes will be in focus, and anything not on them will be out of focus. With wide apertures like f/1.4, your focal plane is quite narrow. Quick trick? Step further back to widen the plane!

Gear review: Sony FE 85mm f/1.4 GM Lens 12

Sharpness

Talking about the focus naturally leads to sharpness. This lens is tremendously sharp. I was very impressed with the amount of detail that this lens can capture. There is absolutely no reason to add sharpening in post-processing.

One of the first sessions I did with the Sony FE 85mm f/1.4 GM lens was action portraits at the beach, and the final result managed to pick up all of the detail including specks of sand flying up.

Gear review: Sony FE 85mm f/1.4 GM Lens 13

I was also very impressed with the clarity and colors when using this lens- the glass was superb. Though I still find a significant advantage in Canon L glass (reminding that I am an avid Canon user), in regards to raw-off-of-the-camera quality. This lens is a close second best.

Gear review: Sony FE 85mm f/1.4 GM Lens 14

Depth of field

The bokeh produced from this lens is where the difference is quite noticeable to the trained eye. The depth of field (DOF) at f/1.4 looks somewhat different from that of its competitors, such as Canon’s equivalent.

I find the depth of field looks more dreamy and a bit artificial from other similar lenses, but it has an authenticity and liveliness to it. The shallow DOF has quite a bit of a subtle, calmer rotation that creates a very natural look to the images (or in the least, as natural as this shallow of a field can be).

Gear review: Sony FE 85mm f/1.4 GM Lens 15

That said, there is a vignetting that occurs at f/1.4. Some people like this, others don’t. I enjoy the natural vignetting that is contrary to popular opinion, but for those that find it a nuisance, keep in mind that this issue does occur with this lens.

Gear review: Sony FE 85mm f/1.4 GM Lens 16

Flare resistance

A big bonus that sets this lens apart from others is its impressive flare resistance. Most of the time you can just shoot directly into the sun and you will neither have problems with a huge loss of contrast nor ghosting. This is brilliant for natural light photographers, especially during the beloved golden hour.

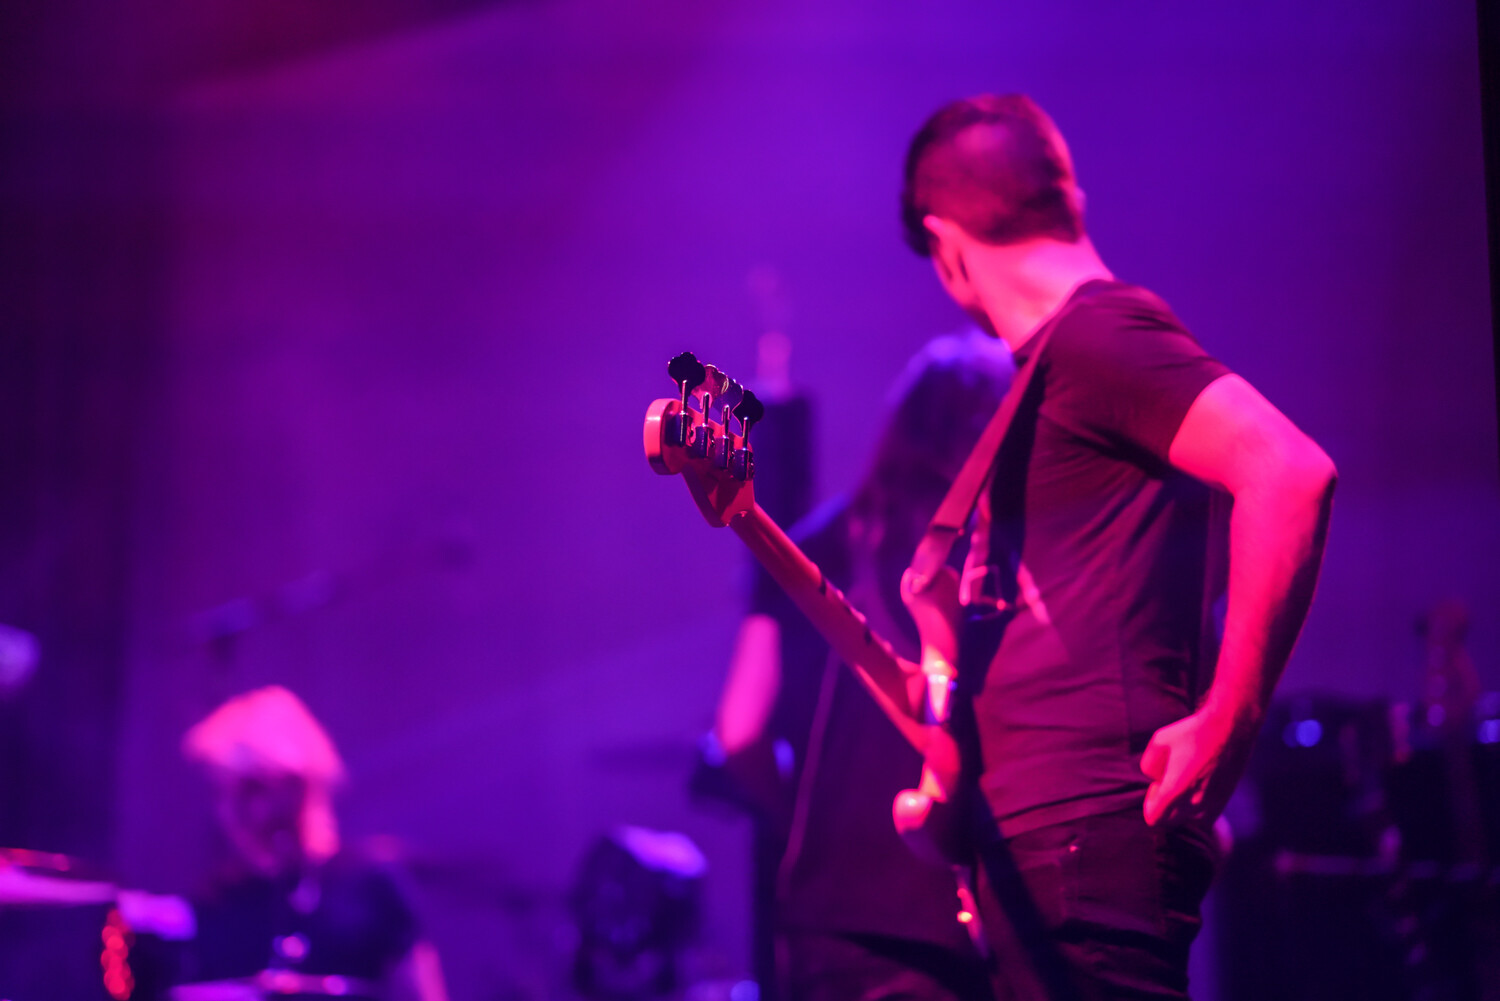
For me, as a concert photographer, I found this to be a significant perk as the stage lights didn’t flare too badly.

Gear review: Sony FE 85mm f/1.4 GM Lens 17

Chromatic aberration

Chromatic aberration, also known as ‘color fringing’ or ‘purple fringing,’ is a common optical problem that occurs when a lens is either unable to bring all wavelengths of color to the same focal plane, or when wavelengths of color are focused at different positions in the focal plane.

Gear review: Sony FE 85mm f/1.4 GM Lens 18

Unfortunately, where I lose a bit of love for this lens is the chromatic aberration issue it suffers. Though I have read reviews in which others claim that the chromatic aberration is minimal, I have experienced the contrary and consider the chromatic aberration to be rather severe.

I have used several high-quality fast lenses that have little to no aberration, and this is not one of them. I have experienced a slew of colors coming out in quite contrasted images, ranging from the purple fringe to aqua or bright green fringing. Although this can be removed in post-processing (especially in a program such as Lightroom), that is an extra step.

Gear review: Sony FE 85mm f/1.4 GM Lens 19

Pros and cons of the Sony FE 85mm f/1.4 GM Lens

Pros

  • Very fast lens – focusing is a breeze.
  • The build quality is quite solid and durable.
  • Very sharp and clear images.
  • The depth of field is more natural rather than dreamy, which I find to be positive.
  • This is a full-frame lens intended for full-frame cameras – always a massive perk.
  • Excellent flare resistance.

Cons

  • Very noticeable chromatic aberration in high contrast situations.
  • Visible vignetting at wide apertures.
  • The ‘A’ option on the aperture ring is located in an inconvenient spot (in my opinion).
  • The lens has a significant weight.
  • The price is a bit steep at around $1700 USD.

Gear review: Sony FE 85mm f/1.4 GM Lens 20

Conclusion

For those rocking Sony E-mount cameras, this lens is dreamy. An excellent and high-quality choice as a native Sony mount. I find it to be rather worth it for those sporting this brand’s camera body.

Have you used the  Sony FE 85mm f/1.4 GM lens? What are your experiences with it? Let us know in the comments below.


The post Gear Review: Sony FE 85mm f/1.4 GM Lens appeared first on Digital Photography School.


it's from Digital Photography School https://ift.tt/2zagsW7
via Anabel DFlux