The post How To Find Your Lens’ Sweet Spot: A Beginner’s Guide to Sharper Images appeared first on Digital Photography School. It was authored by Dena Haines.

Are you tired of blurry images?
It’s time to learn how to capture sharper images by finding your lens’s sweet spot. This will give you more confidence, save time, and help you take better photos.
In this article, you’ll learn:
- How to find your lens’s sweet spot (for sharper images)
- Why you should shoot in Aperture Priority mode (and how to use it)
- How to perform a test to get the sharpest image every time
- How important your lens’s sweet spot really is

In the above images of the clock, the one on the right is sharper. Look closely at the words. The f/9 image is sharper throughout because it was shot using my lens’s sweet spot. The f/3.5 one was not.
First, take a look at your lens
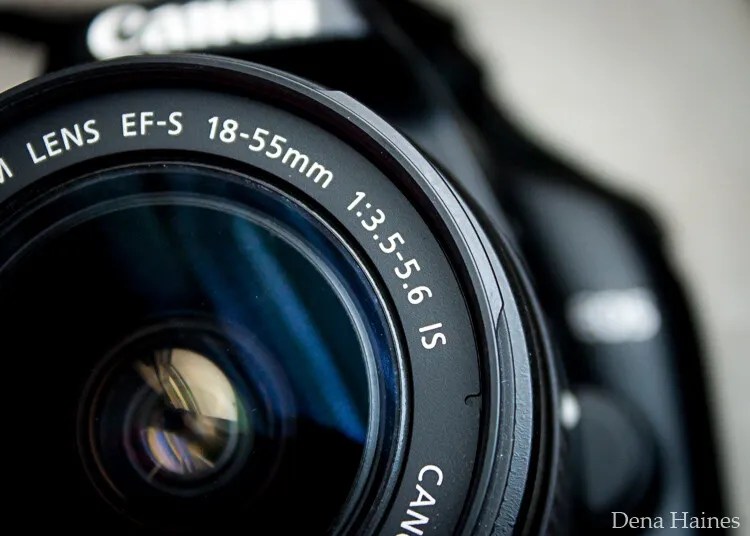
In this beginner’s guide, we’ll use an entry-level zoom lens as our example. Most kit lenses (the basic lens that comes with a DSLR) generally shoot their sharpest at a mid-range aperture setting. To determine the mid-range aperture of your lens, you’ll need to know its widest (or maximum) aperture setting. This is located on the side or end of the lens and will look something like 1:3.5-5.6.
For example, here it is on my Canon 18-55mm zoom lens:

This means that when my lens is zoomed all the way out to 18mm, its widest aperture is f/3.5. When zoomed all the way in to 55mm, its widest aperture is f/5.6.
The rule for finding that mid-range sweet spot is to count up two full f-stops (aperture settings are called f-stops) from the widest aperture. On my lens, the widest aperture is f/3.5. Two full stops from there would bring me to a sweet spot of around f/7.1.
Use this chart to count your f-stops:
There is some wiggle room in what counts as mid-range, so anything from f/7.1 to f/10 will capture a sharp image. Once you know the mid-range aperture of your lens, you can do an easy test to get your sharpest image. To perform the test you’ll need to shoot in Aperture Priority mode.
Take control with Aperture Priority mode
Shooting in Aperture Priority allows you to choose the aperture setting you want, which gives you more creative control than Auto mode.
By controlling the aperture setting, it’s much easier to get a sharp image. And because your camera still chooses the ISO (if it’s set to Auto ISO) and the shutter speed automatically, it’s very easy to use.
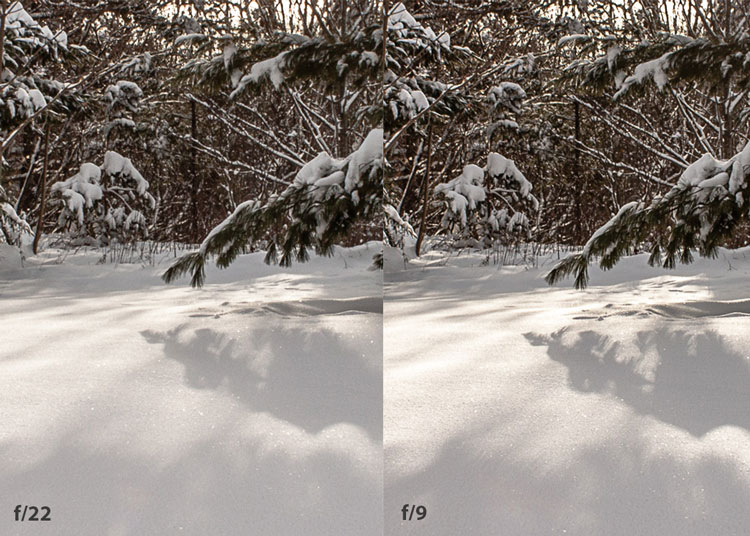
You’ve probably heard that apertures like f/16 and f/22 are best for keeping everything in focus. While that can be true, focus does not always equal overall sharpness. Choosing a mid-range aperture will give you sharper images throughout. You can improve your photos even further by reducing camera shake by way of a tripod and a remote shutter release (or your camera’s self-timer).
Here’s an example of how shooting in your lens’s sweet spot will give you sharper images:


In the above image, the f/9 shot is sharper than the f/22 one. The needles and shadows are not as soft or blurry as in the f/22 shot (look at the crispness and sparkles in the snow, too).
Switching from Auto to Aperture Priority mode
To take your camera off of Auto and put it in Aperture Priority, just turn the large mode dial to Aperture Priority. This is what that looks like on my Canon (on Nikon and other brands look for the “A”).

Auto mode is the green rectangle; Aperture Priority mode is the Av (or A on a Nikon). Once your camera is in Aperture Priority mode, turn the smaller main dial (shown here on the top of my Canon) to choose your f-stop.

As you turn that dial, you’ll see the f-number changing on your screen. In the next picture, it’s set to f/9.5:

Perform a lens sweet spot test
Once you have your camera set up on a tripod, performing a sweet spot test only takes a couple of minutes. To begin, put your camera in Aperture Priority mode, then compose your shot and take photos at varying apertures. Start with a shot at the widest aperture, then rotate that main dial a couple of times (to narrow the aperture) and take another shot. Keep doing that until you’ve taken seven or eight photos.
Upload your photos to your computer and zoom in. You’ll quickly see which aperture settings gave you the sharpest overall image.
This next photo of my daughter was shot using natural light. Shooting in my lens’s sweet spot gave me a pretty sharp image, even in this low light setting:


The close-up of the mug shows the advantage of shooting in the lens’s sweet spot. Whenever you want to make sure you get the sharpest capture possible, take a shot at each mid-range setting: f/7.1, f/8, f/9, and f/10.
Getting your sharpest images
Now that you know your lens’s sweet spot, it’s time to practice. I hope you’re as pleased with the results as I’ve been!

I love shooting in natural light, and learning how to capture sharper images in low light has made me so much happier with my photos.
Tips for capturing the sharpest images
- Shoot in Aperture Priority mode
- Choose a mid-range aperture (usually f/7.1 to f/10)
- Use a tripod and a remote shutter release (or your camera’s self-timer) to reduce camera shake
- Take a series of shots at f/7.1 through f/10 when a sharp capture is especially important
But don’t stop there. Keep playing with settings in Aperture Priority mode. It’s awesome to get images that are sharp throughout, but there’s a lot more to aperture than that.
Learn more about aperture and depth of field here.
The post How To Find Your Lens’ Sweet Spot: A Beginner’s Guide to Sharper Images appeared first on Digital Photography School. It was authored by Dena Haines.
it's from Digital Photography School https://ift.tt/2kUTsVz
via Dena Haines

No comments:
Post a Comment