Feb 27, 2015

[Photography] 24 Uber Sharp Images with Huge Depth of Field to Focus Your Attention

Over the last few weeks on dPS we’ve had some collections of images that demonstrate some of the basic photography principals. Last week it was using a large aperture for shallow depth of field. This time we’re going the other way and looking for images with a lot of depth of field, ones that utilize small apertures like f/16 or even smaller.


These are usually images with a lot of depth and focus from near to far. Landscape photographers use this technique often as do, surprisingly, macro shooters. When you get up close the depth of field is really slim so you need that added focus from the smaller apertures (if not using focus stacking techniques).


As a neat side effect if you include a light source like direct sunlight – smaller apertures will turn those into starbursts – a telltale sign you know a small aperture was used.


So here are some images that exemplify maximum sharpness and large depth of field:


The post 24 Uber Sharp Images with Huge Depth of Field to Focus Your Attention by Darlene Hildebrandt appeared first on Digital Photography School.


it's from Digital Photography School http://ift.tt/1DyKkXF

via Darlene Hildebrandt

Feb 26, 2015

[Photography] Simple Tips to Improve Your Travel Photography – Photographing Mountains, Hills and Valleys

Mountain_Eiger_KavDadfar


There really aren’t many scenes that can match the sheer awe of a snowcapped mountain in a landscape image; but capturing an image that might do the scene justice isn’t always straightforward.


Here are some simple tips to help you next time you are looking to photograph mountains, hills and valleys in your travel photography:


Be Patient


Photography can be incredibly frustrating at times, especially when the weather goes against you; and very rarely will you get to a location and have everything in place to make a great photo. Sometimes you just have to be patient and wait for the right moment when the clouds disperse or the fog lifts. The weather in the mountains, and even hills, can change incredibly quickly so make sure you are aware of weather forecasts before you set off and always tell someone where you are going and when to expect you back.


Valleys_Wales_KavDadfar

It was 9.30pm and after I had waited almost an hour, the sun finally broke through the clouds.


Lighting is Key


In landscape photography, often just the lighting can make all the difference between a good shot and a great shot. Early morning and late afternoon light gives the scene a wonderful golden glow and emphasizes shadows. Think about which direction the light is coming from and be prepared to come back another time to the same location to catch the best light.


Light_Mountains_KavDadfar

The late afternoon light illuminates the Eiger beautifully.


Think About the Foreground


Just because you are photographing a mountain in the distance doesn’t mean you can forget about the foreground; good landscape images usually also contain something interesting close to the camera. So next time you are photographing into the distance, have a think about how you could incorporate a tree, a stream, some people or animals, or even some rocks to give your image more depth and also a sense of scale.


Scotland_KavDadfar

An interesting foreground can make your photo look more appealing and also guide the viewer’s eyes into the distance.


Place Your Horizon Carefully


Your horizon is one of the most important parts of the photo. Think about the rule of thirds and avoid putting your horizon in the middle. If the scene has an interesting foreground or an uninteresting sky (i.e. white clouds) place your horizon high. Alternatively, if you have interesting cloud formations or light you could place your horizon lower to show more of the sky.


Horizon_Mountains_KavDadfar

If the sky isn’t interesting place place your horizon higher.


Think Vertical


Naturally most landscape shots are taken in landscape format (horizontal); however don’t be afraid to experiment photographing in portrait (vertical). This works especially well if you want to isolate a narrower view of the scene and lead the viewer into the distance. But remember, your foreground is possibly even more vital as you might be showing more of it.


Mountains_Switzerland_KavDadfar

The ski lines in the snow and the two very small people add a bit of interest to the foreground.


Adapt to the Weather


Stormy skies, rain, mist and even fog can all contribute to making a photo look even more dramatic. So if you find yourself not getting sunshine and blue skies, don’t despair; instead think of how you could adapt the image to match the mood in the scene. Don’t forget to be patient; you never know, a beautiful blue sky could only be a few minutes away.


Weather_Mountains_Switzerland

The clouds help to frame the top of the mountain in this photo.


There are few images that wow an audience like a beautiful mountainous landscape, but it takes skill, hard work, and perseverance to capture unique and beautiful shots of mountainous areas. Just remember to be patient, follow the tips above, and you’ll be on your way. Please remember – always stay safe!


Now it’s your turn. Share your photos, thoughts and tips below.


The post Simple Tips to Improve Your Travel Photography – Photographing Mountains, Hills and Valleys by Kav Dadfar appeared first on Digital Photography School.


it's from Digital Photography School http://ift.tt/1AOtGST

via Kav Dadfar

Feb 25, 2015

[Photography] 7 Uncommon Tips for Winter Sunrise Photos Near Water

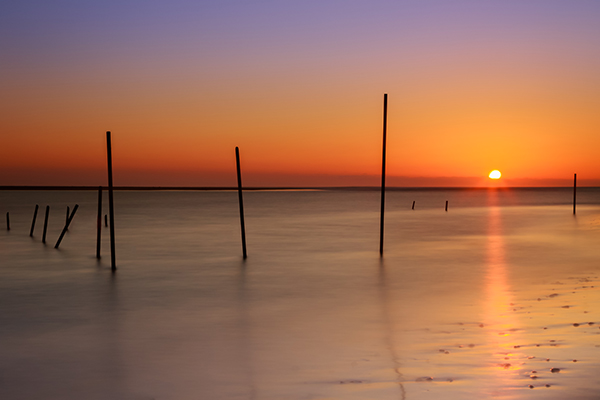
DPS3


There are few things in photography that people love more than dreamy sunrise shots full of bold oranges, big suns, washing waters, and burnt horizons. The dawn of a new day is a spiritually significant event as our past misdeeds of yesterday are forgotten under the promise of fresh beginnings. Sunrise also affords us some of the best light to work with in photography.


However, if you live near the coast and you plan to get up early to take some sunrise shots that involve you being in or around rocks on the water’s edge, there are some key things you must remember, especially in the cold, winter months.


1. Set the alarm earlier than you think.


This is stage one. You’ve calculated that the sun rises at 6:00 a.m., you want to get there by 5:30 to set up, it takes you 10 minutes to get there, so you set the alarm for 5:10. But be honest, it never works like this does it? The alarm goes off at 5:10, it’s cold, you’re snug in bed, it’s dark outside, you were in the midst of a dream, and you roll back over. Missed sunrise. How often do you ever jump straight out of bed at 5:10 to take photos, in the midst of winter? By learning this mistake, I set the alarm for 4:40 then give myself three hits on the snooze button to take me to 5:10. It never fails (unless it’s cloudy!!)


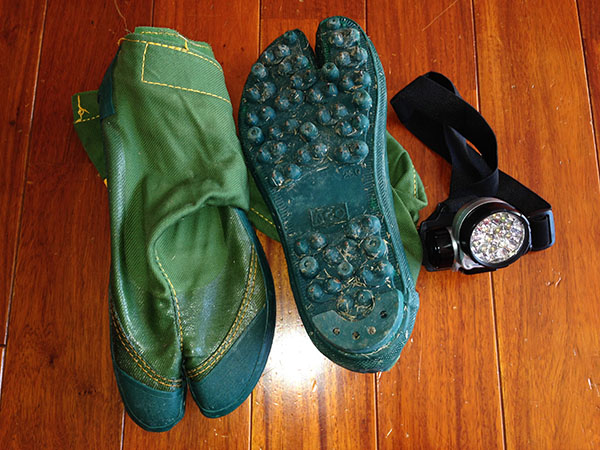
2. Make sure you have shoes with spikes on the bottom.


Think about it – you’re an avid photographer who has set up a kit to your liking with lenses, filters, batteries and your camera. You put it in your bag, put your shoes on, head to the wet, rocky location then bammo, you fall over on the freezing, slippery moss. Either you or your bag gets wet, and neither is a desired result. There’s nothing scarier than trying to keep your bag on your back and out of the water as you slip around the rocks on ill-equipped shoes.


I have fisherman’s boots that cost $40. They have small metal spikes on the sole, perfect for getting across the rocks, and for scurrying to new locations quickly. They’re waterproof too. Alternatively, you could try the little clamp-ons that hikers use in icy conditions. They work well too, but your shoes will get cold and wet.


3. Use a head torch (headlamp).


The first time I brought mine I felt utterly ridiculous, like I was a miner heading down into the pits. Now, I wouldn’t dream of not having one. The convenience of having both hands free to see where you’re going, to open and close your bag, and set your camera up in the dark is without comparison. Especially if you are trying to get filters and holders attached to the ends of lenses.

DPS5


4. Have at least two lens cloths and other lens cleaners or pens.


Imagine this scenario: you are changing your lens out on the rocks and you put your cleaning cloth down to free your hands. There is a little bit of residue on the rocks so when you pick up your cloth and started wiping the lens, it gets coated in a film of goo. You may be able to clean the lens with different parts of the cloth (depending on the type of rock goo!) but it will likely leave most of the cloth dirty. Therefore, you will be unable to clean other lenses later on when they inevitably get hit by sea-spray.


How can I picture such a scenario? Sadly, I have lived it, and there is nothing worse than getting up early to a prime location, only to have your single cleaning cloth ruined before your shooting appetite has been satisfied, leaving you unable to do anything with other lenses that need cleaning. Now I always carry at least three cleaning implements in my bag.


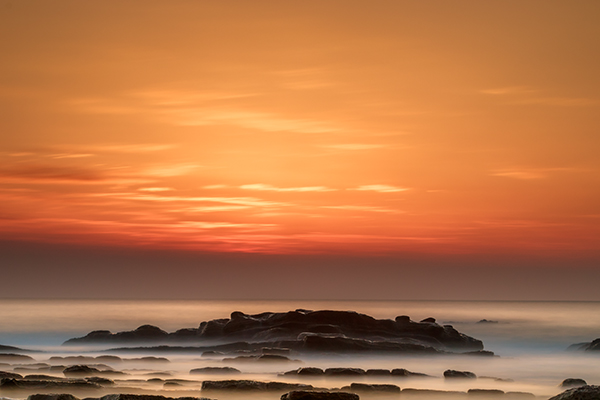
5. Study the tides.


Ideally, you should know exactly what you want to shoot, so you can frame the shot before you go and know where the water will be. This is not always possible, but at least you should know what the tide will be at sunrise. You might go somewhere the day before and see a perfect shot in your head, only to return at dawn the next day and find those beautiful rocks covered in two metres of water. There’s no point setting the alarm for 4:40am if the subject you want in your shot is submerged like a sunken ship.

DPS1


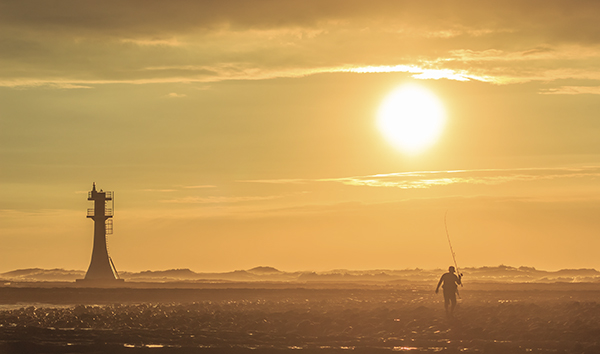
6. Know where the sun rises. This may seem ridiculous – east you say! Well yeah, the sun rises in the east, but exactly where on the horizon will it rise for you? The angle changes every day. I once woke at 4:00 a.m. to get a shot in at sunrise only to realize after setting up that even my Sigma 10-20mm couldn’t get the sun and subject in my frame. East isn’t just east. Know exactly where the sun rises on the horizon in order to frame the shot you want.

DPS2


7. Mittens not gloves.


In the wintertime, near the coast, you need something to cover your hands. But not gloves. Mittens are those cute, little gloves that have all the tops of the fingers cut off. The very reason you need mittens is to keep the tips of your fingers free to play with the camera and to get everything set up. This is very difficult with padded, woolly gloves on. Also, don’t make the mistake of buying woollen gloves, then cutting the tops off yourself. This leaves threads hanging that get longer and longer every day, and more and more annoying.


DPS6


The joy of getting those early morning shots makes a perfect start to the day. Follow these tips and all you’ll have to worry about is framing that perfect shot.


The post 7 Uncommon Tips for Winter Sunrise Photos Near Water by Iain Stanley appeared first on Digital Photography School.


it's from Digital Photography School http://ift.tt/1vziYjO

via Iain Stanley