Sep 30, 2015

[Photography] 10 Common Bird Photography Mistakes and Their Solutions

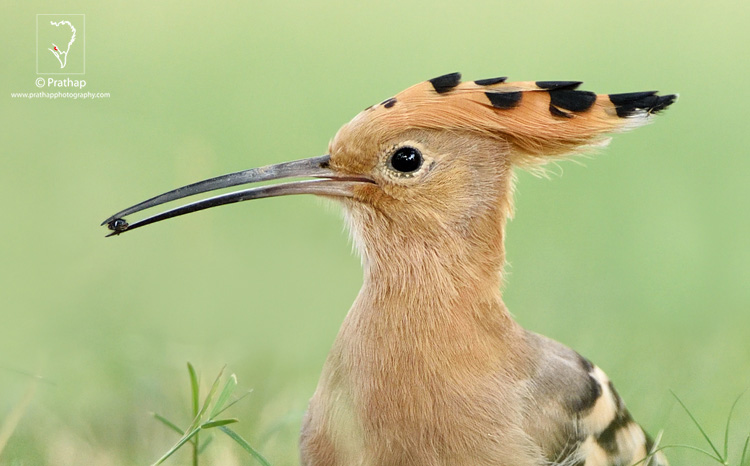
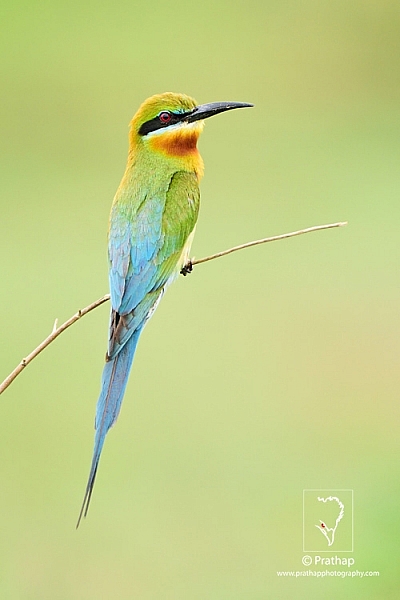
Do you commit mistakes in photography?

I bet you do. I have made mistakes. As a matter of fact I have committed many. But we all learn from our mistakes. What you don’t have to necessarily do is to re-invent the wheel. Instead of learning about these common mistakes the hard way, why not learn from other’s mistakes? That sounds awesome, doesn’t it?

Sandhill Crane Family Flying on a Beautiful Autumn Morning in Jasper-Pulaski Fish and Wildlife Area in Medaryville in northwestern Indiana. Every year around 10,000 Sandhill Cranes migrate to this location during Autumn. The calls of thousands of Sandhill Cranes that reaches several miles is an experience that is next to none. It is one of the best locations to photograph them as they fly past the Autumn trees at the Sunrise to feed in the close by farms.

Sandhill Crane Family Flying on a Beautiful Autumn Morning in Jasper-Pulaski Fish and Wildlife Area in Medaryville in northwestern Indiana. Every year around 10,000 Sandhill Cranes migrate to this location during autumn. The calls of thousands of Sandhill Cranes that reaches several miles is an experience that is next to none. It is one of the best locations to photograph them as they fly past the autumn trees at sunrise to feed in the nearby farms.

Here is the list of 10 common bird photography mistakes and their solutions. If you learn and apply these bird photography tips you would see the results immediately in your images.

#1 BAD EXPOSURE

This is the biggest mistake. A bad exposure would ruin the photograph. Most common is overexposed (blown-out) highlights.

01-The-Most-Useful-Bird-Photography-Tips-for-Beginners-by-Prathap-Nature-Photography-Simplified

Overexposed – highlights blown out.

The issue is that your camera has much less dynamic range than your eyes. This means you can see the details in both brighter and darker regions of a scene, but the camera doesn’t.

You have to make a choice whether to keep the details in the brighter or the darker region. Your choice would almost always be to keep the details in the brighter region. Because our eyes are more sensitive to brighter areas (or highlights).

02-The-Most-Useful-Bird-Photography-Tips-for-Beginners-by-Prathap-Nature-Photography-Simplified

Correctly exposed for the highlights.

In short – always expose for the highlights.

#2 BAD LIGHT

Photography is painting with light. If you underestimate the light, then you are bound to get bad photographs. It’s not an exaggeration to say most photographers seem to ignore it.

More the time is spent debating about equipment, than studying the light. No equipment can save your photograph if the light is not favorable. Look how boring this silhouette of an India peafowl is.

03-The-Most-Useful-Bird-Photography-Tips-for-Beginners-by-Prathap-Nature-Photography-Simplified
Just before minutes, it was like this.

04-The-Most-Useful-Bird-Photography-Tips-for-Beginners-by-Prathap-Nature-Photography-Simplified

Isn’t it evident? Learn to see the light. It’s all about light.

#3 BAD COMPOSITION

Bird photography is not demanding in terms of composition. Even so, a lot many bird photographers don’t seem to understand simple techniques. All that you need to know is the rule of thirds, the rule of spaces, and fill the frame composition techniques.

How many times have you seen a photograph like this? A subject in the center!

05-The-Most-Useful-Bird-Photography-Tips-for-Beginners-by-Prathap-Nature-Photography-Simplified

Just by following the rule of thirds, this is what I got.

06-The-Most-Useful-Bird-Photography-Tips-for-Beginners-by-Prathap-Nature-Photography-Simplified

Next time you are out in the field, remember to compose well.

  • Place the bird off-centered and give enough it breathing space.
  • Or, fill the frame with the bird.

That is as simple as it gets.

#4 BAD FOCUS

Blurry bird photos are everywhere. Birds are always active, making it harder to achieve sharp focus. But that doesn’t mean you don’t recognize it. If you rely heavily on your LCD monitor, this is what happens.

07-The-Most-Useful-Bird-Photography-Tips-for-Beginners-by-Prathap-Nature-Photography-Simplified
Nothing seems to be wrong in this photograph, right?

Wrong. It’s a blurry photograph. Can you see the out of focus eye now?

08-The-Most-Useful-Bird-Photography-Tips-for-Beginners-by-Prathap-Nature-Photography-Simplified
Fixing it is easy. Check for the critical focus by zooming in on your LCD monitor. If it’s not sharp, make the adjustments until you get the focus perfect. The initial focus was on the bird’s body. By shifting the focus point to the eye of the bird, I got this tack-sharp image.

09-The-Most-Useful-Bird-Photography-Tips-for-Beginners-by-Prathap-Nature-Photography-Simplified
#5 WRONG POINT OF VIEW

How do you see your world? From your eye level…isn’t it? But, how does the bird see its world? You got the point. But more than 90% of the bird photographers do not seem to understand this simple concept. They shoot from their eye level. Can you believe that?

10-The-Most-Useful-Bird-Photography-Tips-for-Beginners-by-Prathap-Nature-Photography-Simplified
If you are doing it too…stop it right now. It’s not your portrait but the bird’s.

11-The-Most-Useful-Bird-Photography-Tips-for-Beginners-by-Prathap-Nature-Photography-Simplified

Get down and shoot from a bird’s point of view, and see the magic unfold.

#6 WRONG HEAD ANGLE

Your eyes follow the lead. You will follow the line of sight of a bird. If the bird looks left, your eye will move in that direction and vice versa. If your eye is lead in an interesting way, then your image works.

What doesn’t work is when the bird looks away. It’s not uncommon to see such photographs everywhere on the web.

12-The-Most-Useful-Bird-Photography-Tips-for-Beginners-by-Prathap-Nature-Photography-Simplified
Wait for the right head angle. Take photograph when bird is actively looking for its prey. Or, when it is sensing an impending danger.

13-The-Most-Useful-Bird-Photography-Tips-for-Beginners-by-Prathap-Nature-Photography-Simplified
With just the right head angle, the image became more interesting. The Great Egret is actively searching for its prey. The head angle is diagonally inclined adding dynamism to the photograph.

#7 WRONG BACKGROUND

Do you care for the background? Most often bird photographers just don’t care about anything other than the bird. Why? Are you saying because it’s a bird photograph after all! Do you know it’s the background which makes the picture?

Okay, take a look at this bird photograph.

14-The-Most-Useful-Bird-Photography-Tips-for-Beginners-by-Prathap-Nature-Photography-Simplified
That’s a fantastic action shot of two Indian Darters or Snakebirds fighting. But, is it amazing? Take a look at this one now.

15-The-Most-Useful-Bird-Photography-Tips-for-Beginners-by-Prathap-Nature-Photography-Simplified
You see how beautiful the action is. It just couldn’t get better. Here’s the best bird photography tip I can give you – put more importance on background than the bird and you’ll make great bird photographs.

#8 BAD PROCESSING

Is post-processing good? There’s probably a hot debate around every corner about this topic. If you do post-process here’s what you shouldn’t do.

Here’s a simple and useful post-processing tip for bird photography. Don’t over process your image. Over sharpening and extreme noise reduction are typical mistakes of many bird photographers.

Rose-Ringed Parakeet displaying all its color in soft Sunlight in Bharatpur Bird Sanctuary. I sm so lucky to have been able to capture this beautiful parakeet. I love it!

This one has too much noise reduction

Rose-Ringed Parakeet displaying all its color in soft Sunlight in Bharatpur Bird Sanctuary. I sm so lucky to have been able to capture this beautiful parakeet. I love it!

This one is over sharpened.

It destroys your image. It makes it either look like a wax statue or a wired toy.

Take it easy. Keep your processing to a minimal. Just do enough processing to bring back the details and colors in the bird. Reduce noise only in the background. Sharpen only the bird with just enough to bring out detail.

Rose-Ringed Parakeet displaying all its color in soft Sunlight in Bharatpur Bird Sanctuary. I sm so lucky to have been able to capture this beautiful parakeet. I love it!

Rose-Ringed Parakeet displaying all its color in soft Sunlight in Bharatpur Bird Sanctuary. I sm so lucky to have been able to capture this beautiful parakeet. I love it!

#9 WRONG PLACE

Do you know that location really matters? In fact, it can make or break your image. It’s a very important bird photography tip to remember. If you end up photographing a species in a wrong place, then you’ll end up with bad results.

18-The-Most-Useful-Bird-Photography-Tips-for-Beginners-by-Prathap-Nature-Photography-Simplified
Find the right location where there are enough birds, good light, good feeding ground, and a good background. Assuming that you know important bird photography tips, you’ll most certainly make the best bird photographs.

19-The-Most-Useful-Bird-Photography-Tips-for-Beginners-by-Prathap-Nature-Photography-Simplified
#10 WRONG EXPECTATIONS

Not many photographers talk about this. But here’s the thing: If you think that a professional or experienced bird photographer goes to a place, points their expensive gear at the birds, and take home loads of amazing photographs, then you are wrong.

20-The-Most-Useful-Bird-Photography-Tips-for-Beginners-by-Prathap-Nature-Photography-Simplified
This is far from the truth. The truth is they are the ones who go to the place before anyone. Stay there until there’s no light. Come back to the same place again, and again, and again until they get what they want.

21-The-Most-Useful-Bird-Photography-Tips-for-Beginners-by-Prathap-Nature-Photography-Simplified
My friend, it’s not magic. It’s bird photography. Everyone needs to pay their due respect. Birds never differentiate.

CONCLUSION

Bird photography is fascinating.

Birds attract us like crazy. They make us forget about the world around us. But, you have to get over this. You have to see beyond the bird. You have to pay close attention to everything in the frame – the bird, the background, the placement, the light, exposure, etc.

It’s easy to be a bird photographer. Not that easy to be a good bird photographer.

These 10 bird photography tips should give you a fair idea of what makes a good bird photograph. Understand them. Practice them. Your bird photographs are bound to improve.

Let me know if you have any questions. I would love to answer them.

The post 10 Common Bird Photography Mistakes and Their Solutions by Prathap DK appeared first on Digital Photography School.


it's from Digital Photography School http://ift.tt/1LPLAMb
via Prathap DK

[Photography] How to Organize Your Photos in Lightroom

The Lightroom Catalog is a database containing all the relevant information that Lightroom needs about your photos in order to process your images and sit at the centre of your workflow.

Lightroom is a digital asset management (DAM) tool – you can use it to organize and search your photos, as well as process them. This is the main difference between Lightroom and Photoshop, which is a powerful image editor, but has no database capabilities.

Even if you use Photoshop for all your processing you can still use Lightroom to view, organize, and search your photos. That’s why the two programs come together if you subscribe to Adobe’s Creative Photography Plan (and why Photoshop no longer comes with Adobe Bridge). This article will walk you through some of the tools inside Lightroom to help you organize your photos.

Using Collections

Lightroom uses Collections to organize your images. A Collection is a virtual folder that exists in the Lightroom Catalog. You can create as many Collections as you like within Lightroom and use them for whatever purpose you see fit. The more you use them, the more you will find better ways to use them.

There are several types of Collections in Lightroom:

Collections: Virtual folders to which you can add any photo that you have imported into Lightroom.

Collection Sets: Another type of virtual folder to which you can add Collections, but not photos. Collection Sets are used to keep your Collections organized.

How to organise photos in Lightroom

This screen shot shows the icons used to represent Collection Sets and Collections in Lightroom. Xi’an – Terracotta Warriors (red arrow) is a Collection Set. Full Selection (green arrow) is a Collection. The icon is indented because it is inside the Collection Set.

Smart Collections: Collections that are populated automatically according to the rules that you set. For example, you could create a Smart Collection containing all photos taken in 2015, tagged with the keyword phrase “New York” to find all photos that meet those criteria. A Smart Collection is really a way of searching for images, and retaining the result indefinitely.

Published Collections: Beyond the scope of this article, Published Collections are created in Lightroom’s Publish Services. You can learn more about Published Collections in my article How to Upload Photos to Flickr and 500px Using Lightroom 5 (the information applies to Lightroom 6 and Lightroom CC as well).

Book and Print Collections: These are created in the Book and Print modules. My articles How to Create a Simple Blurb Photo Book in Lightroom and How to Create a 2015 Calendar in the Lightroom Print Module go into more detail.

For the purposes of this article we are interested in Collections and Collection Sets.

Creating Collections and Collection Sets

If this is your first time using Lightroom you won’t have any Collections yet (apart from the Smart Collections that it already contains). So let’s get started! I’m assuming that you have already imported your first photos into the Lightroom Catalog.

Go to the Collections panel and click on the plus icon you see in the top right corner. Select Create Collection Set.

How to organise photos in Lightroom

The Create Collection Set window appears, where you can give the Collection Set a name.

How to organise photos in Lightroom

I’ve named this one 2015. The idea is that it will house all the Collection Sets containing photos taken in the year 2015 (remember that Collection Sets can only contain Collections, not photos).

Now right-click on the Collection set you just created and choose Create Collection Set. Lightroom prompts you for a name. I’ve called this Island Bay because it’s the Wellington suburb where the photos in my last import were taken (and have saved it inside the 2015 Collection Set).

How to organise photos in Lightroom

Right-click on this new Collection Set (Island Bay) and select Create Collection. The Create Collection window opens. This is slightly different and gives you more options. Name the Collection “Full selection” (I’ll explain why in a minute), tick the Set as Target Collection box and click Create.

How to organise photos in Lightroom

Now go to the Catalog panel and click on Previous Import. Lightroom displays the last set of imported images in the Content window. Go to Edit > Select All to select all the photos and press the B key. Lightroom adds all the selected photos to the Target Collection – the Collection called Full Selection that you just created. Congratulations, you have just created your first Collection!

How to organise photos in Lightroom

This is what the Collection Sets and Collection I created in the example above look like in the Collections panel in the Library module. The plus icon next to the Collection Full Selection indicate it is the Target Collection. The number 27 on the right tells you how many photos are in the Collection.

Collections and workflow

Of course, you are probably wondering why I asked you to create such a strange name as Full Selection. To find out why read my article Use Lightroom Collections to Improve Your Workflow. It shows you how to use Collections to help you decide which photos from a shoot you are going to process. All will become clear when you do so.

Flags, Ratings and Color Labels

The Lightroom database (called the Catalog) lets you assign Flags, Ratings, and Color Labels to your photos. There seem to be as many ways of using these as there are photographers, but if you have read my article about using Collections to improve your workflow you will understand that I favour a very simple system, which is this:

Use Flags to indicate which photos you are going to process.

I ignore Ratings and Color Labels and don’t use them. Of course, you may wish to use them and there is nothing wrong with that. Workflow is a personal thing, and ultimately you will figure out what works best for you through trial and error.

Let’s take a closer look at Flags, Ratings, and Color Labels. The easiest way to see them is in Grid View, which you can go to from any Lightroom module by pressing the G key on the keyboard. Read my article Making Sense of Lightroom’s Grid View to learn more.

Flags

Every photo in your Lightroom Catalog is either unflagged (the default), flagged as a Pick (indicated by a white flag) or flagged as a Reject (marked by a black flag with a cross in it).

The quickest way to flag a photo as a Pick is to select and it and press the P key. You can remove the flag by pressing the U key or mark it as a Reject by pressing the X key. Flags are generally used to indicate which photos you would like to process (Picks) and which you would like to delete (Rejects).

How to organise photos in Lightroom

The middle photo has been flagged as a Reject. It is marked with a black flag (circled left) and the thumbnail is greyed out, making it easy to pick out in Grid View. The right photo has been flagged as a Pick and is marked by a white flag (circled right). The left photo is unflagged. There is no flag icon, but Lightroom displays a grey one when you mouse over the thumbnail.

Ratings

Every photo in your Lightroom Catalog is either unrated (the default) or has a one, two, three, four or five star rating. You can apply these ratings by selecting a photo and pressing the corresponding number key (1, 2, 3, 4 or 5).

Ratings are generally used as a way to indicate which photos are your favourites. Give your best images a rating of 5, and use the other numbers for the rest.

How to organise photos in Lightroom

Here, the three photos have been given a rating of three, four and five stars respectively. The star rating of each photo is displayed under the thumbnail in Grid View.

Color Labels

You can also assign a color label to your photo by selecting it, going to Photo > Set Color Label and choosing from Red, Yellow, Green, Blue, Purple or none. You can also use the 6, 7, 8 and 9 number keys as a shortcut to applying Red, Yellow, Green and Blue color labels.

How to organise photos in Lightroom

Colour labels are designed to be adaptable so you can use them for whatever you want. Go to Metadata > Color Label Set > Edit to assign a meaning to each color label. In this example I have entered a purpose for three of the color labels. It’s just an example to show you the possibilities – in reality I prefer to keep things simple and not use them.

How to organise photos in Lightroom

Hopefully this article has given you a good overview of the process of using Lightroom as a digital asset management tool. The next article in this series will show you how to get started in the Develop module. Meanwhile, if you have any questions about organizing your photos in the Library module then please let me know in the comments.


Mastering Lightroom Book One: The Library Module

Mastering Lightroom ebookMy latest ebook Mastering Lightroom Book One: The Library Module (second edition) is a complete guide to using Lightroom’s Library module to import, organise and search your photo files. You’ll learn how to tame your growing photo collection using Collections and Collection Sets, and how to save time so you can spend more time in the Develop module processing your photos.

The post How to Organize Your Photos in Lightroom by Andrew S. Gibson appeared first on Digital Photography School.


it's from Digital Photography School http://ift.tt/1WxQPTG
via Andrew S. Gibson

Sep 29, 2015

[Photography] How to Capture a Photo of a Bubble Bursting

Set yourself a high-speed challenge: Capture a bursting bubble

bubbledps1
I have always loved the idea of photography as being a way of taking an instant out of time, and preserving that moment forever. By freezing time in this way, a photograph can show something that may not normally be seen in day-to-day life, and can make an ordinary subject extraordinary.

So, when going through a bit of a creative lull a couple of years ago, I felt that I needed to set myself a challenge to restore my motivation. I decided that I was going to capture the exact moment of a bubble being burst. After some internet research, I came to the conclusion pretty quickly that I did not have the necessary budget for a super slow-motion camera to achieve this. I did, however, become determined to capture a bubble in mid-burst using only equipment I already owned – my DSLR, various lenses and a flashgun (speedlight).

The challenge was lengthy and often frustrating, but when I did successfully take a photograph of a bursting bubble, it was incredibly satisfying. By freezing a moment, the photograph showed something that could not normally be seen by the human eye – a soap bubble with one half completely intact and the other half made up of separate swirls of liquid. The bubble was collapsing in on itself in mid-air. Friends and family who saw the photograph showed surprise and commented that they, like me, had assumed that a bubble just disappeared when popped. A photograph had changed their view of the world simply by freezing a single moment of time and I was reminded just how powerful photography can be.

bubbledps2

With my motivation fully restored, I progressed further and attempted to capture a sequence of shots to show the entire process of a bubble collapsing. One of the shots has even been included in an international exhibition for scientific images. I have included some of these shots here but there are many more on my website at the link shown below in my bio.

I would definitely recommend this challenge to anyone, particularly if you may be in need of a creative boost or maybe need to rediscover your passion for photography. If you do decide to take up this high-speed challenge, here are some things that I learned along the way. I hope that they will be of help to you when capturing a bursting bubble.

1. Use large bubbles

Larger soap bubbles will be easier for you to focus on than small bubbles, and they will also be easier to burst. Additionally, the composition of your shot can really benefit from using larger bubbles – you should be able to get a frame-filling shot of a bubble bursting without the need to crop.

I have previously used a kids’ bubble toy set (purchased for around £1) that came with a bubble wand of around 5cm (2 inches) in diameter. I found this to be ideal for blowing one or two medium-to-large size bubbles, that stayed in the air long enough to capture them being burst. Smaller wands tended to produce streams of little bubbles which were (a) difficult to burst and (b) cluttered up the final shot.

2. Get a friend to help you

You are probably going to need somebody else to help you with this project unless you have superhuman reaction times! Blowing the bubble, bursting the bubble, and setting up the shot was just too much for me to complete on my own. Having someone to blow and burst the bubble for you, allows you to compose and focus your shot without distraction.

3. Shoot indoors

If possible, shoot indoors so that you can limit the movement of the bubble. I have taken a number of shots outdoors, but any slight breeze will cause the bubbles to fly away pretty quickly, making it much harder to set up your shot.

I have found it very useful to shoot in front of a floor-to-ceiling window facing onto a garden. This provides lots of natural light and some pleasing, natural colours for the backdrop, which was the look I was after. Just remember to leave some space between the bubbles and the window to reduce any reflections or glare that you may get from the glass.

4. Use a zoom lens

Even when shooting indoors, the movement of the bubbles will still be somewhat unpredictable. For this reason, I have found it useful to use a zoom lens when shooting bubbles, so that I can adjust the focal length as necessary to focus and compose the shot while the bubble is in mid-air. I have usually taken the bursting bubble images with a Canon 70-200mm f/2.8 lens set to between 100-150mm. A further advantage of using this lens is that it helps to create some pleasing bokeh (blurry out-of-focus highlights) in the background while keeping the bubble details sharp when the focal length is increased.

bubbledps3

5. Shoot in full manual mode

Shooting in full manual mode will give you the control over the settings that you will need to get good results. Firstly, you will need to set as fast a shutter speed as you can get away with, depending on the available light. The action of a bubble bursting is extremely fast and so you will need to set your camera to a shutter speed of 1/1000 second or faster to freeze the action – the faster the better.

With such fast shutter speeds, you will need to use a wider aperture (lower f-number) or a higher ISO setting. However, given the unpredictability of the bubble’s movements, you do not want to have such a wide aperture (and, therefore, shallow depth of field) that you end up with most of the bubble out-of-focus. For this reason, I prefer to increase the ISO setting before dialling in a wider aperture as some additional noise to the image is easier to manage (and can be corrected to a certain extent during post-processing) than an image where the bubble is largely out-of-focus.

If the available natural light is not sufficient to allow fast shutter speeds, a flash can be used to help to freeze the action. However, I would recommend using a diffuser or reflector with any flash, particularly if shooting indoors in front of a window.

6. Focus manually

I have tried to capture bursting bubbles with and without the use of autofocus. My preference is definitely without. My best results have been when I focused manually on the bubble floating in mid-air and pressed the shutter release button as soon as the bubble was to be burst. On several occasions, the autofocus was too slow and I missed the shot as the camera struggled to find focus. If nothing else, this project will give you a lot of practice in manual focusing!

7. Keep calm and carry on

bubbledps4

The speed at which the bubble bursts means that you will probably have to try this many times to get the timing exactly right. Patience is key. Don’t give up on the challenge. Accept that it is going to be slightly frustrating but know that, when you get the timing spot-on, your final image will be much more satisfying.

The post How to Capture a Photo of a Bubble Bursting by Richard Beech appeared first on Digital Photography School.


it's from Digital Photography School http://ift.tt/1OEFoIn
via Richard Beech